How to Publish a Video With Velocity
Updated October 14, 2026 · 10 min read
To publish a video with Velocity, connect the destination accounts to the relevant Brand Identity, attach the approved video, describe the destinations and timing, then review each platform draft before you publish or schedule it.
Velocity's AI social media agents can prepare reviewable video drafts for connected destinations. You still decide whether to publish now, schedule a future time, save the draft, or request review.
Before you start: connect the accounts you intend to use
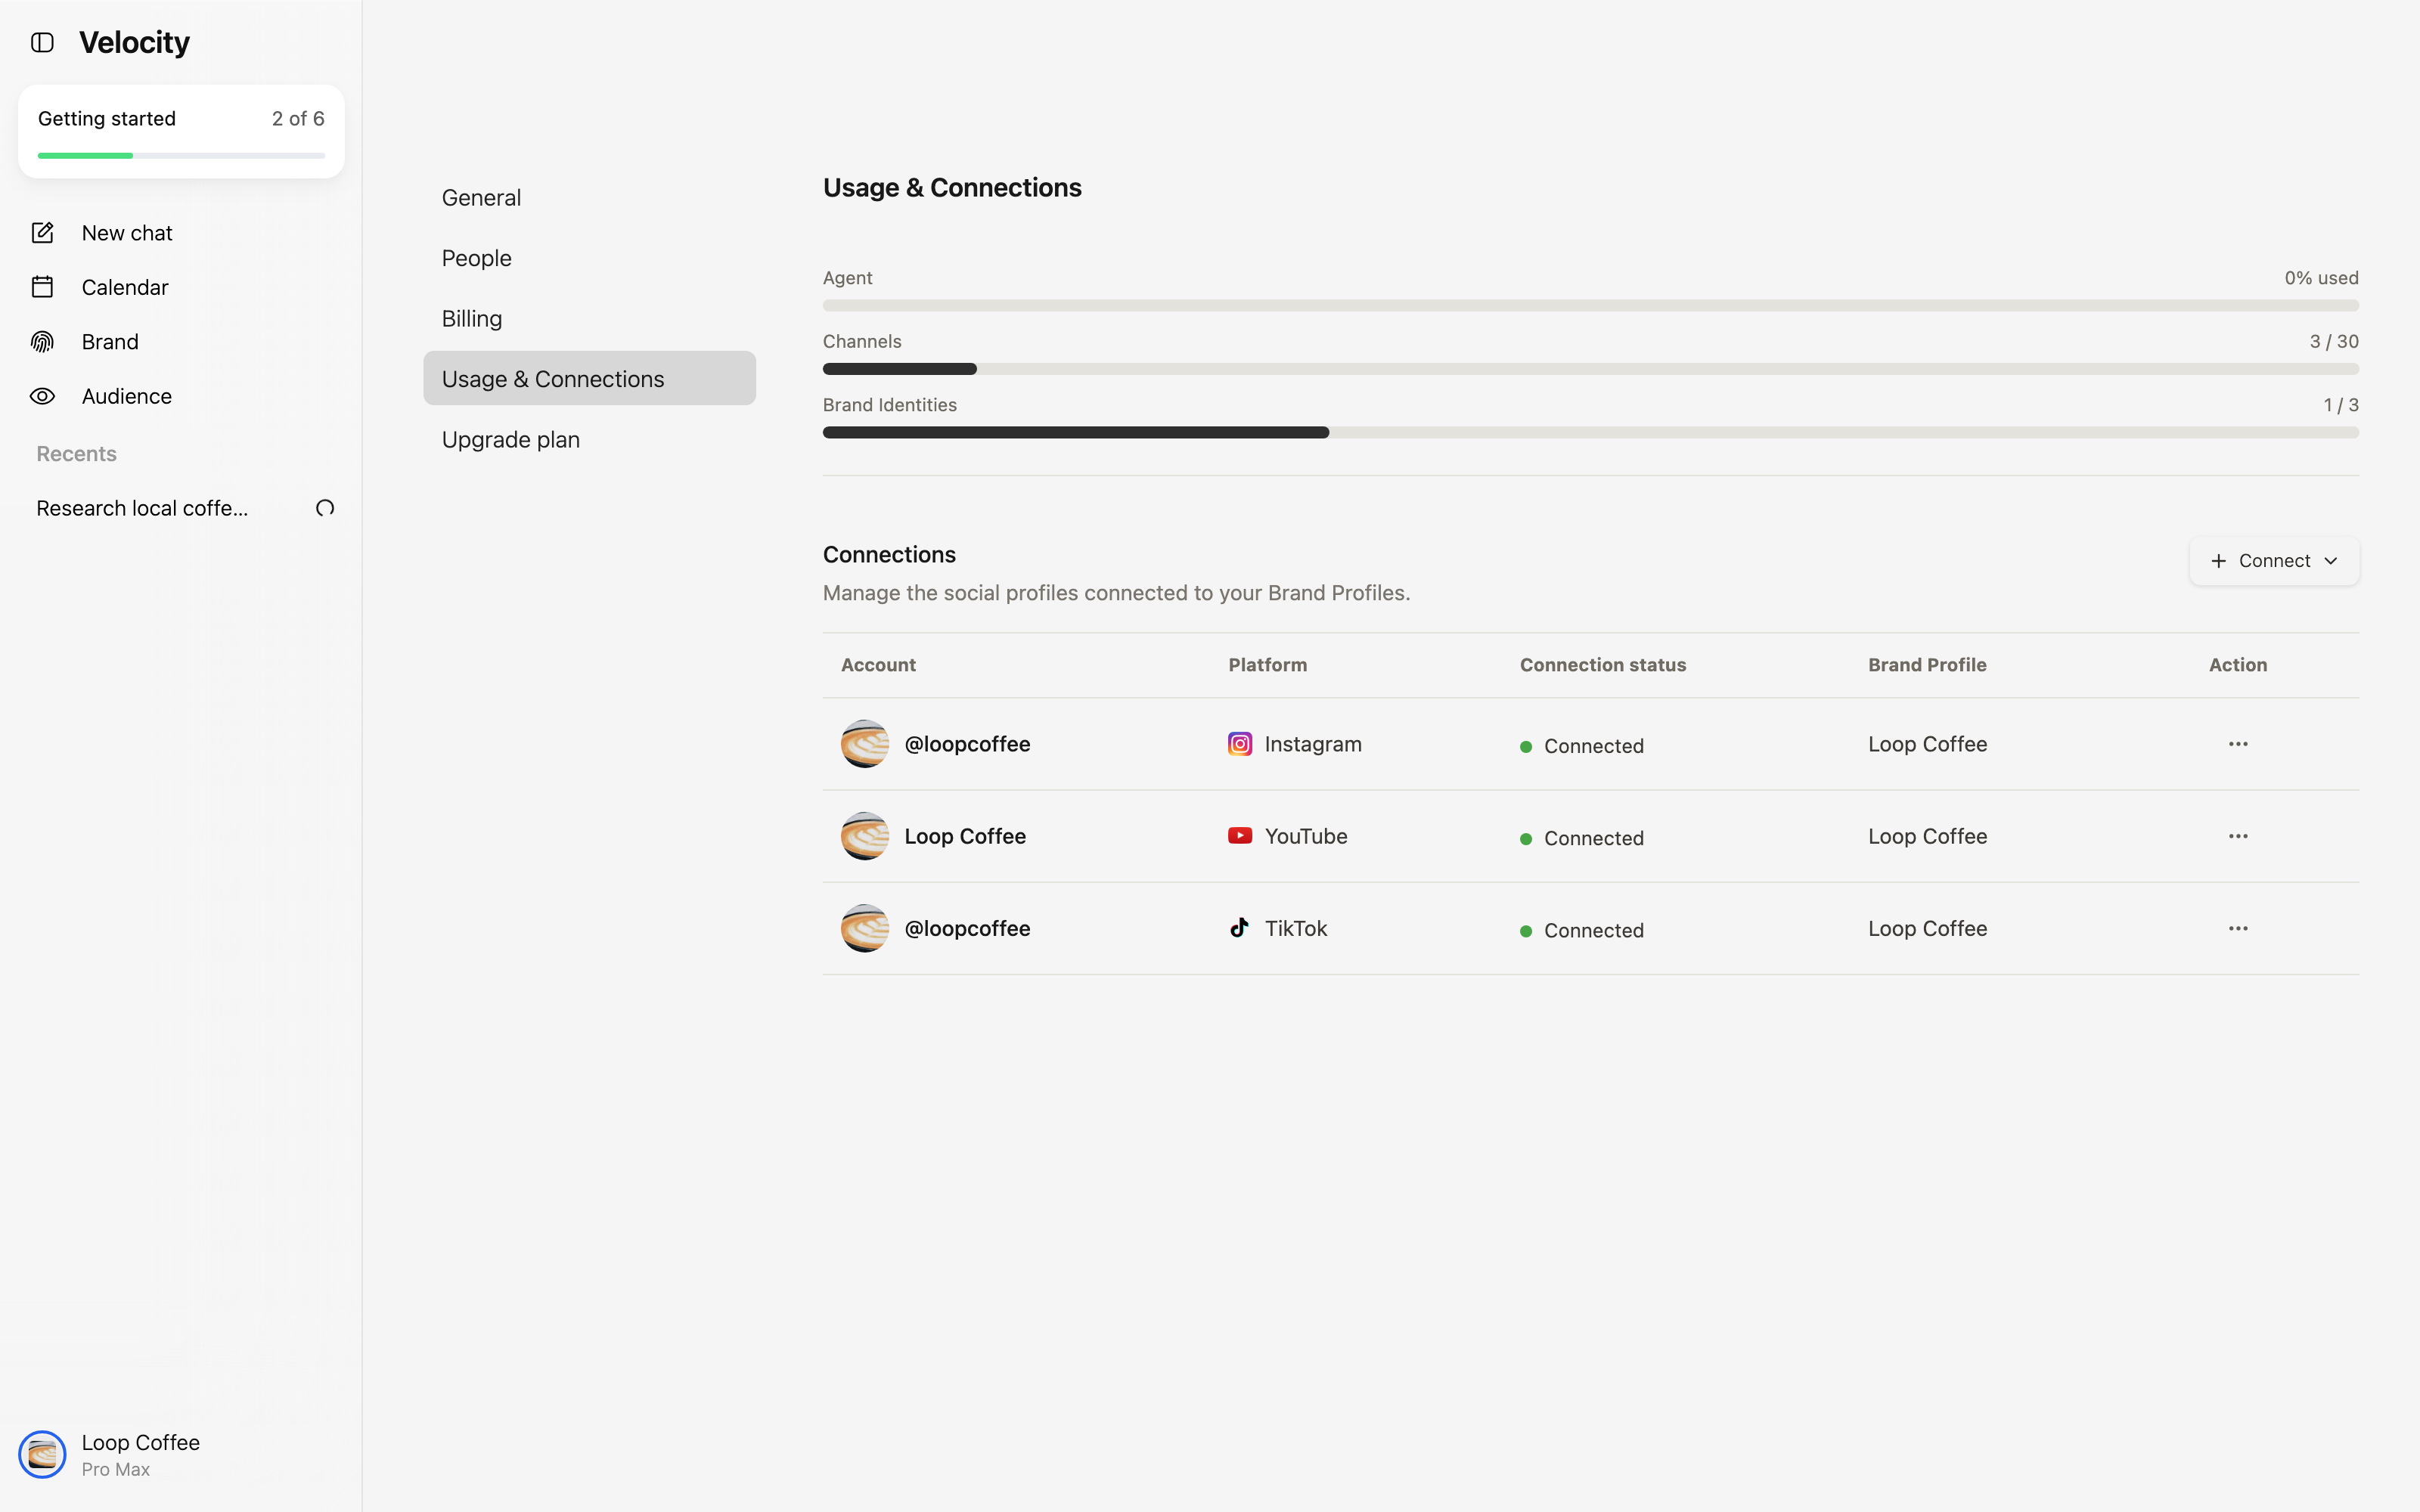
Velocity can prepare a video post for more than one destination, but it can only prepare or schedule it for accounts that are already connected to the relevant Brand Identity. Open Usage & Connections and confirm the account for each destination before you begin.
In this example, the Loop Coffee Brand Identity has connected Instagram, YouTube, and TikTok accounts. Confirm the account name and connection status, not just the platform logo. If a channel is not connected, connect it first, then return to the video workflow.
Step 1: Attach the finished video
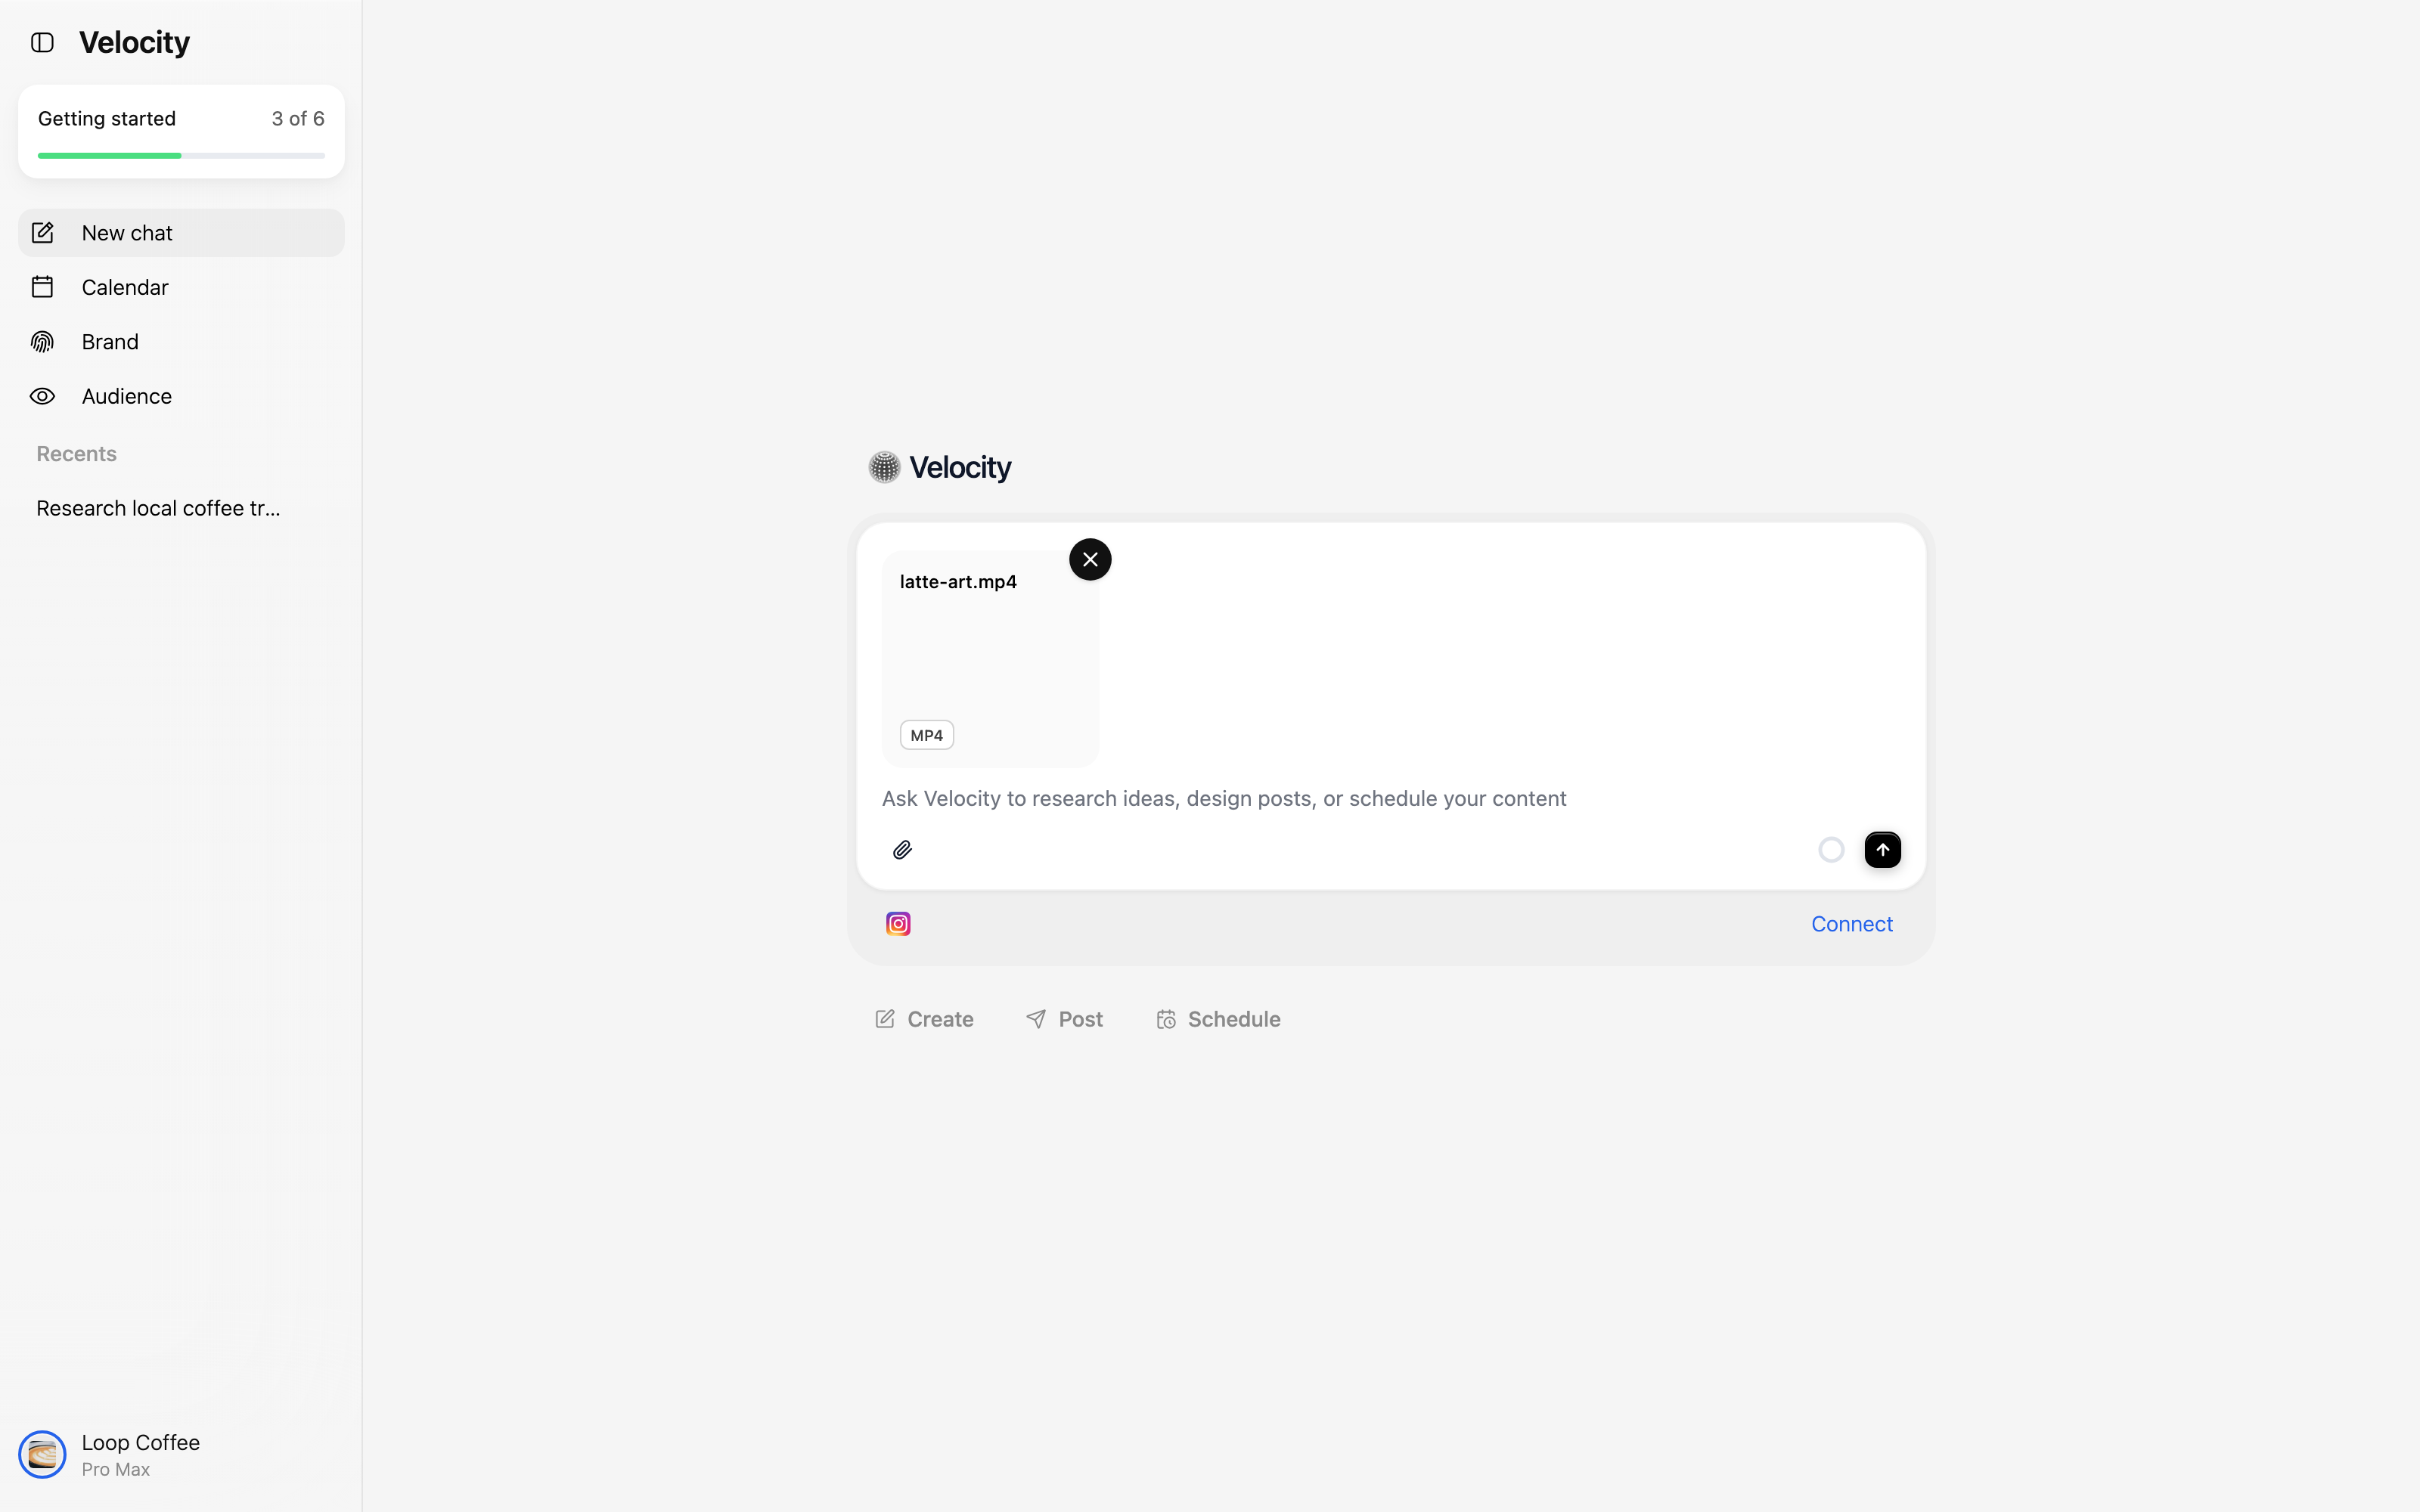
Start a new chat in Velocity. Use the attachment control to add the completed video file. Wait until the attachment is visible in the composer before sending the request; a file that is still uploading is not ready for the agent to use.
The example below shows `latte-art.mp4` attached as an MP4 video. This is the point to double-check that you chose the correct file, especially if several edits or exports have similar names.
What to check before you continue
The file is the final approved cut, not a working export.
The filename and media type look correct in the attachment card.
The social accounts you need are connected to the Brand Identity you are using.
You know whether the instruction is for immediate publication or a scheduled time.
Step 2: Give Velocity a clear publication request
Tell Velocity what the video is for, which destinations you want, and when you want it to go out. Plain language is enough. A useful request contains four things: the video, the destinations, the desired outcome, and the timing.
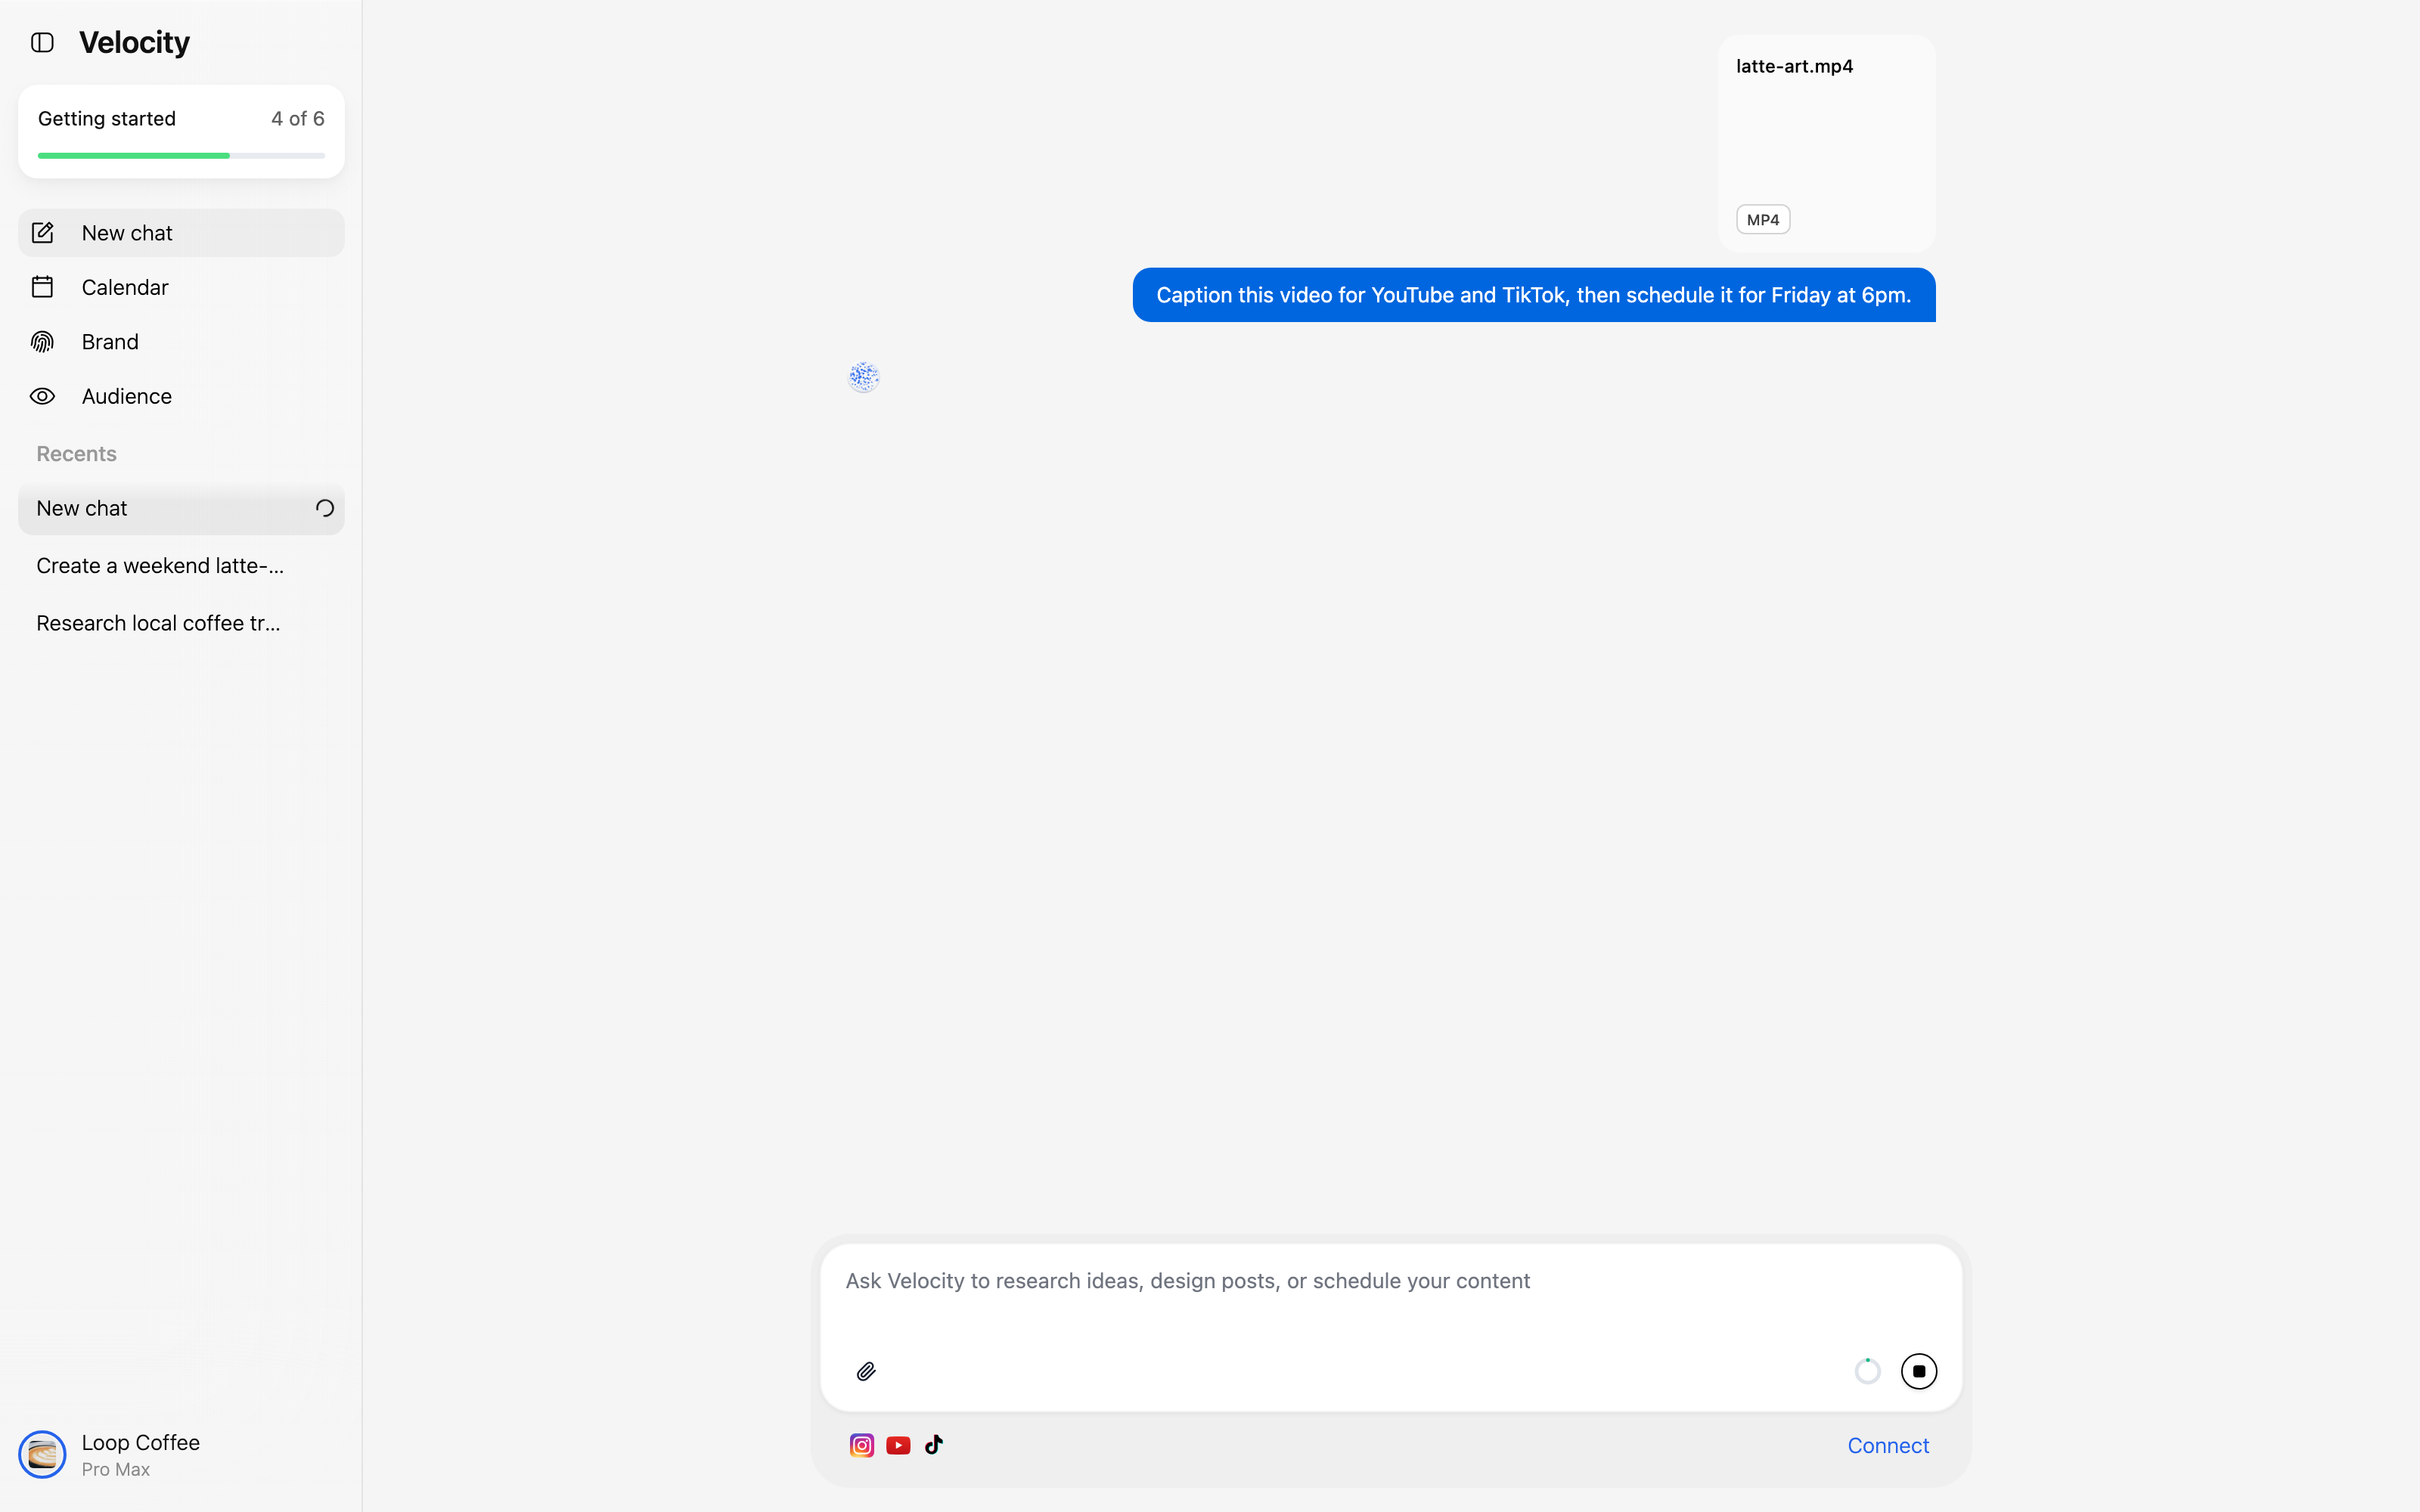
For example: "Caption this video for YouTube and TikTok, then schedule it for Friday at 6pm." This tells Velocity to create separate destination drafts instead of treating every channel as the same post. If timing matters, include the intended timezone in the request and still check it before you confirm the schedule.
You can be more specific when the work needs it. Add the audience, the campaign goal, a call to action, or the tone you want. If the post needs to match an established visual and writing system, make sure the correct Brand Identity is active before you send the request.
Step 3: Open the prepared video drafts
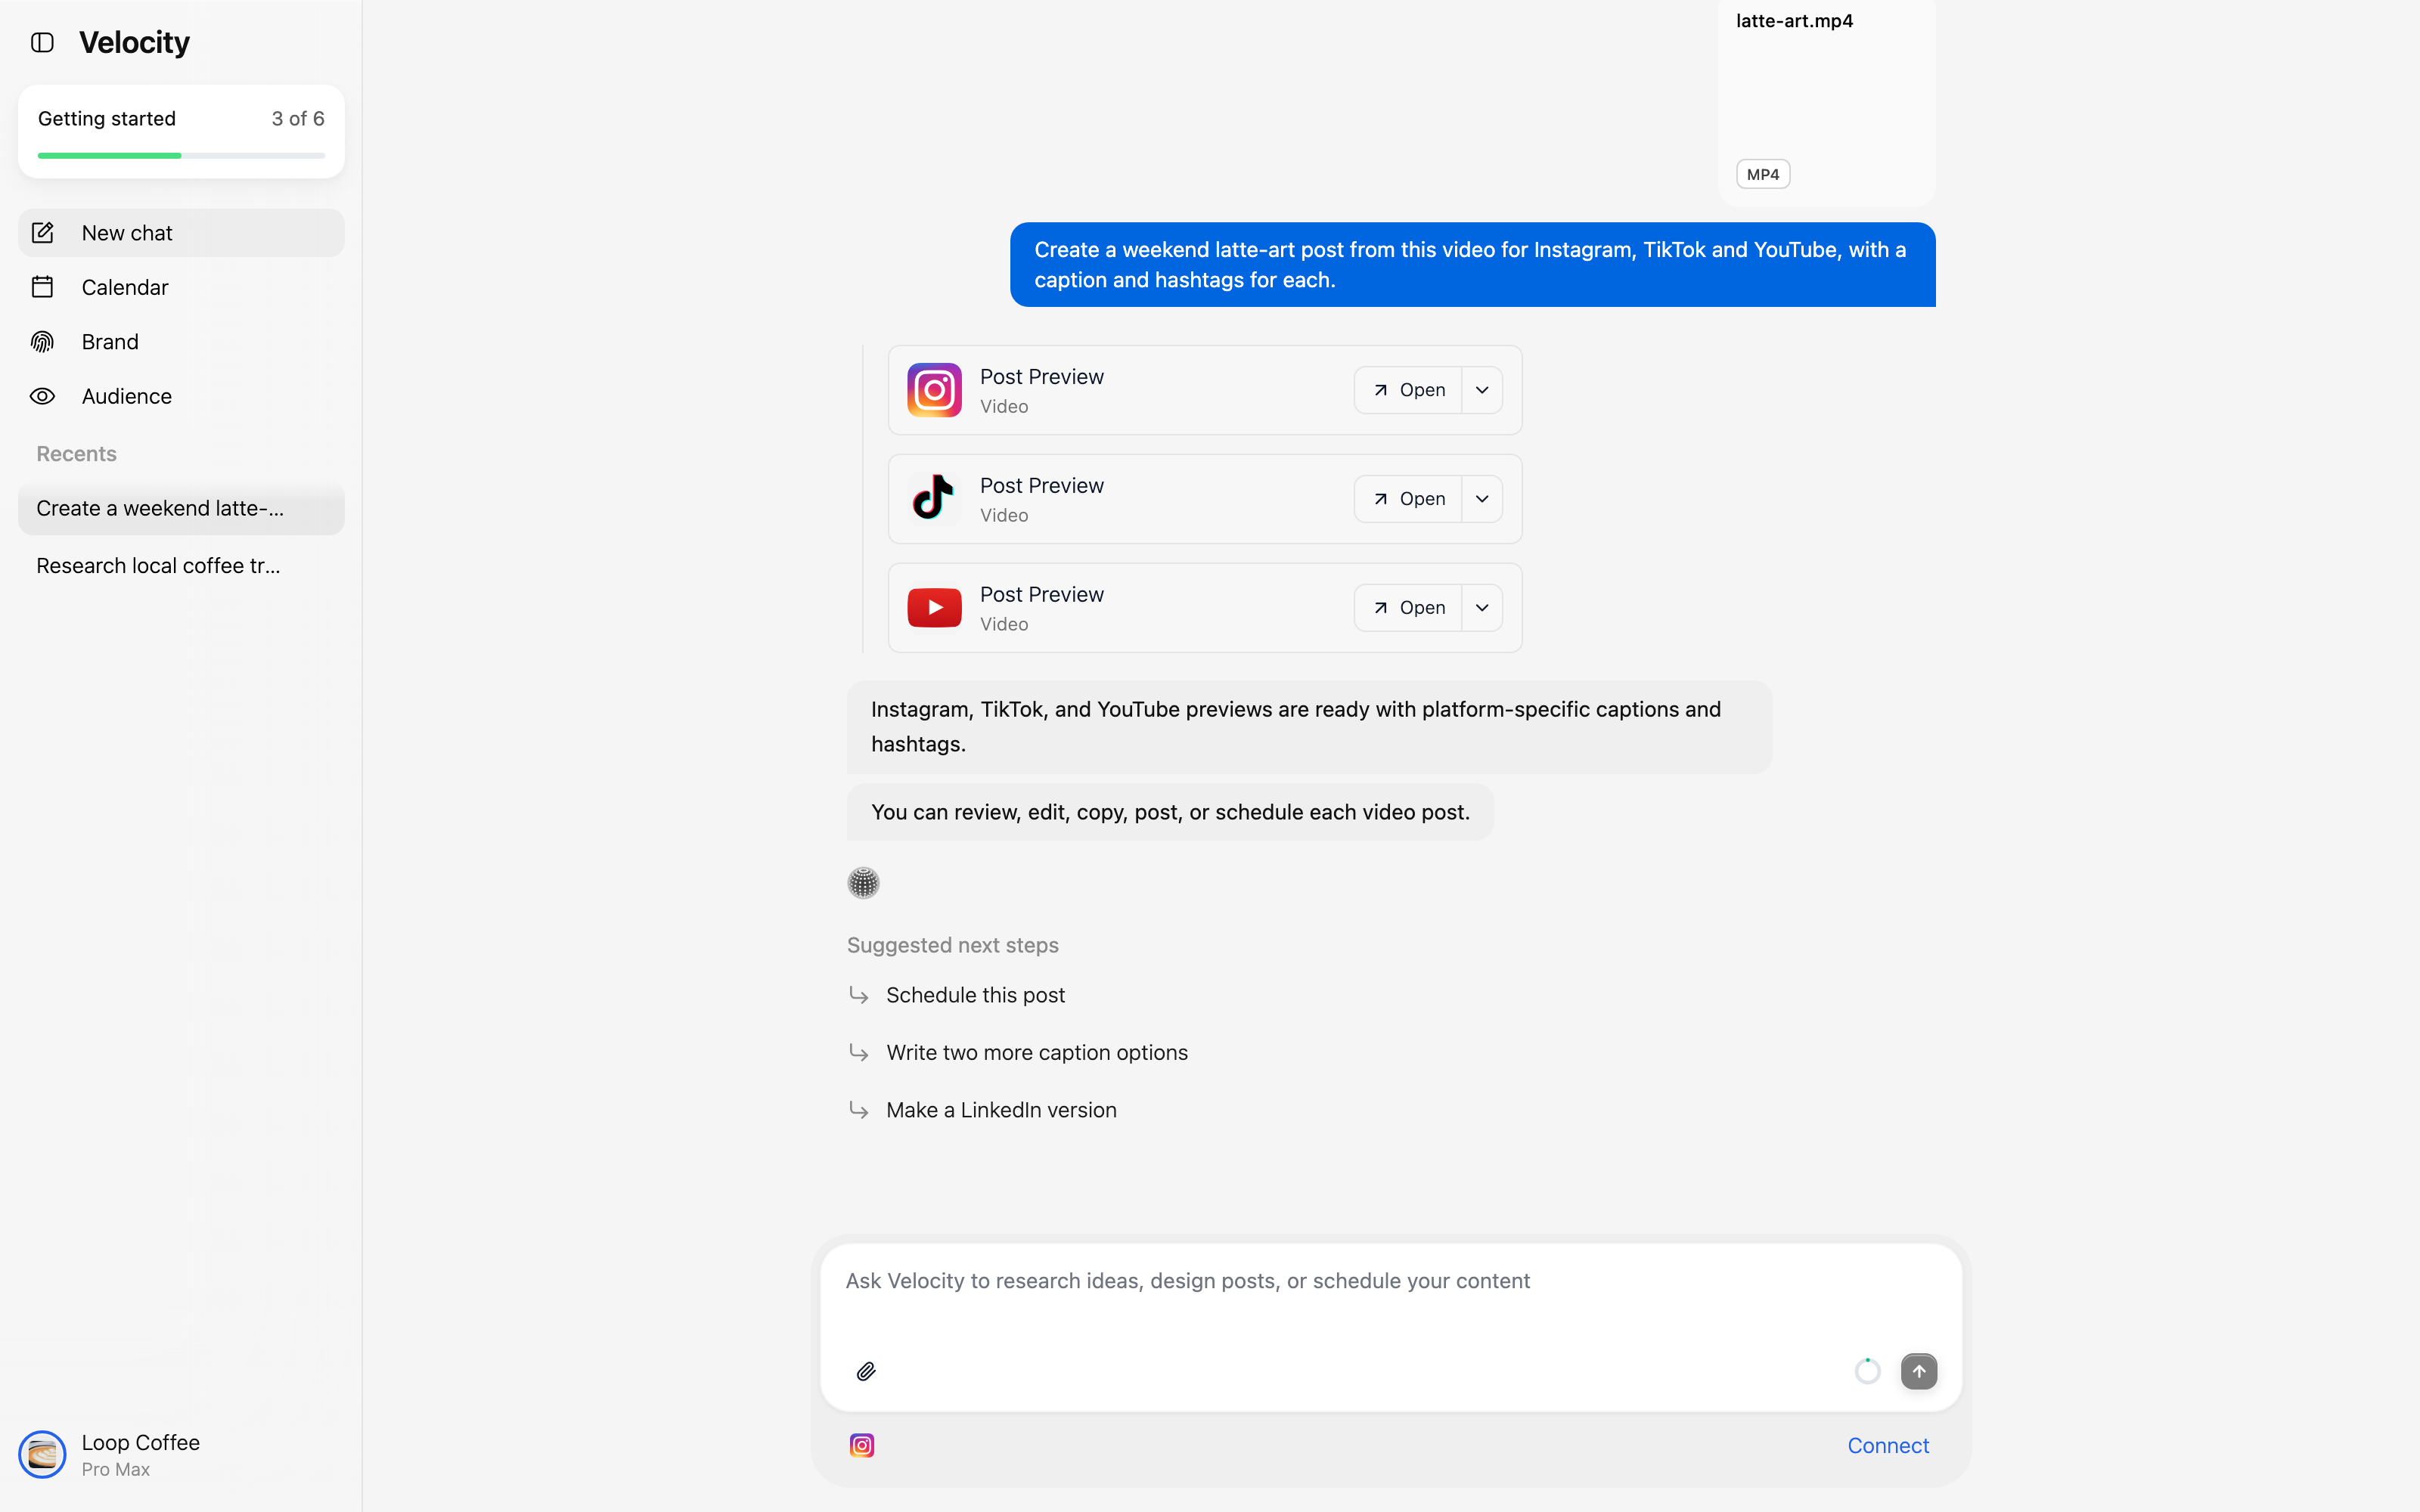
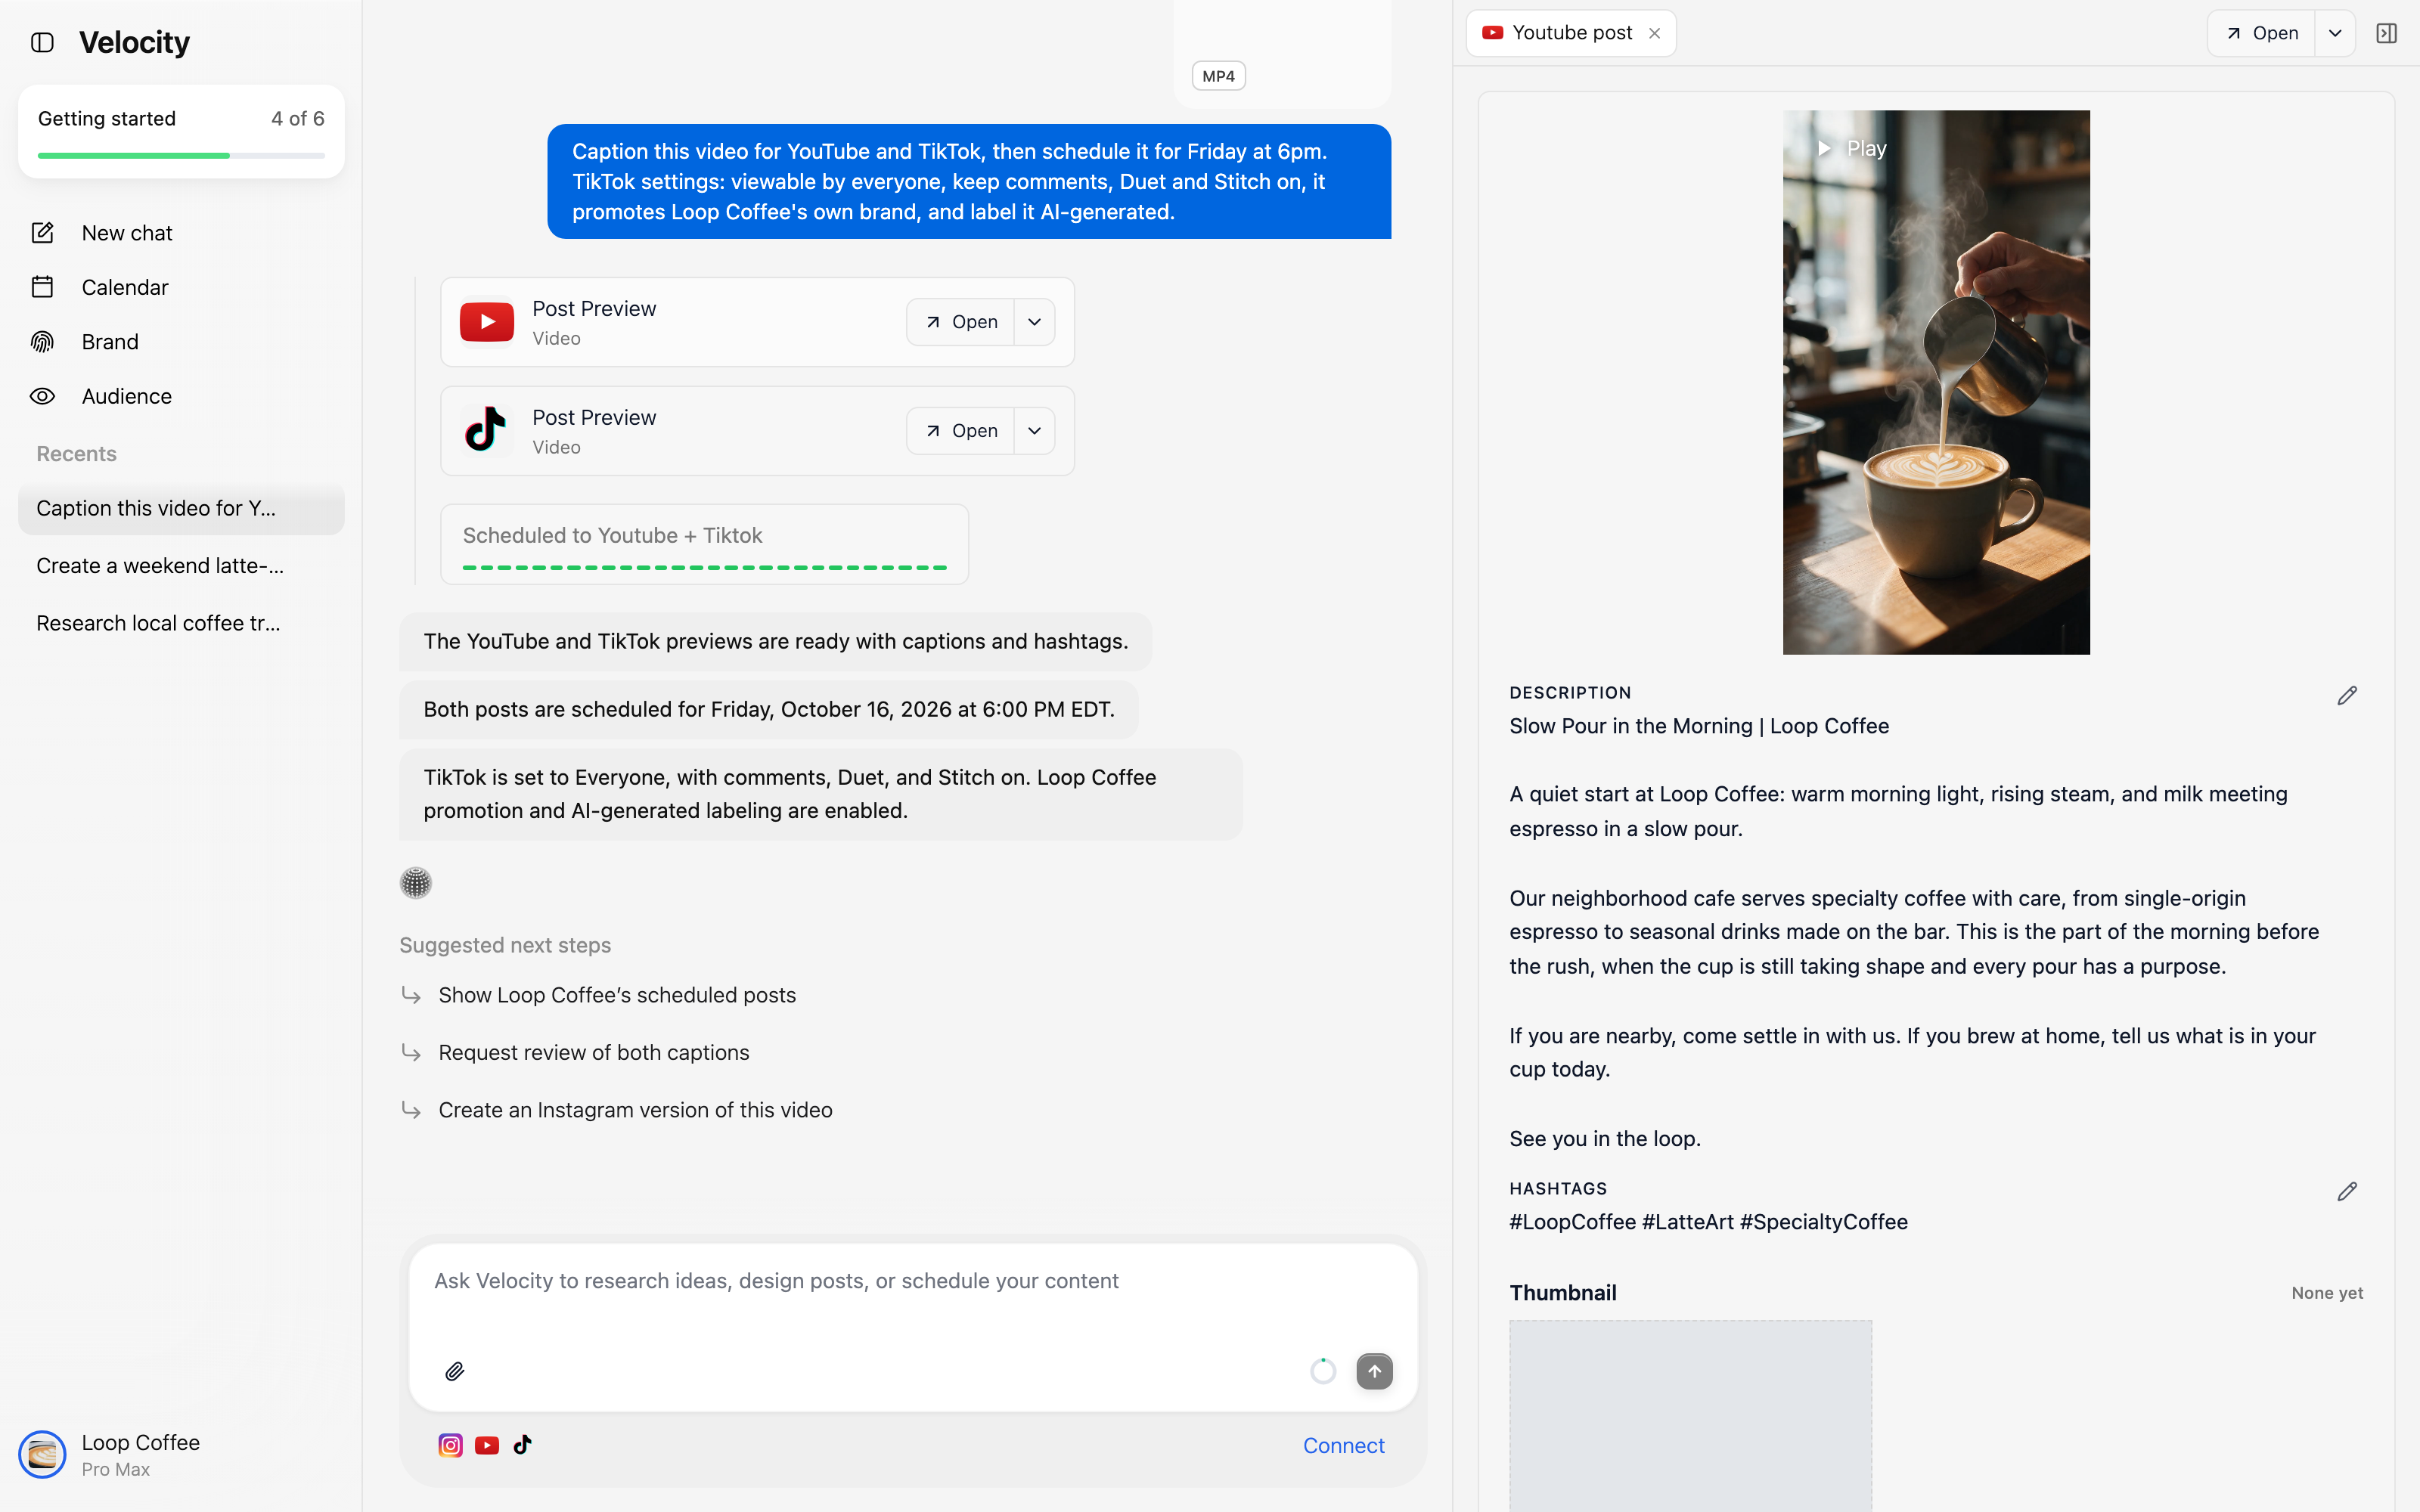
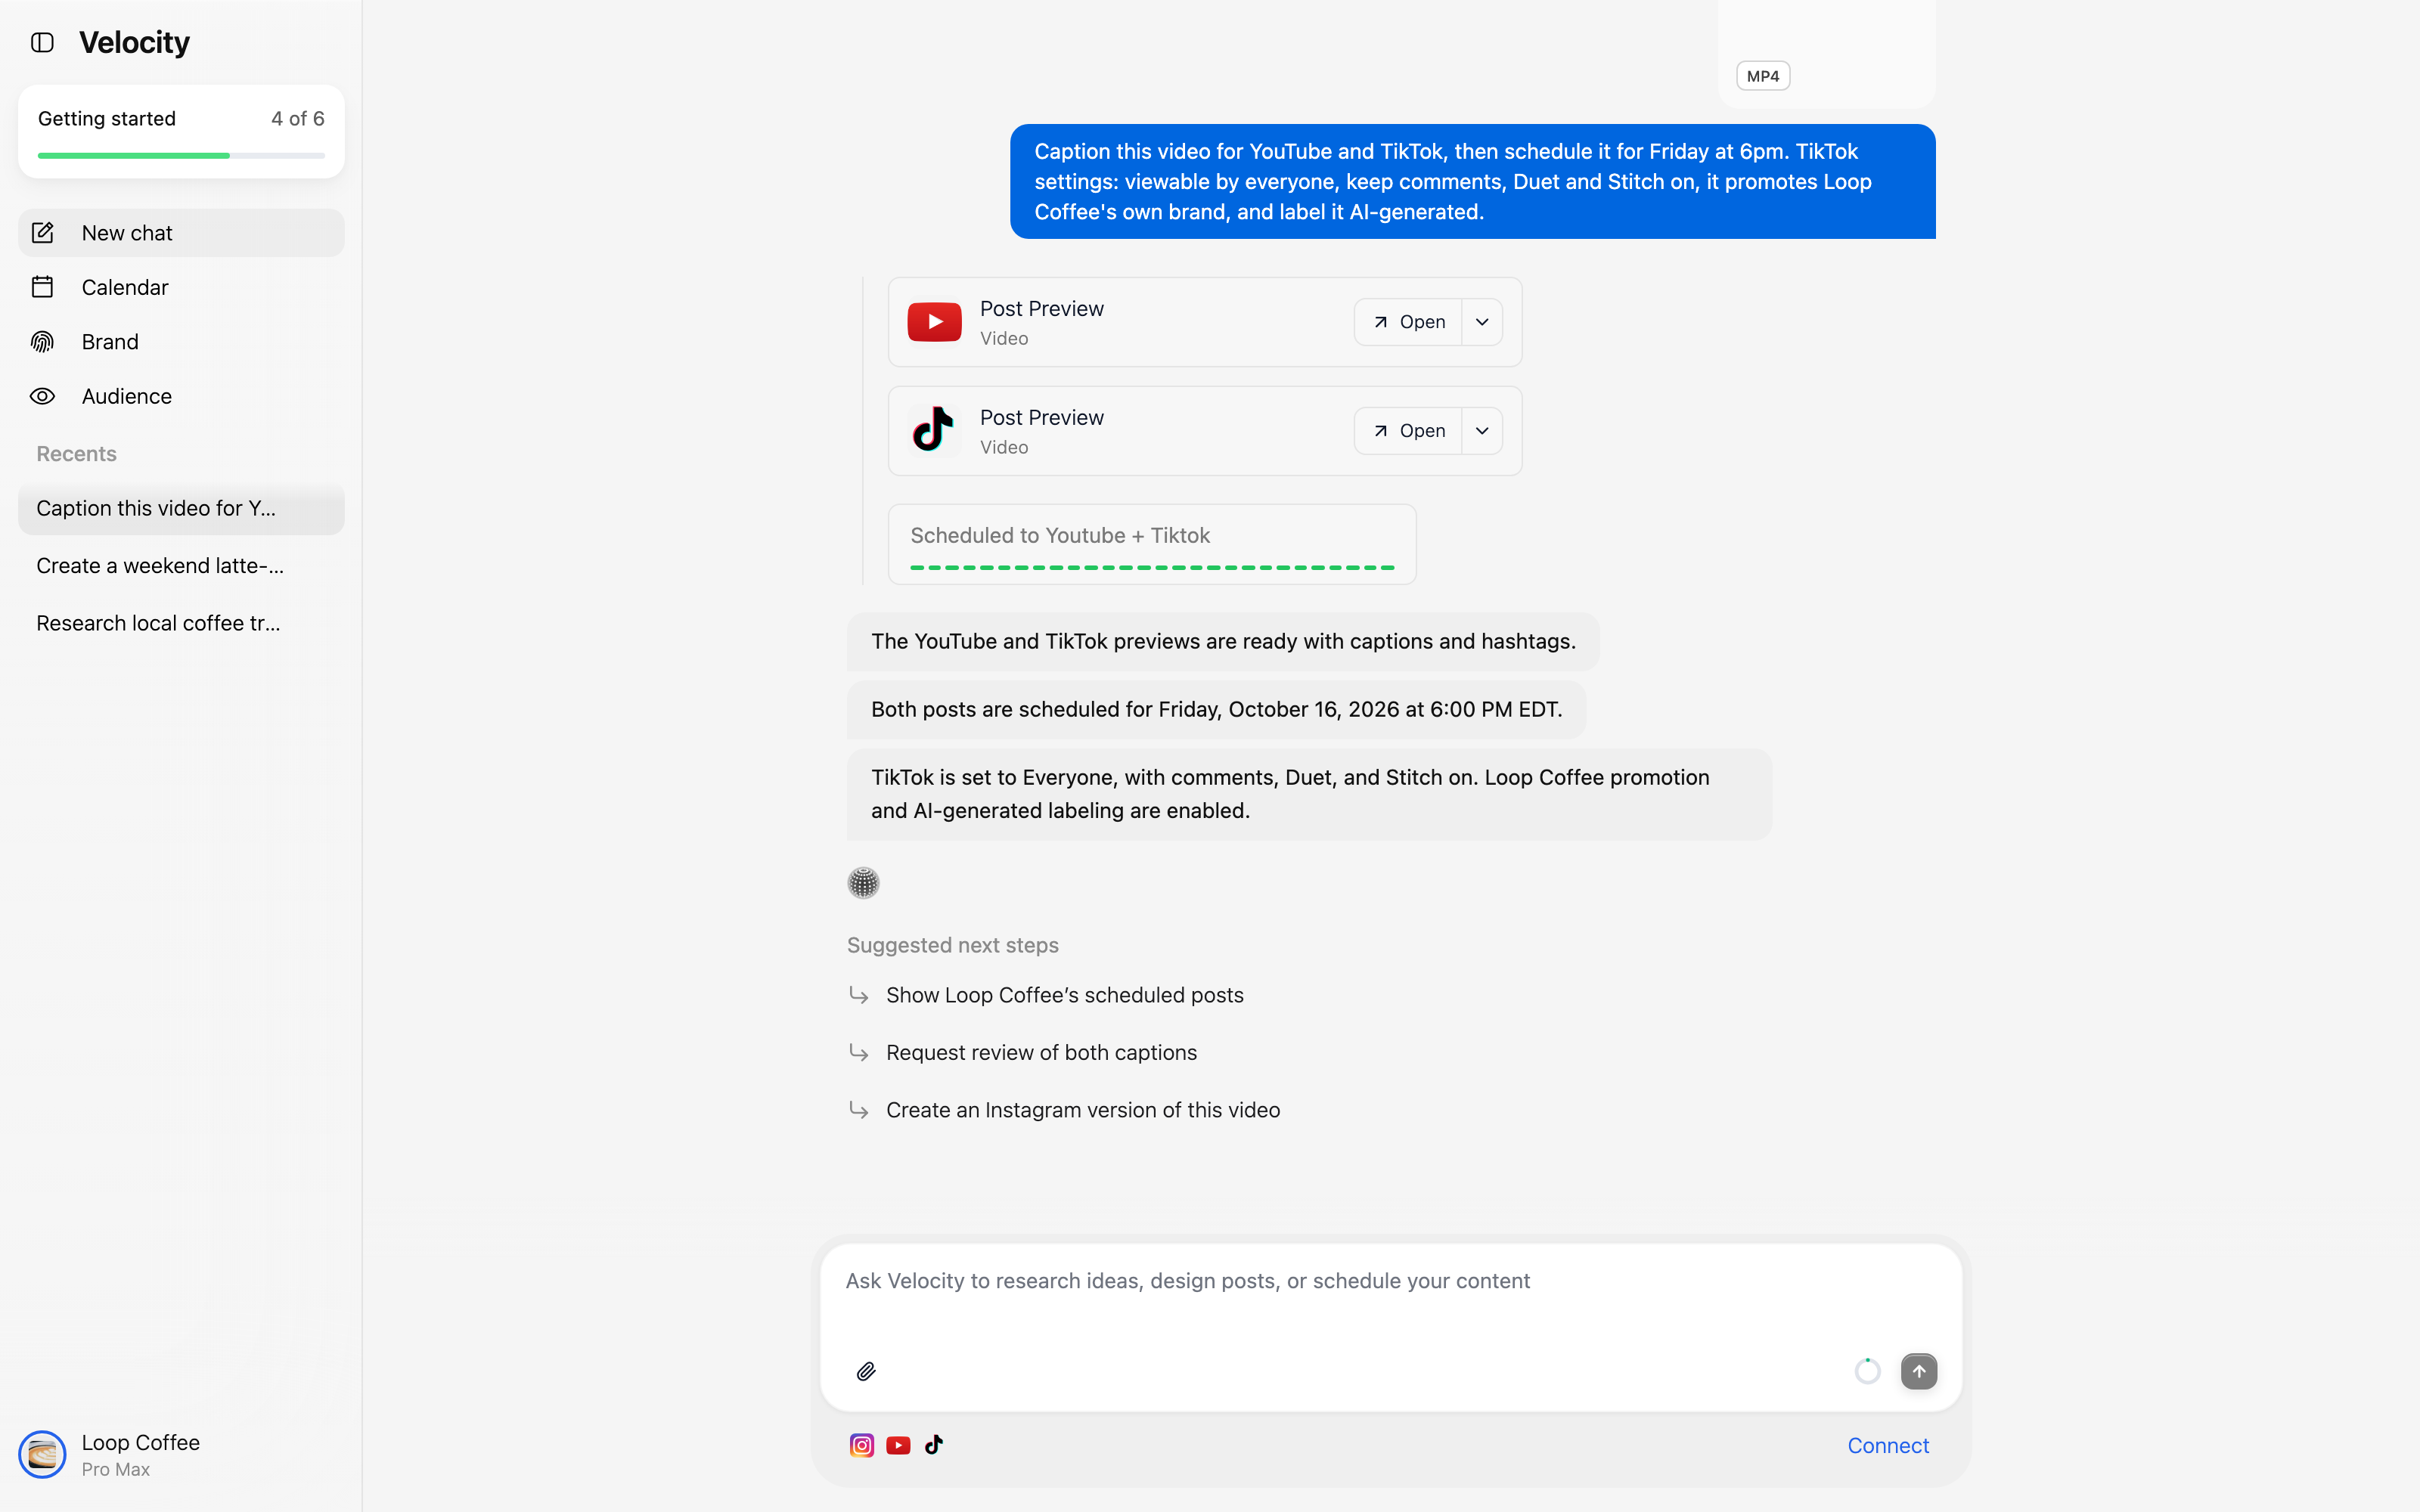
Velocity returns a separate video-post preview for each requested destination. Open every relevant preview before you schedule anything. The preview cards in this example are clearly labelled as video posts for YouTube and TikTok.
This separation matters for multi-platform video publishing. A single source file can be the starting point, but the copy, available fields, and publishing controls can differ by destination. Do not assume that a setting visible on one platform is available on another.
Step 4: Review each platform version before scheduling
Reviewing a video post is not only about watching the video again. It is the final moment to make sure the platform-specific text and settings are appropriate.
Review the YouTube version
Open the YouTube preview and inspect the video preview, title, description, and hashtags. The screen below also shows a thumbnail area with no thumbnail selected. That is a useful cue to decide whether this particular video needs a chosen thumbnail before it is scheduled.
- 1
Watch enough of the preview to confirm the right file opened.
- 2
Make sure the title says what the video is about.
- 3
Read the description as it will appear on the destination.
- 4
Check the hashtags for relevance and formatting.
- 5
Decide whether to set or change the thumbnail before you proceed.
Review the TikTok version
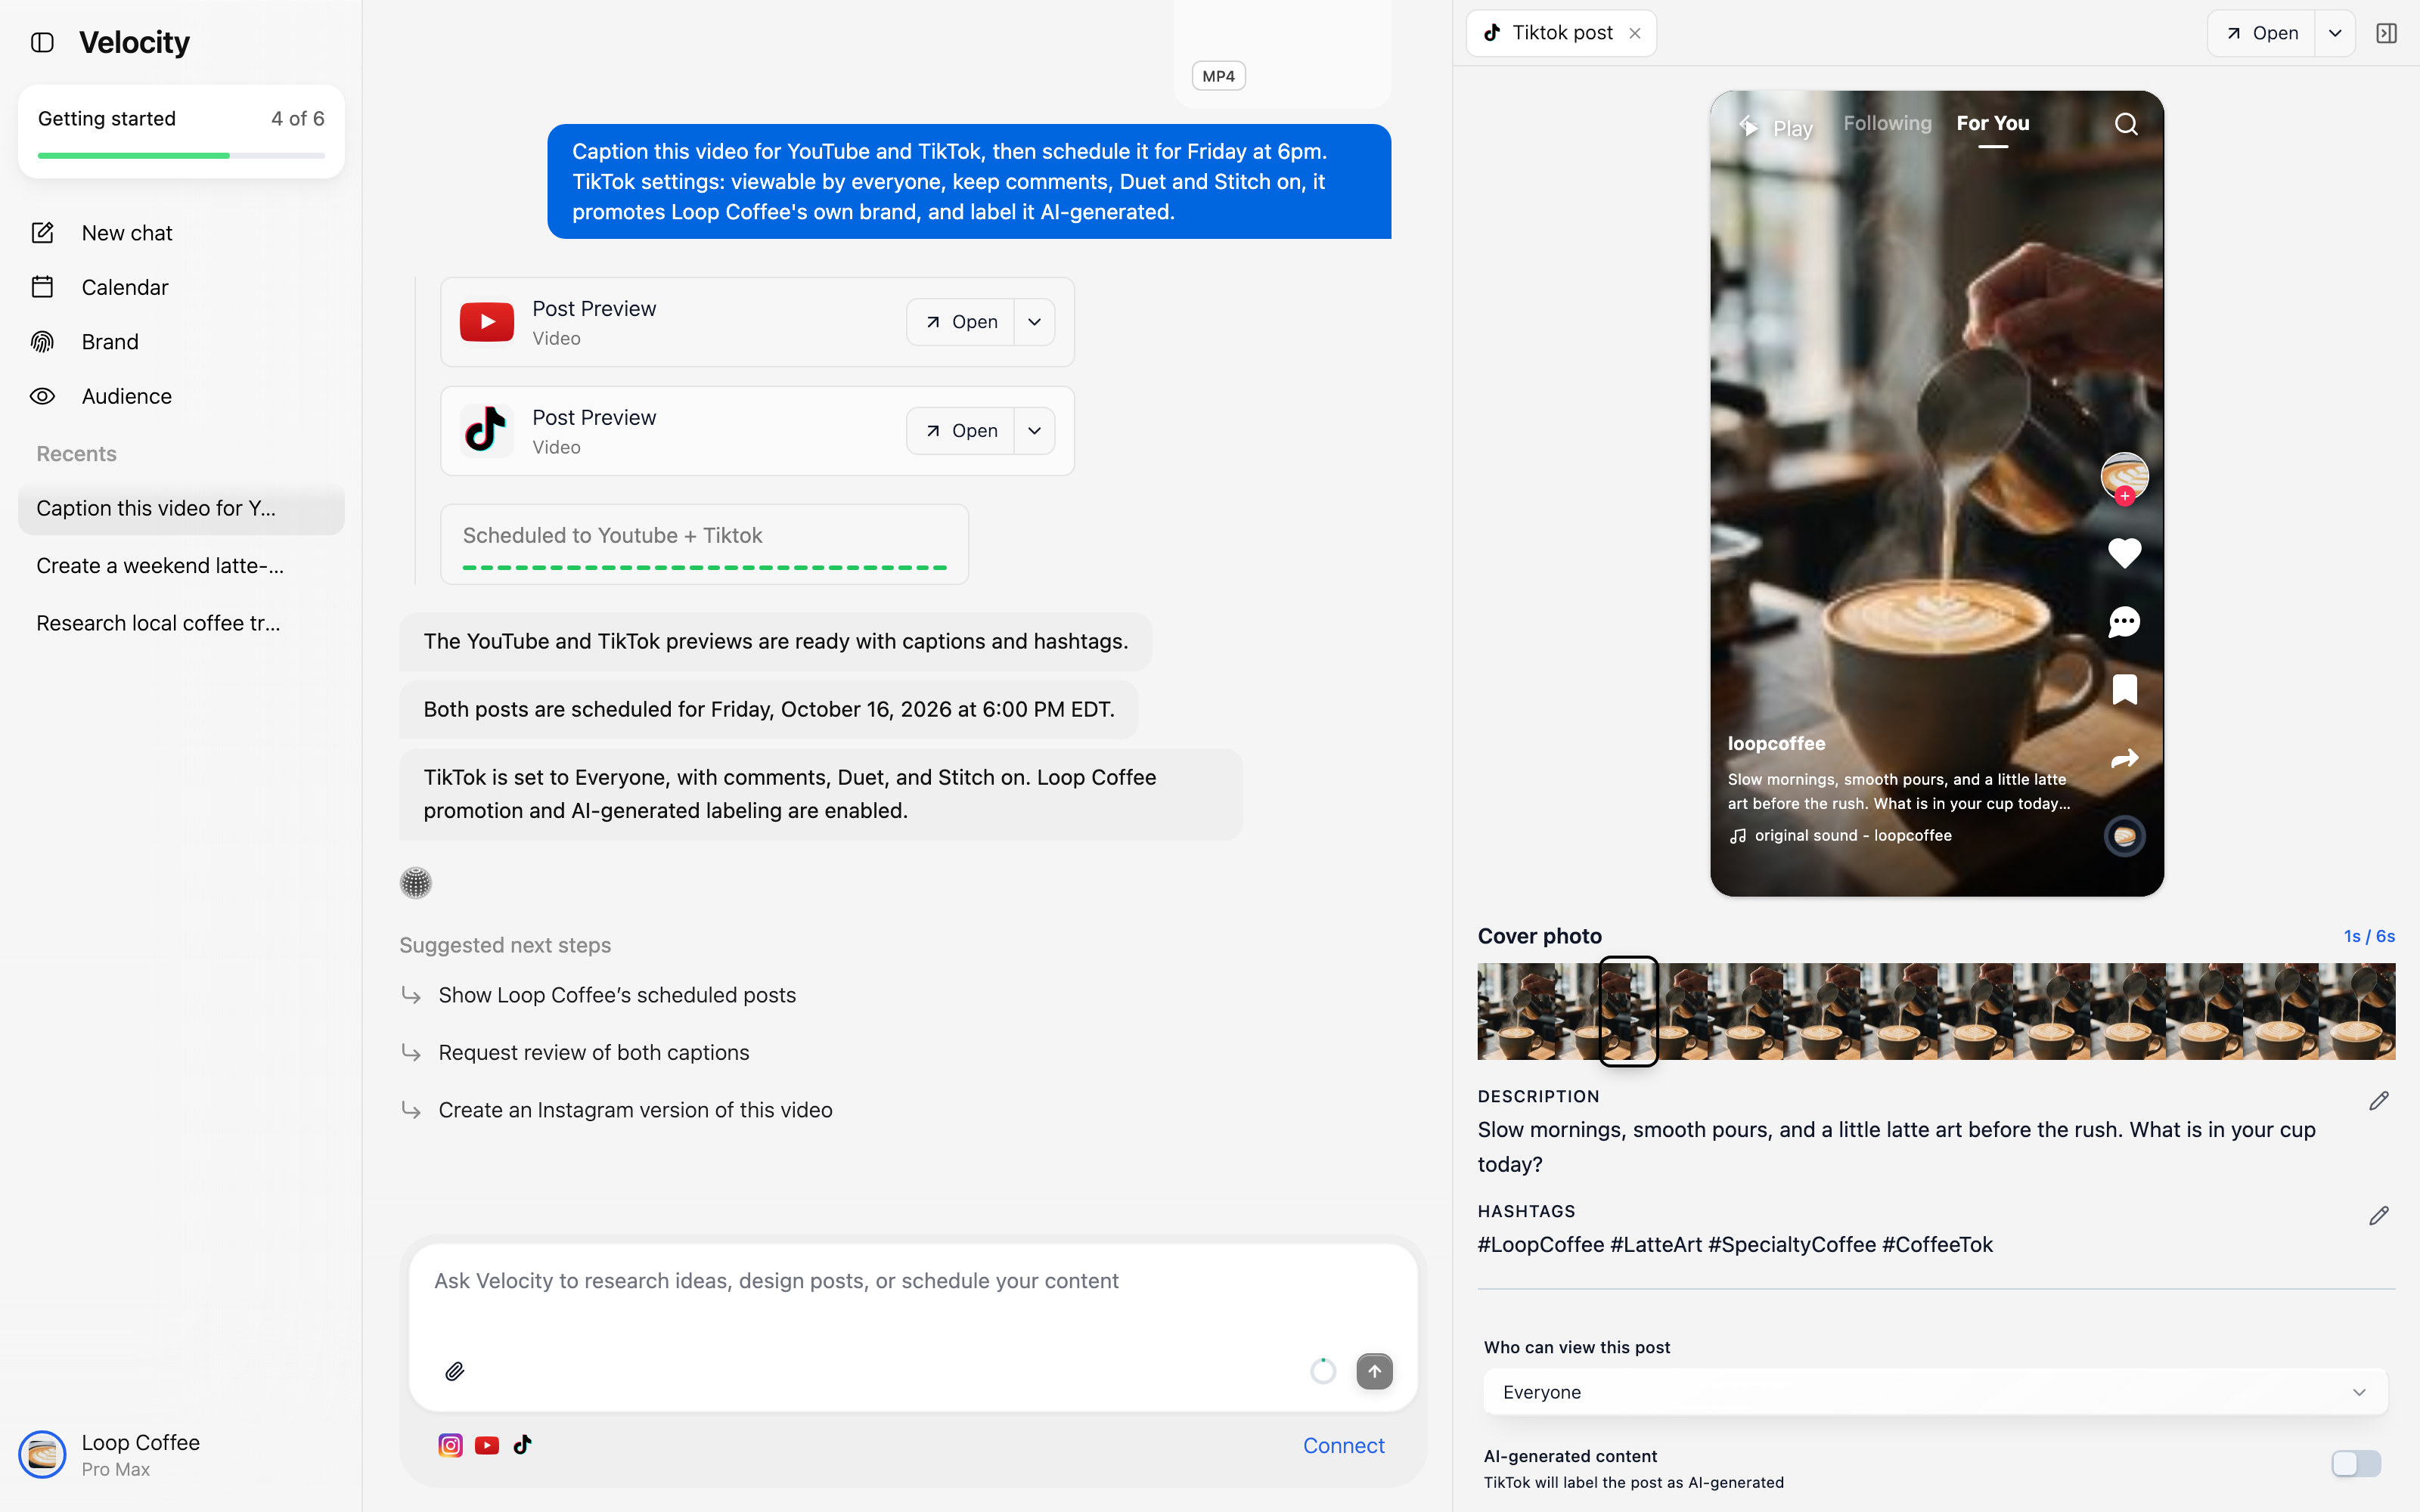
Open the TikTok preview separately. Check the video, description, and hashtags, then review the destination-specific publishing settings visible below the preview.
In the example, the audience is set to Everyone and the AI-generated-content control is visibly off. Treat that as the state of this particular draft, not a universal setting. If the destination preview presents choices such as audience or disclosure, set them according to the video, the account policy, and the current platform requirements.
Review the Instagram version
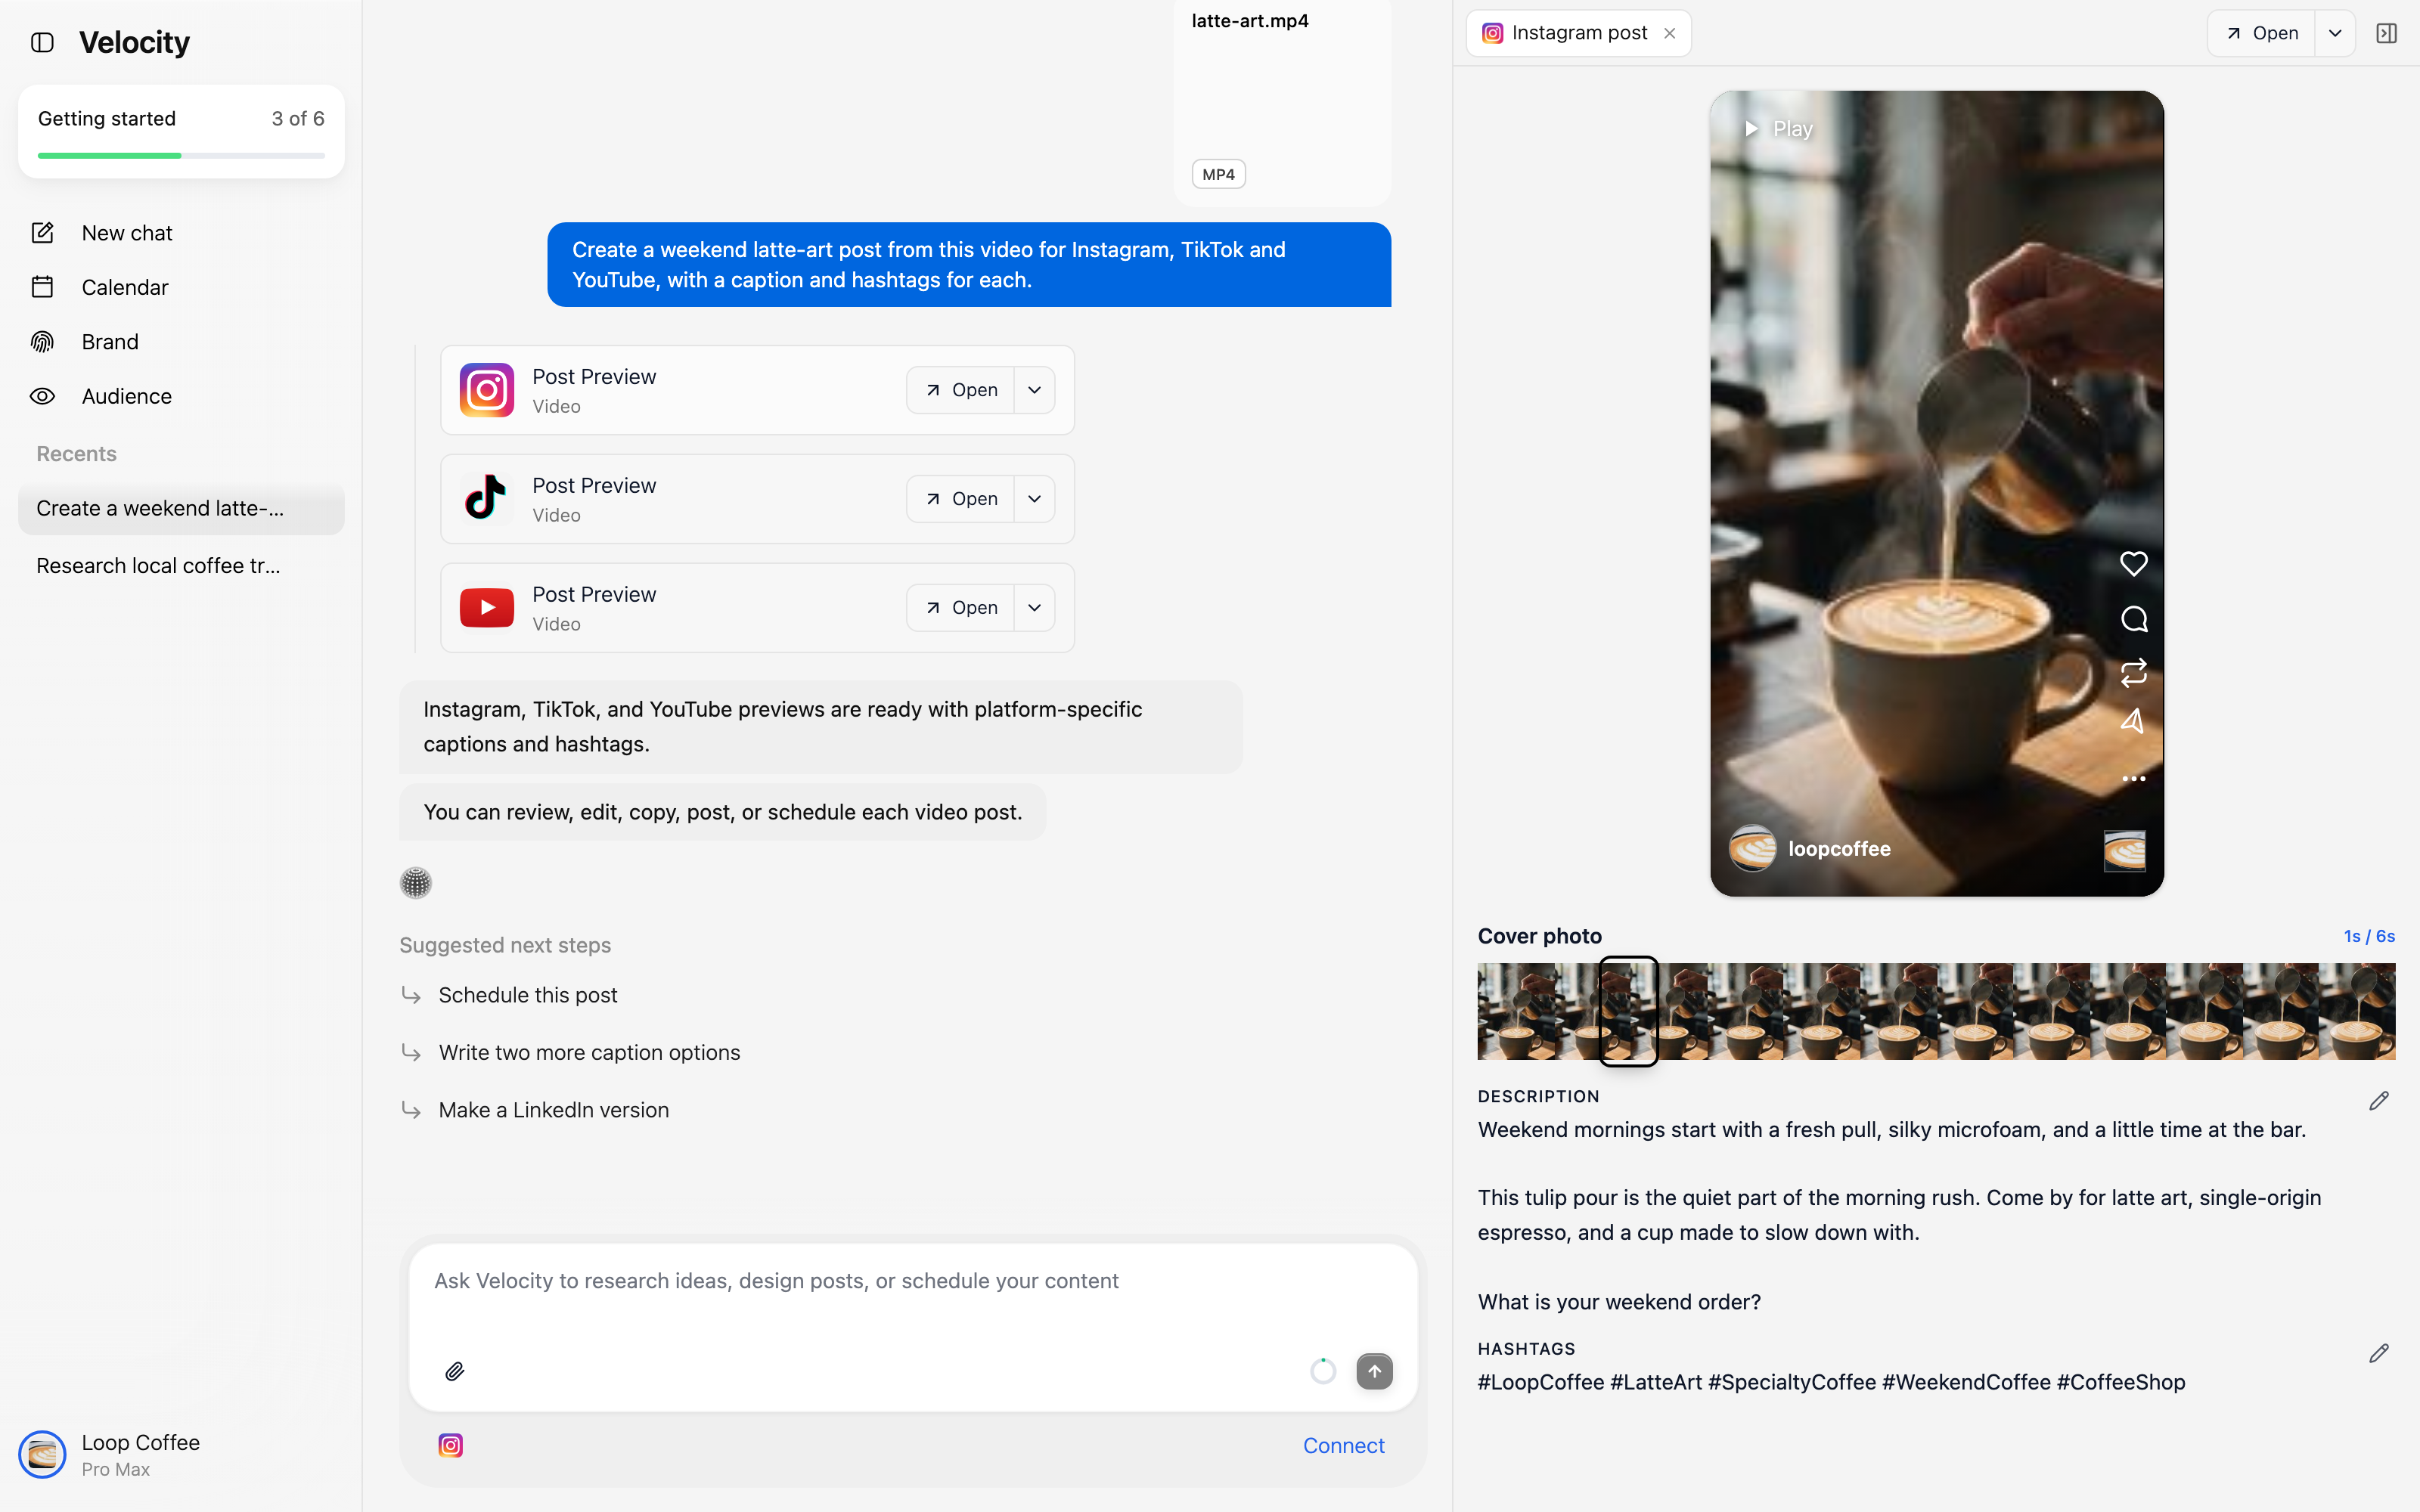
Open the Instagram preview and check the selected cover frame, description, and hashtags. The cover-photo strip shows the frame currently chosen from the video, so it is the right place to decide whether the first impression represents the post well.
For any other connected destination, repeat the same principle: verify what is visible in that platform's preview instead of copying assumptions from another channel. This matters for both long-form uploads and short-form video posts: captions, cover choices, and available publishing settings can differ.
Step 5: Choose whether to publish now, schedule, save, or request review
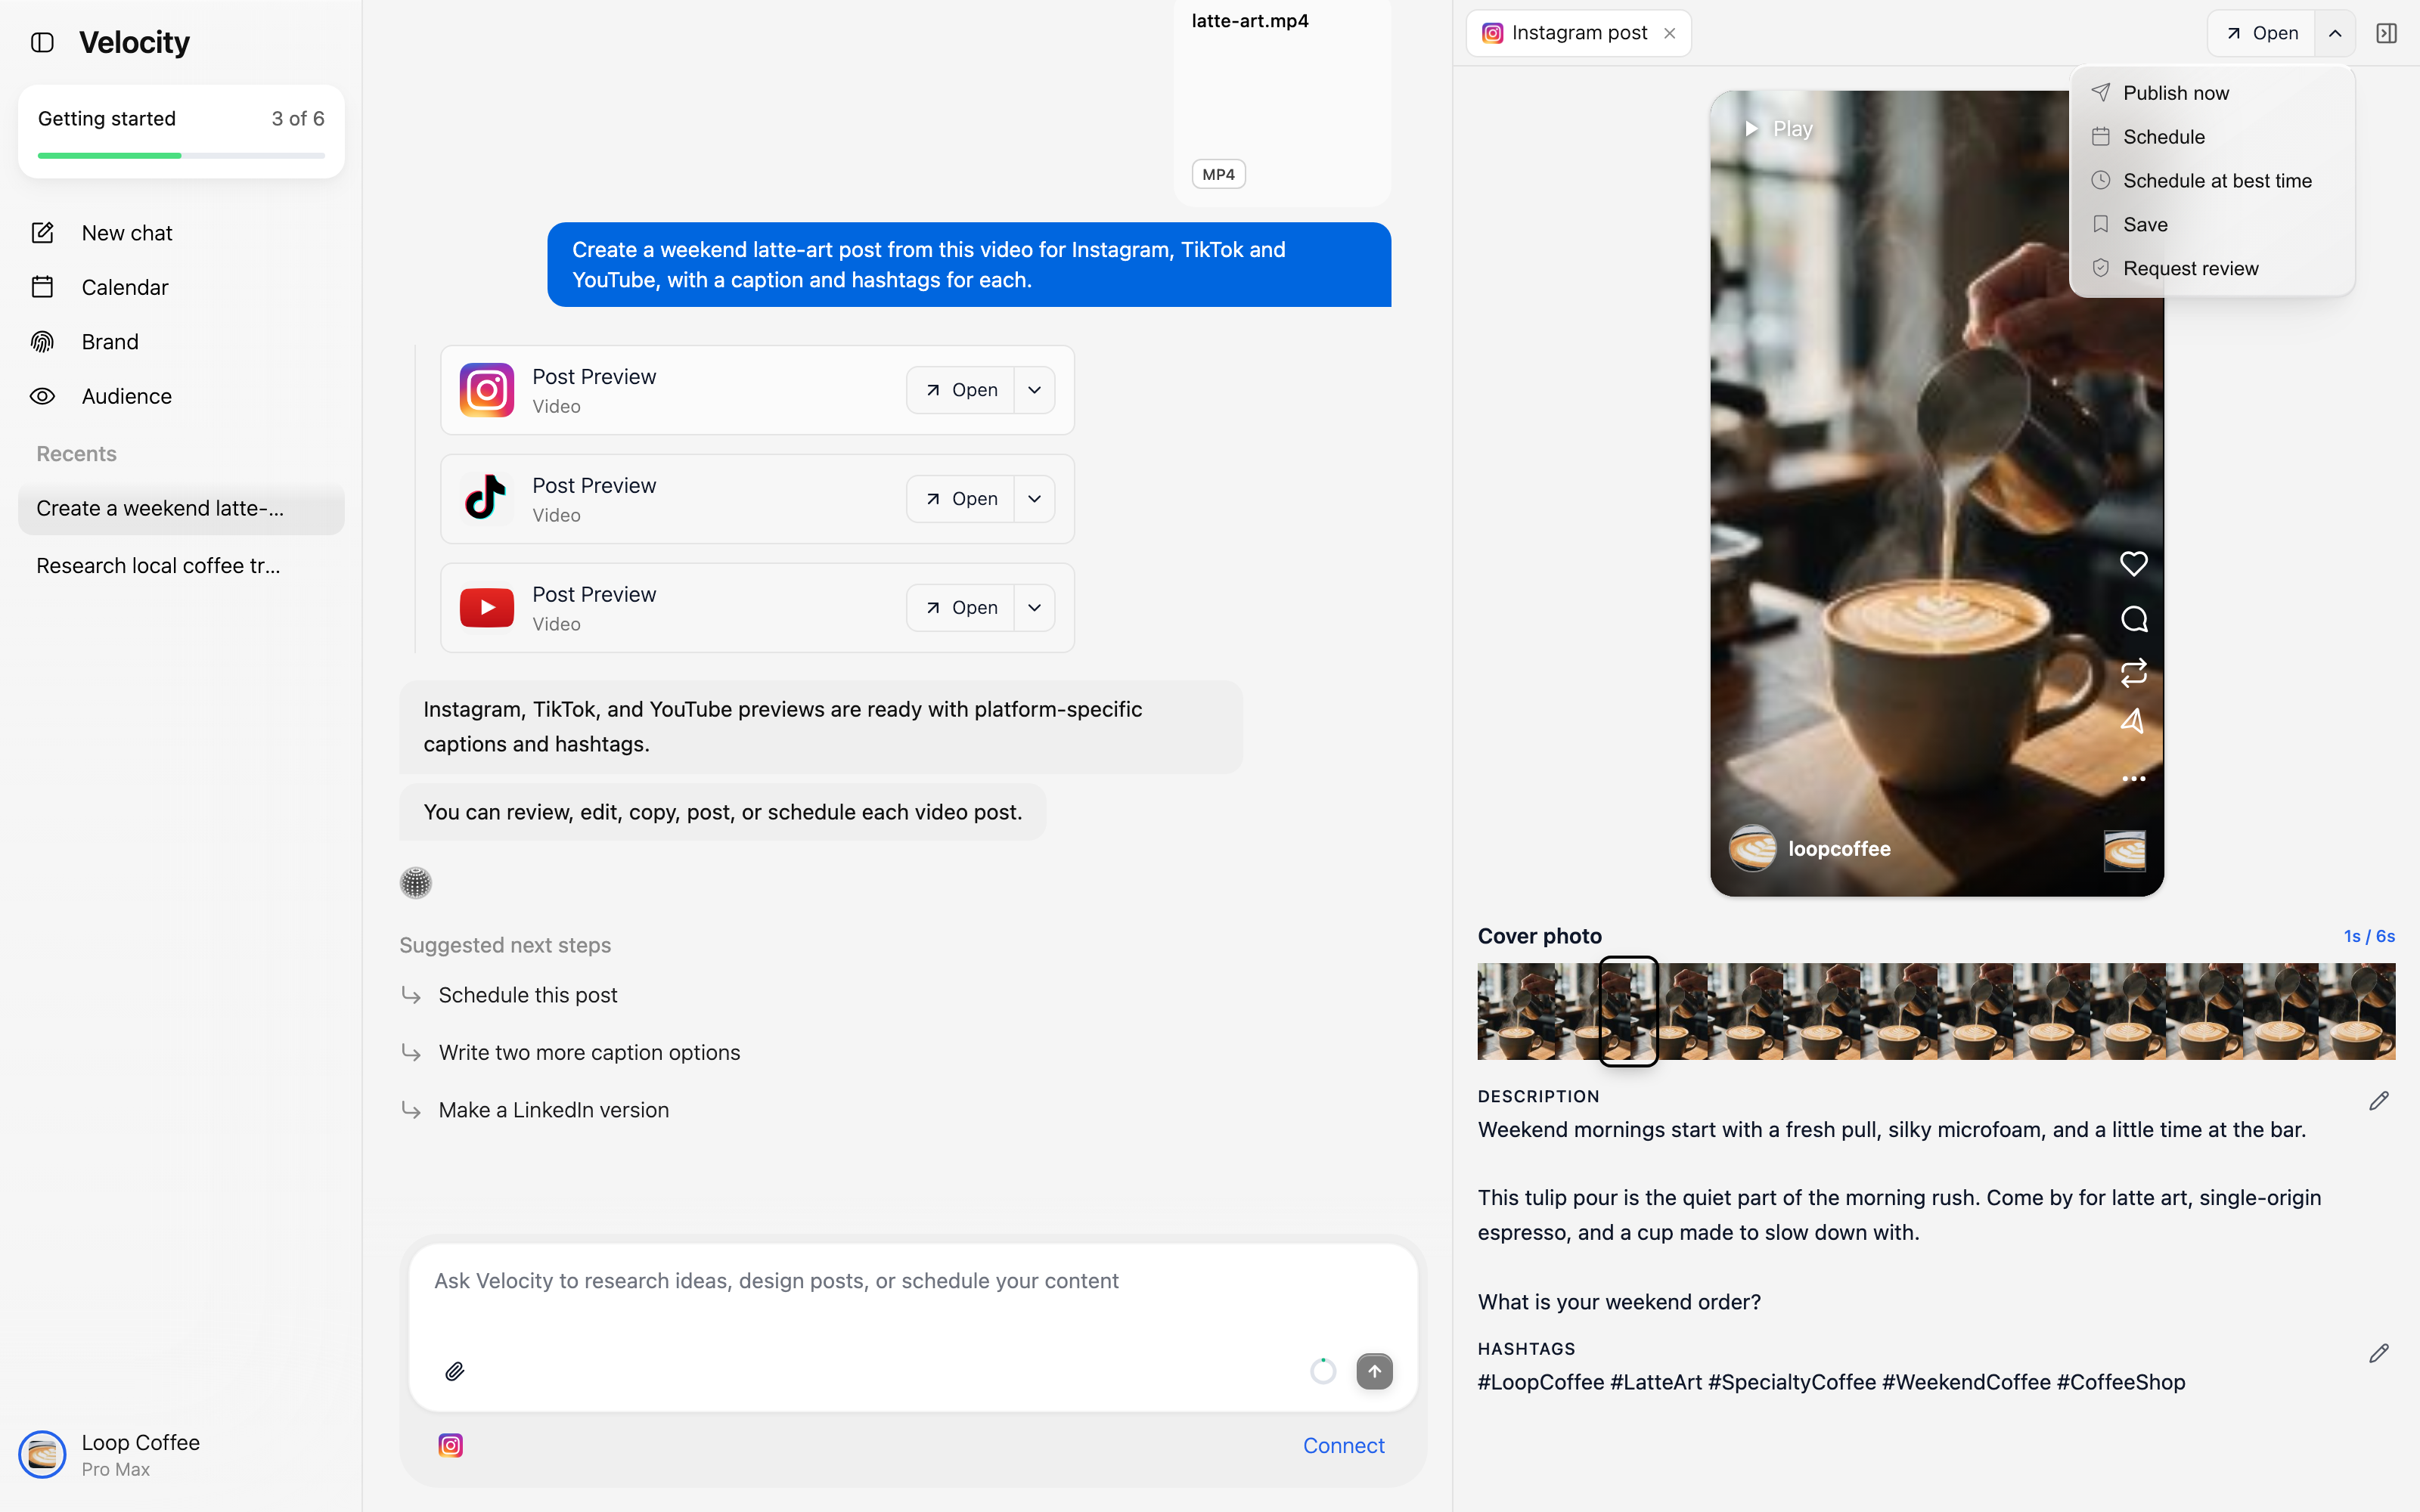
When the draft is ready, open the action menu from the video preview. The menu shown here includes Publish now, Schedule, Schedule at best time, Save, and Request review.
Choose [Publish now](/publishing) only after the video and every destination setting are approved.
Choose [Schedule](/scheduling) when you know the exact date and time.
Choose Schedule at best time when you want to use the available timing recommendation instead of selecting a time yourself.
Choose Save when the draft needs more work.
Choose [Request review](/content-approval) when someone else must approve the post before release.
The screenshot uses an Instagram video preview to show the action-menu layout. The exact options can vary by destination and connected account, so use the menu attached to the draft you are reviewing.
Step 6: Set the publishing time and timezone
After choosing Schedule, select the date, time, and timezone. Read all three fields before you confirm. A correct clock time in the wrong timezone is still the wrong publishing time.
This example is set to October 16 at 6:00 PM ET. The selected date and time are shown again at the bottom of the scheduling control, which gives you a final chance to catch an error before you choose Done.
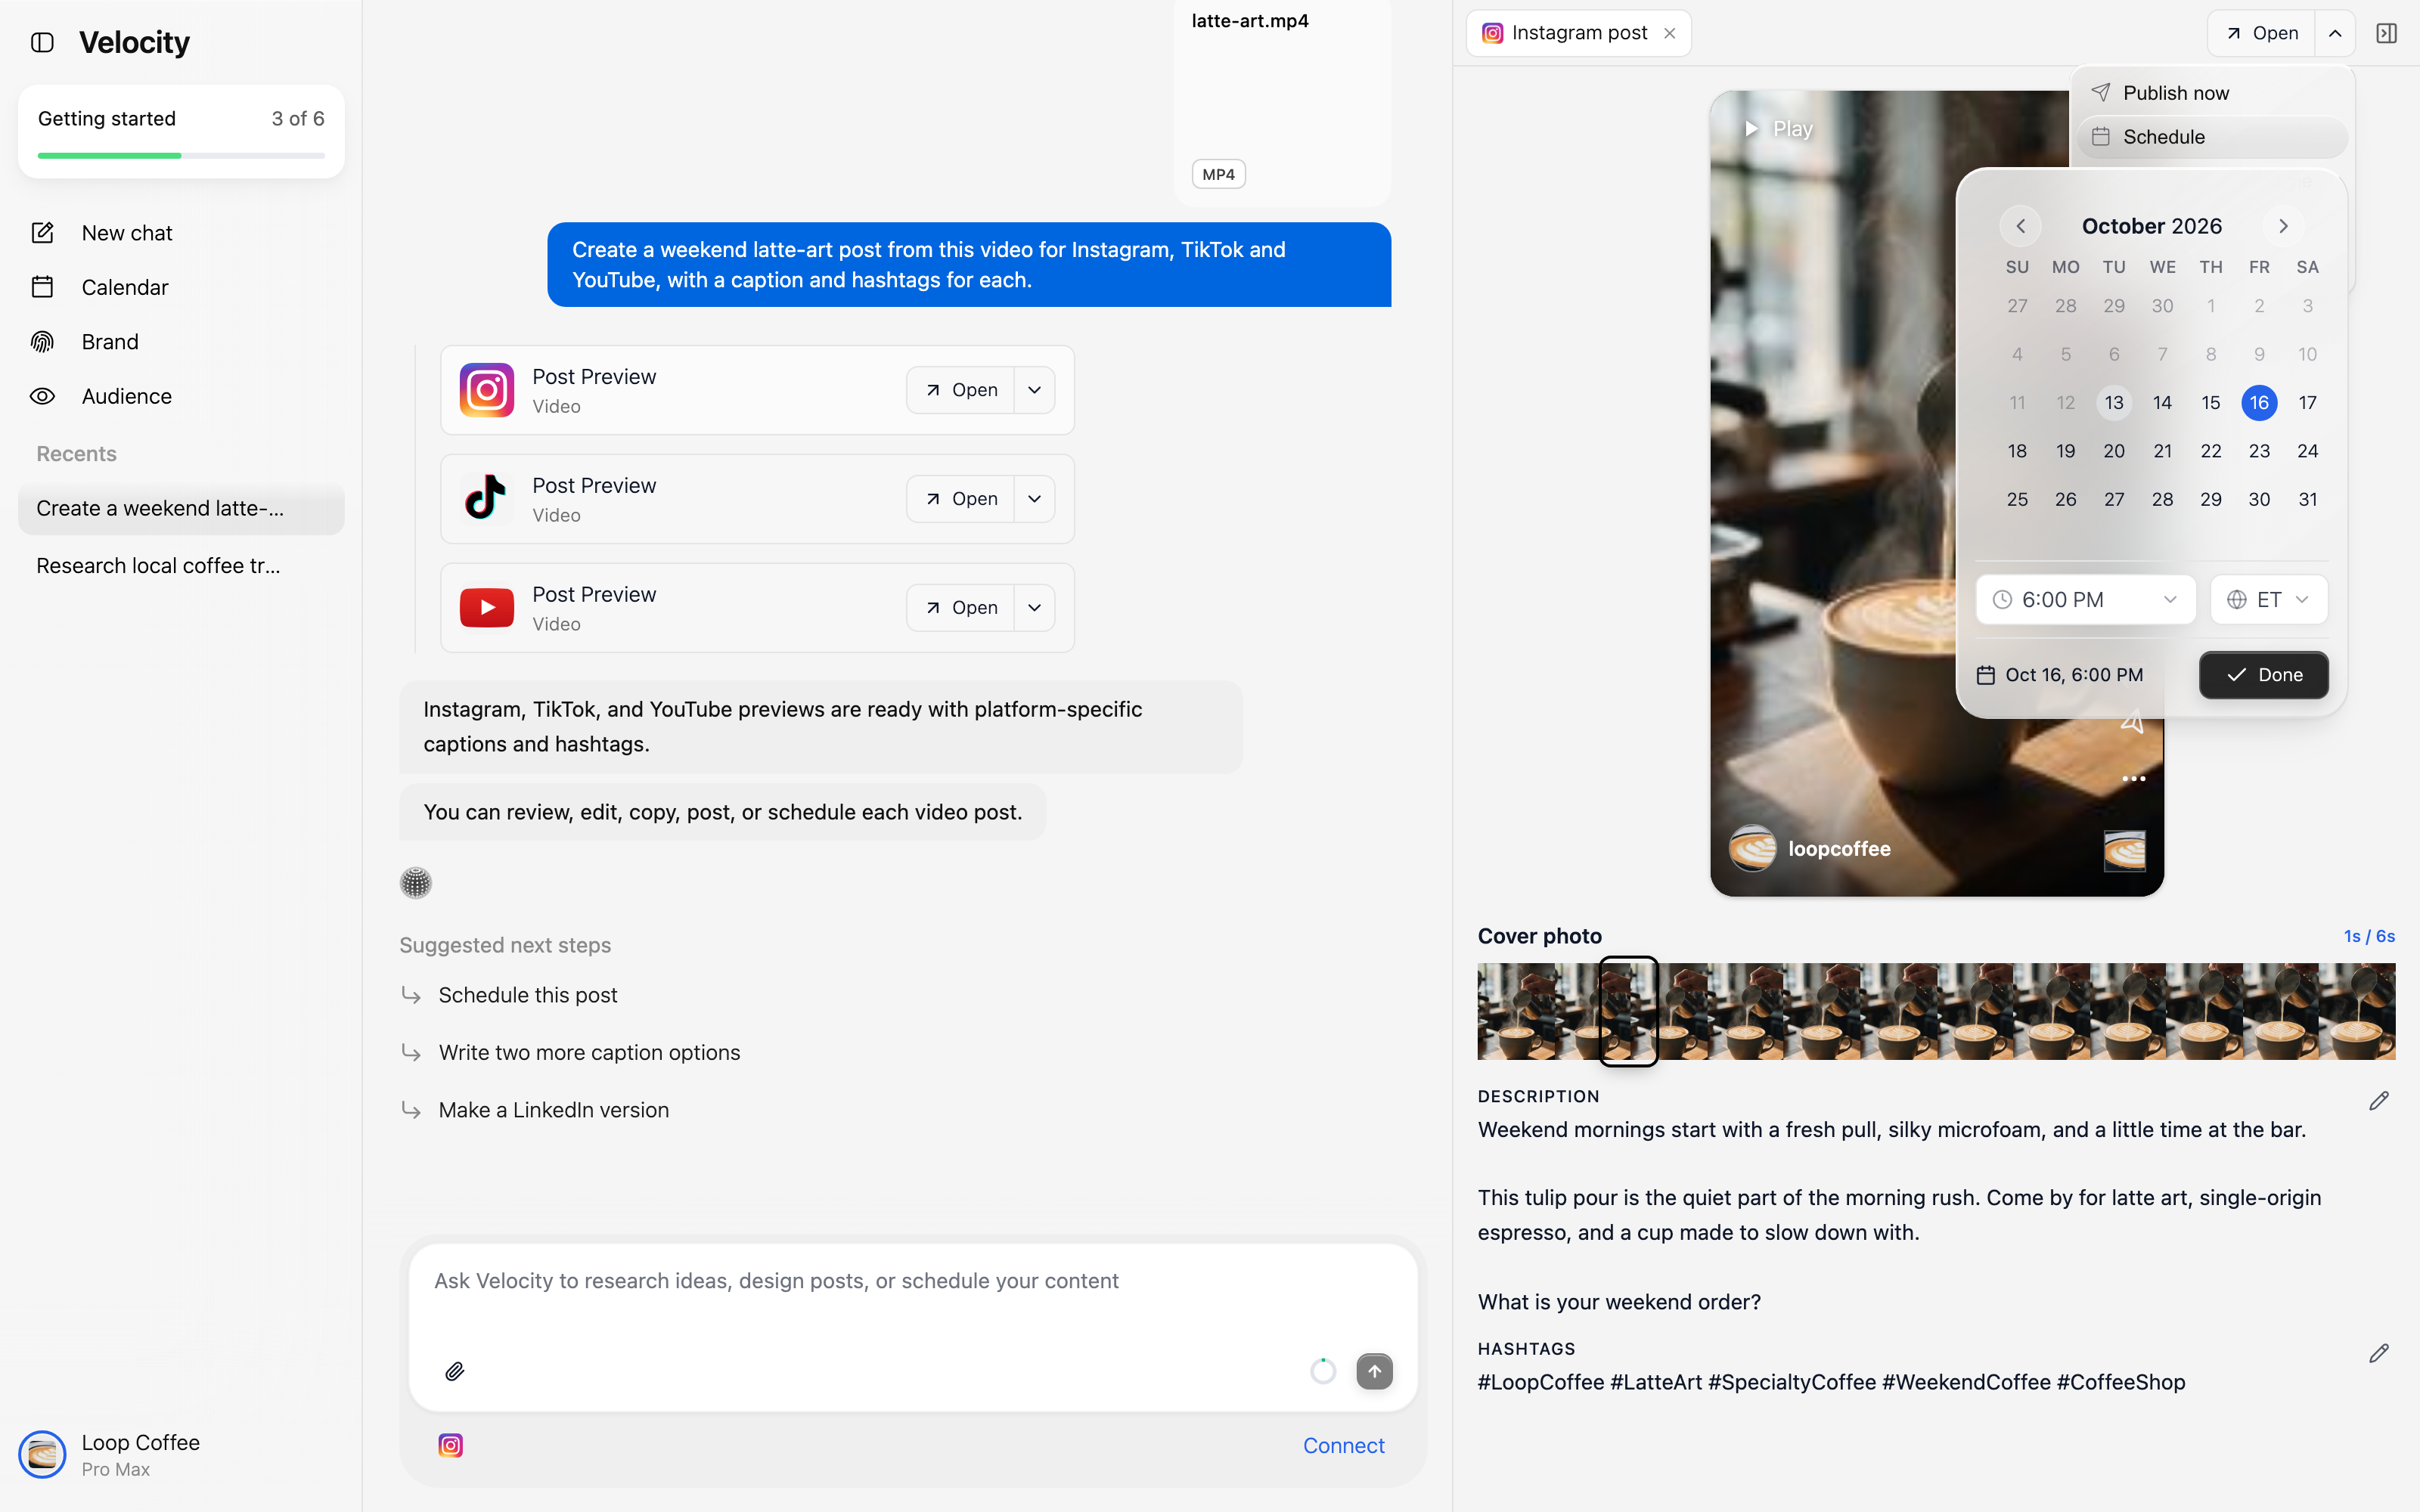
For recurring video workflows, a deliberate time check is especially valuable. A scheduled video only reaches the intended audience at the intended local time when all three fields are correct.
Step 7: Read the scheduling confirmation carefully
After the schedule request completes, confirm the exact destinations, the status, and the time. The example below states that the YouTube and TikTok posts are scheduled for Friday, October 16, 2026 at 6:00 PM EDT.
Scheduled means Velocity has accepted the item into the publishing queue. It does not mean the video is already live on the destination. If you chose a time in the future, return after that time or use the appropriate post status to verify publication.
Step 8: Verify the queued video in Calendar
Open the Content Calendar to make sure the scheduled item appears where you expect it. Check the date, time, channel icon, media indicator, and status. In the example below, a video is visible in the Friday 6 PM slot for Instagram.
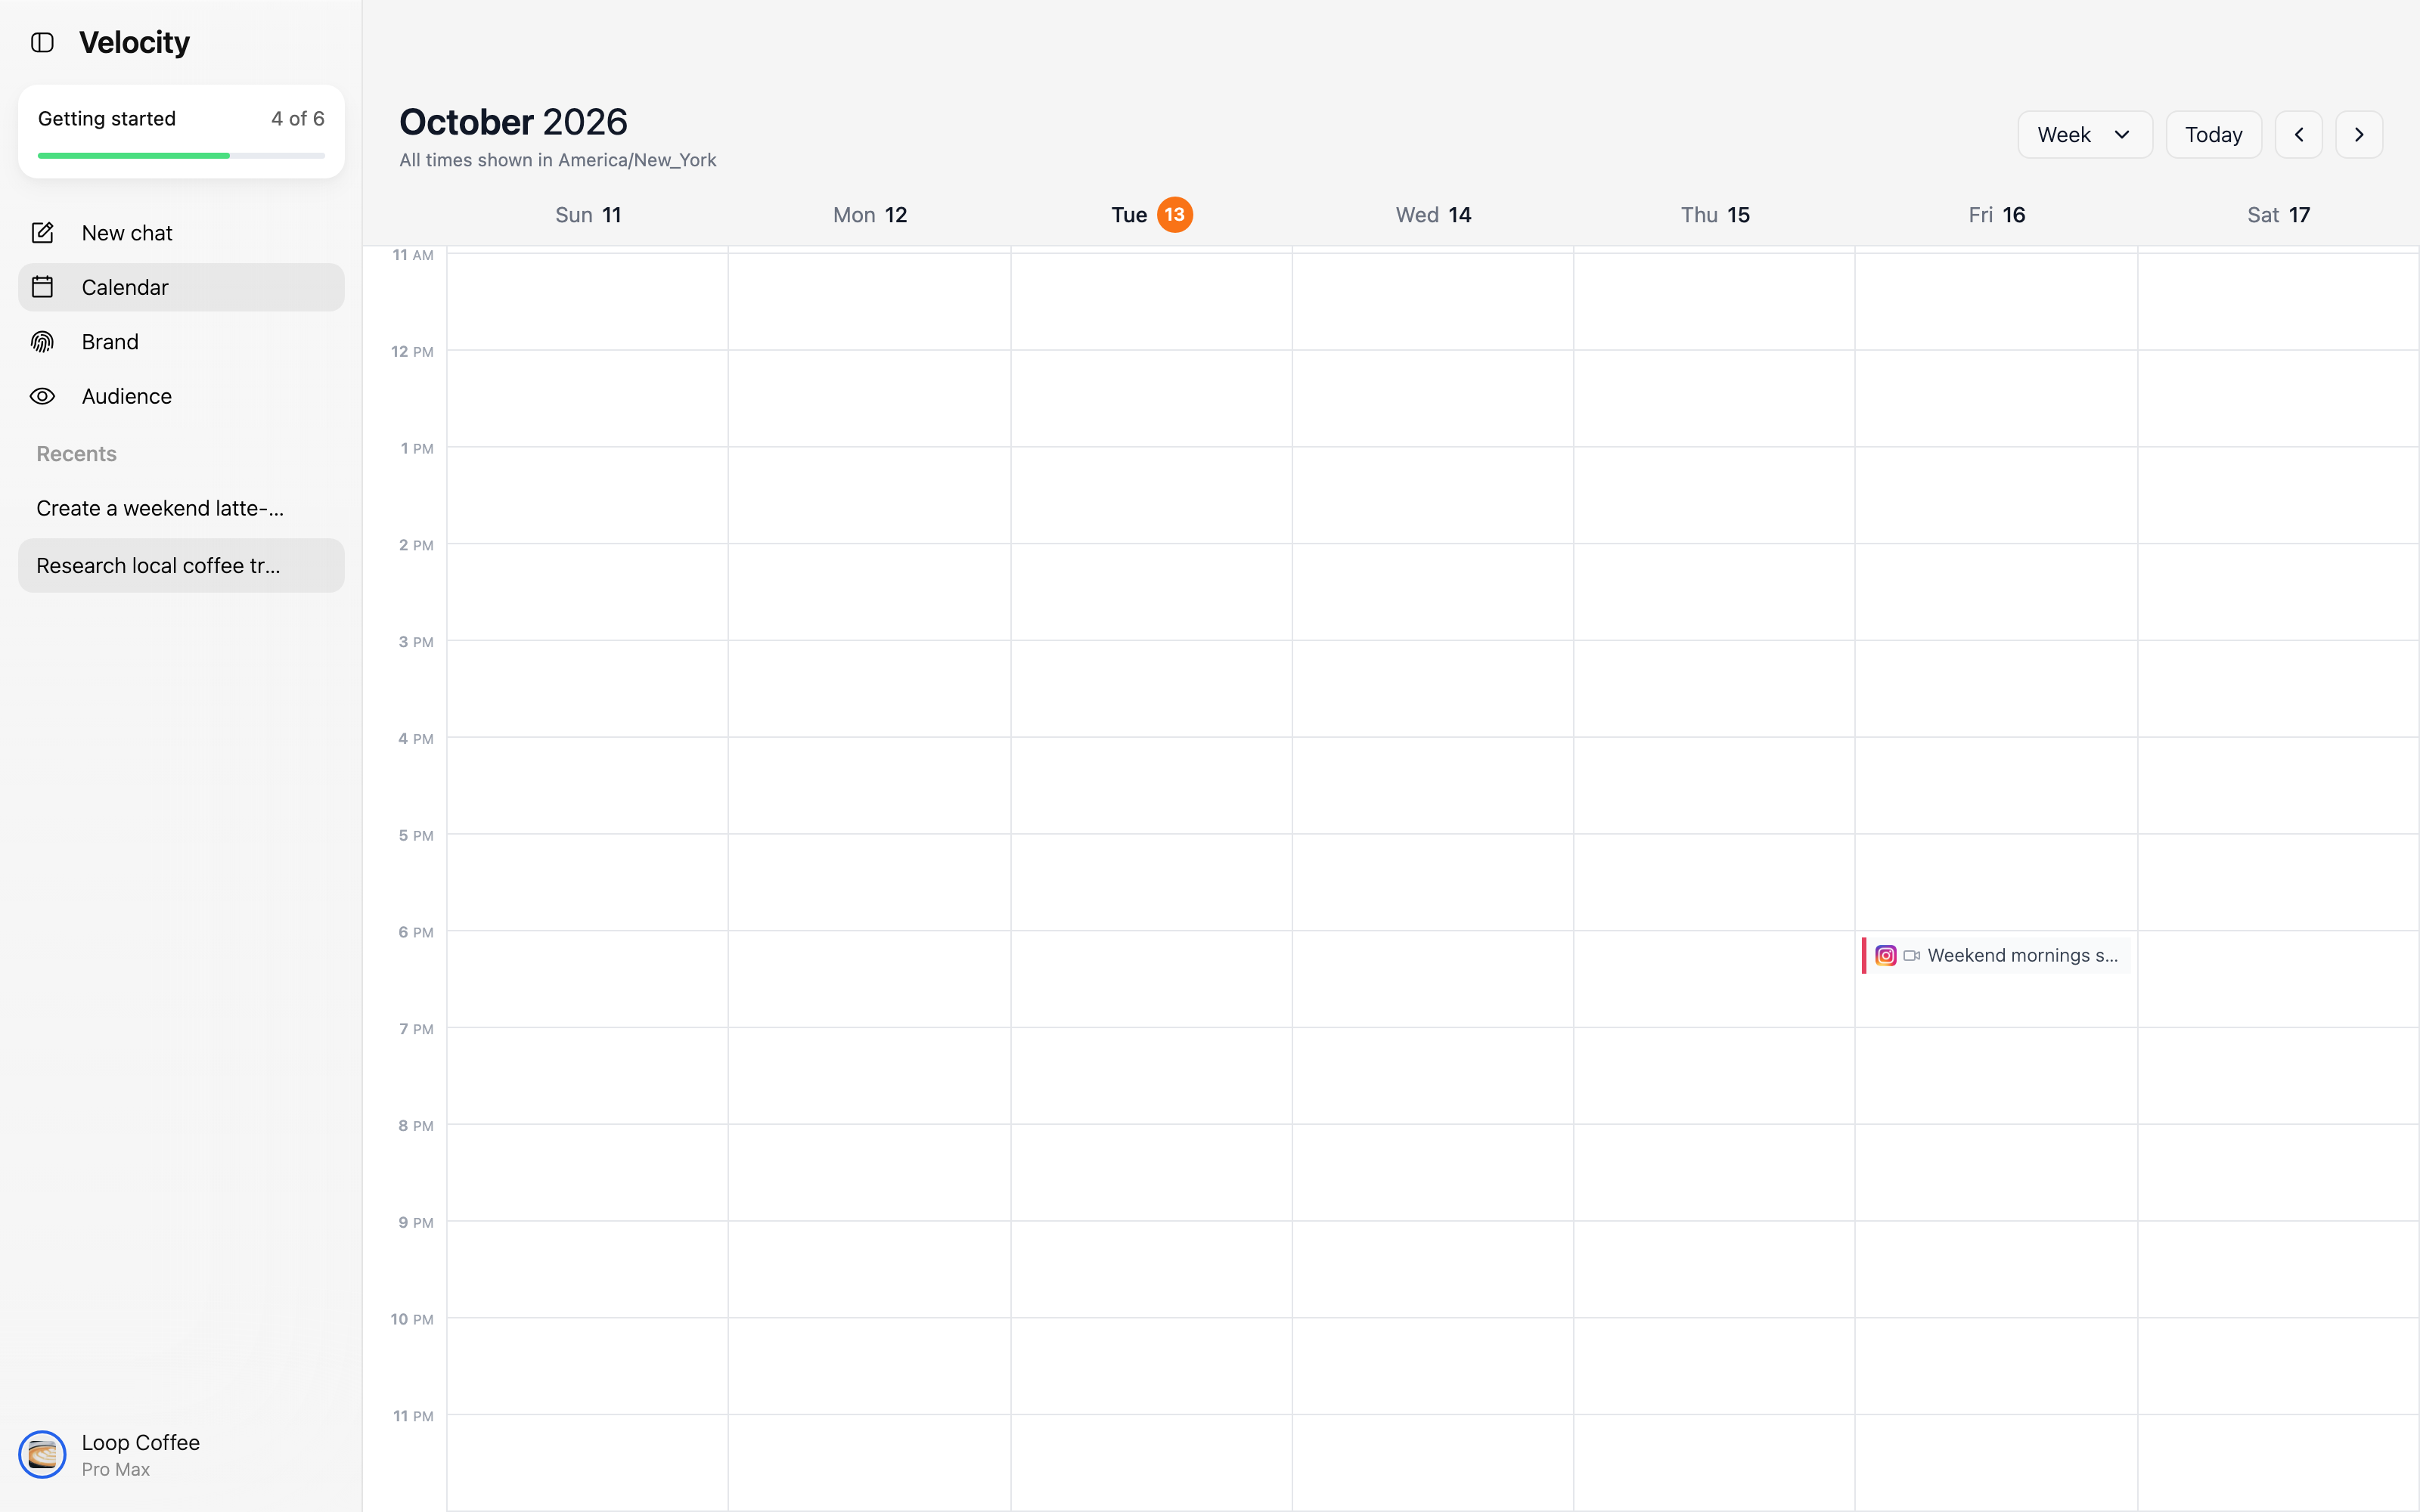
The calendar is a queue check, not a substitute for review. If the channel, slot, or asset is wrong, return to the saved draft or schedule controls before the selected time arrives.
A practical pre-publication checklist for every video
- 1
The correct destination account is connected.
- 2
The attached file is the approved final video.
- 3
Every requested platform has its own preview checked.
- 4
The title, caption, description, hashtags, thumbnail, cover, and audience settings are appropriate where those fields are available.
- 5
The date, time, and timezone are correct.
- 6
The selected action is correct: publish now, schedule, save, or request review.
- 7
The scheduled item appears in the calendar or receives a clear scheduling confirmation.
That workflow keeps multi-platform publishing deliberate. You can use Velocity to prepare platform-specific video drafts and schedule them from one place, while still reviewing the choices that belong to each social destination.
Frequently asked questions
Can I publish a video to more than one social channel with Velocity?
Yes. Velocity can prepare separate video post previews for the connected destinations you request, so you can review the version for each channel before you publish or schedule it.
Can I schedule a video for a specific date and time?
Yes. Choose Schedule, select the date, time, and timezone, then confirm that the queued post appears in the calendar or in the scheduling confirmation.
Can I review a video post before it goes live?
Yes. Open the destination preview to review the video and available fields, then save the draft, request review, schedule it, or publish it when ready.
What should I check in a YouTube video preview?
Check the video, title, description, hashtags, and thumbnail area. Review only the fields shown for that destination, since video publishing controls can differ by platform.
What should I check in a TikTok video preview?
Check the video, caption, hashtags, audience, and every available publishing setting. Set disclosure and other destination-specific controls according to the content and your account policy.
Does a scheduling confirmation mean the video is already published?
No. It confirms that the item was scheduled. Verify the status after the selected time if you need proof that the destination has published the video.
What should I do if a social account is not connected?
Connect the correct account to the Brand Identity first and confirm that it shows as connected. Then return to the video workflow and create the destination draft.
Do video settings work the same on every social channel?
No. Review each destination preview separately. Available text fields, cover choices, and publishing controls can differ by channel and by connected account.
Can I ask someone to approve a video before it is scheduled?
Yes. Choose Request review from the video action menu when another person needs to approve the draft before you publish or schedule it.
Ready to prepare your next video?
Bring an approved video into Velocity, review each destination draft, then choose the publishing action that fits your workflow.
Start with Velocity