How Velocity Works: Turn a Simple Goal Into On-Brand Social Content
Updated October 13, 2026 · 10 min read
Velocity turns a clear business goal into a social-content workflow you can review before anything goes live. Its AI social media agents help you start with the brand and channels that matter, describe the outcome you want in plain language, then use the resulting research and drafts to review, schedule, publish, and learn from performance.
The important point is control: Velocity can help research ideas, prepare platform-specific drafts, and surface scheduling options, while you decide what is ready to publish and when.
The workflow at a glance
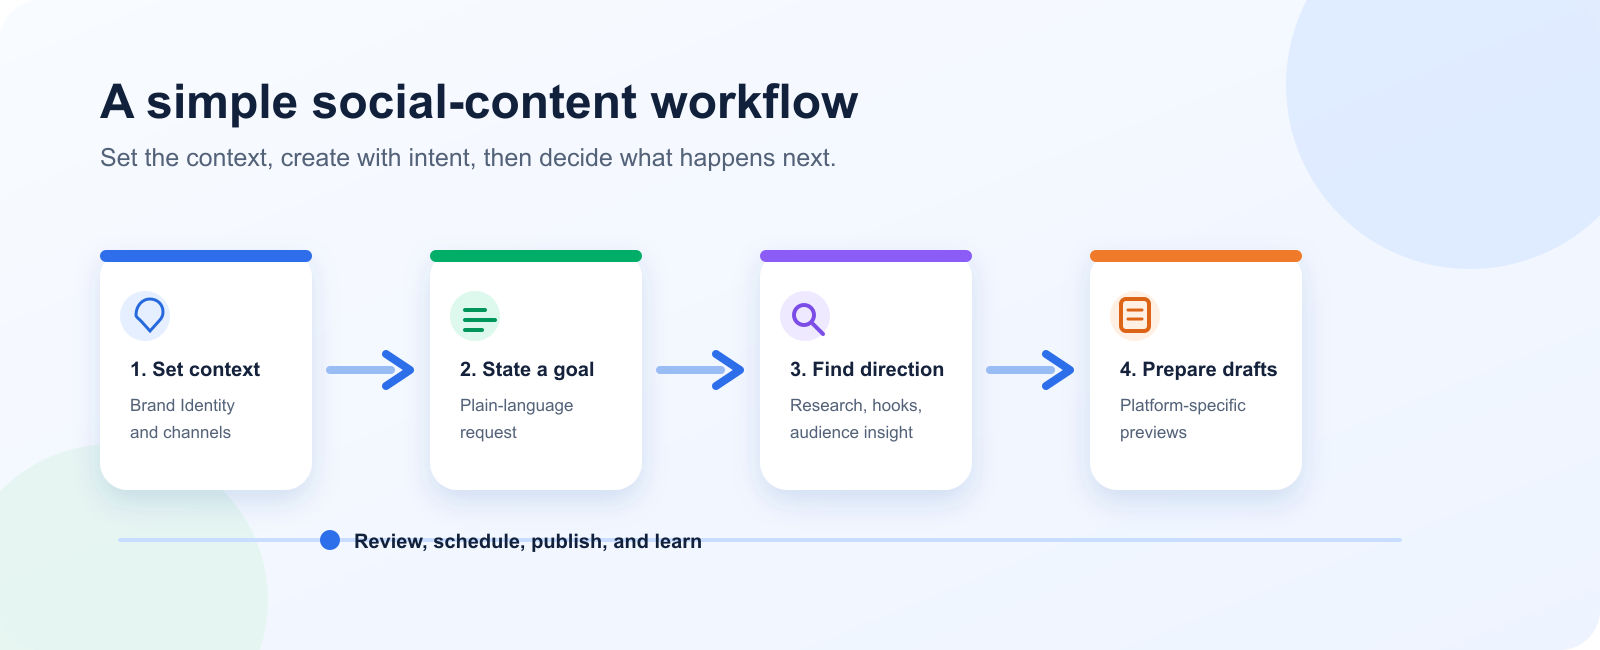
The screenshots in this guide follow one consistent example: Loop Coffee wants to turn a simple weekend latte-art idea into useful social content. The same workflow applies when the starting point is a campaign idea, an image, a video, or a planning task.
Step 1: Choose the Brand Identity that should guide the work
Begin by choosing the Brand Identity for the business, product line, or client you are working on. This tells Velocity which brand context should shape the output before you ask for ideas or posts.
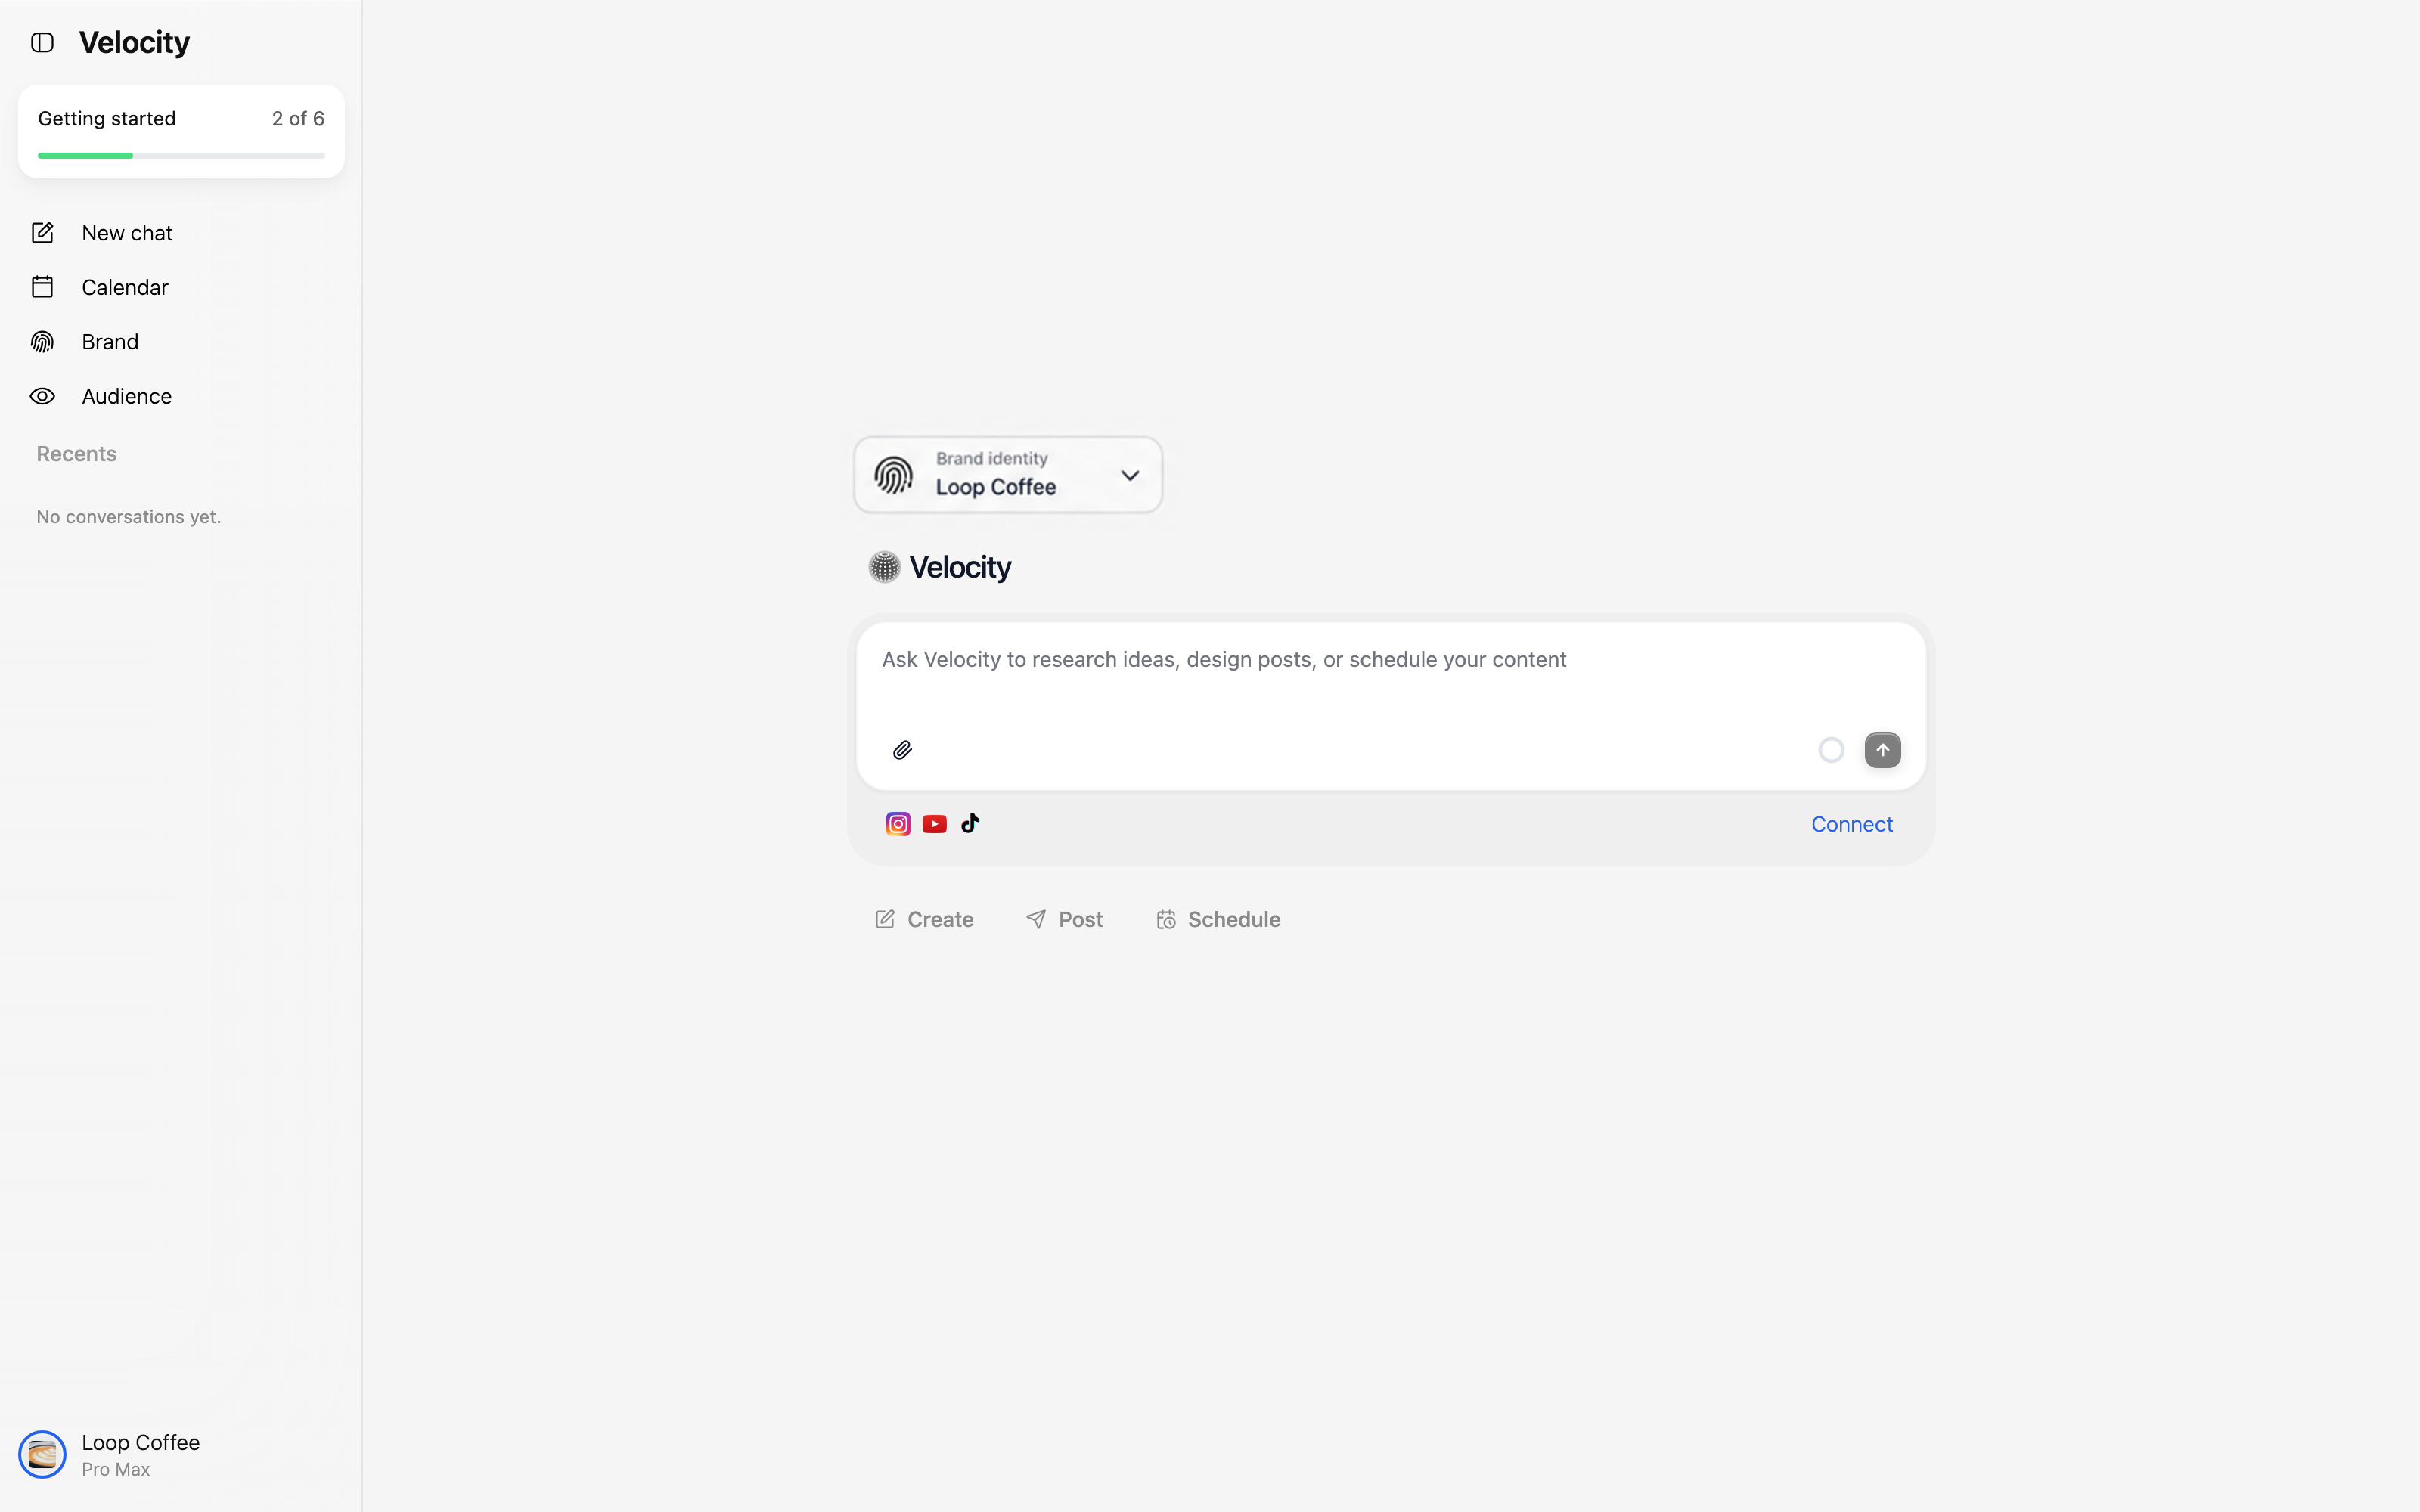
In the example, Loop Coffee is selected. That means the workflow starts from the relevant brand instead of treating every request as generic social copy.
Next, review the information stored in that identity. The brand view brings together the connected destinations, visual kit, assets, and core business information.
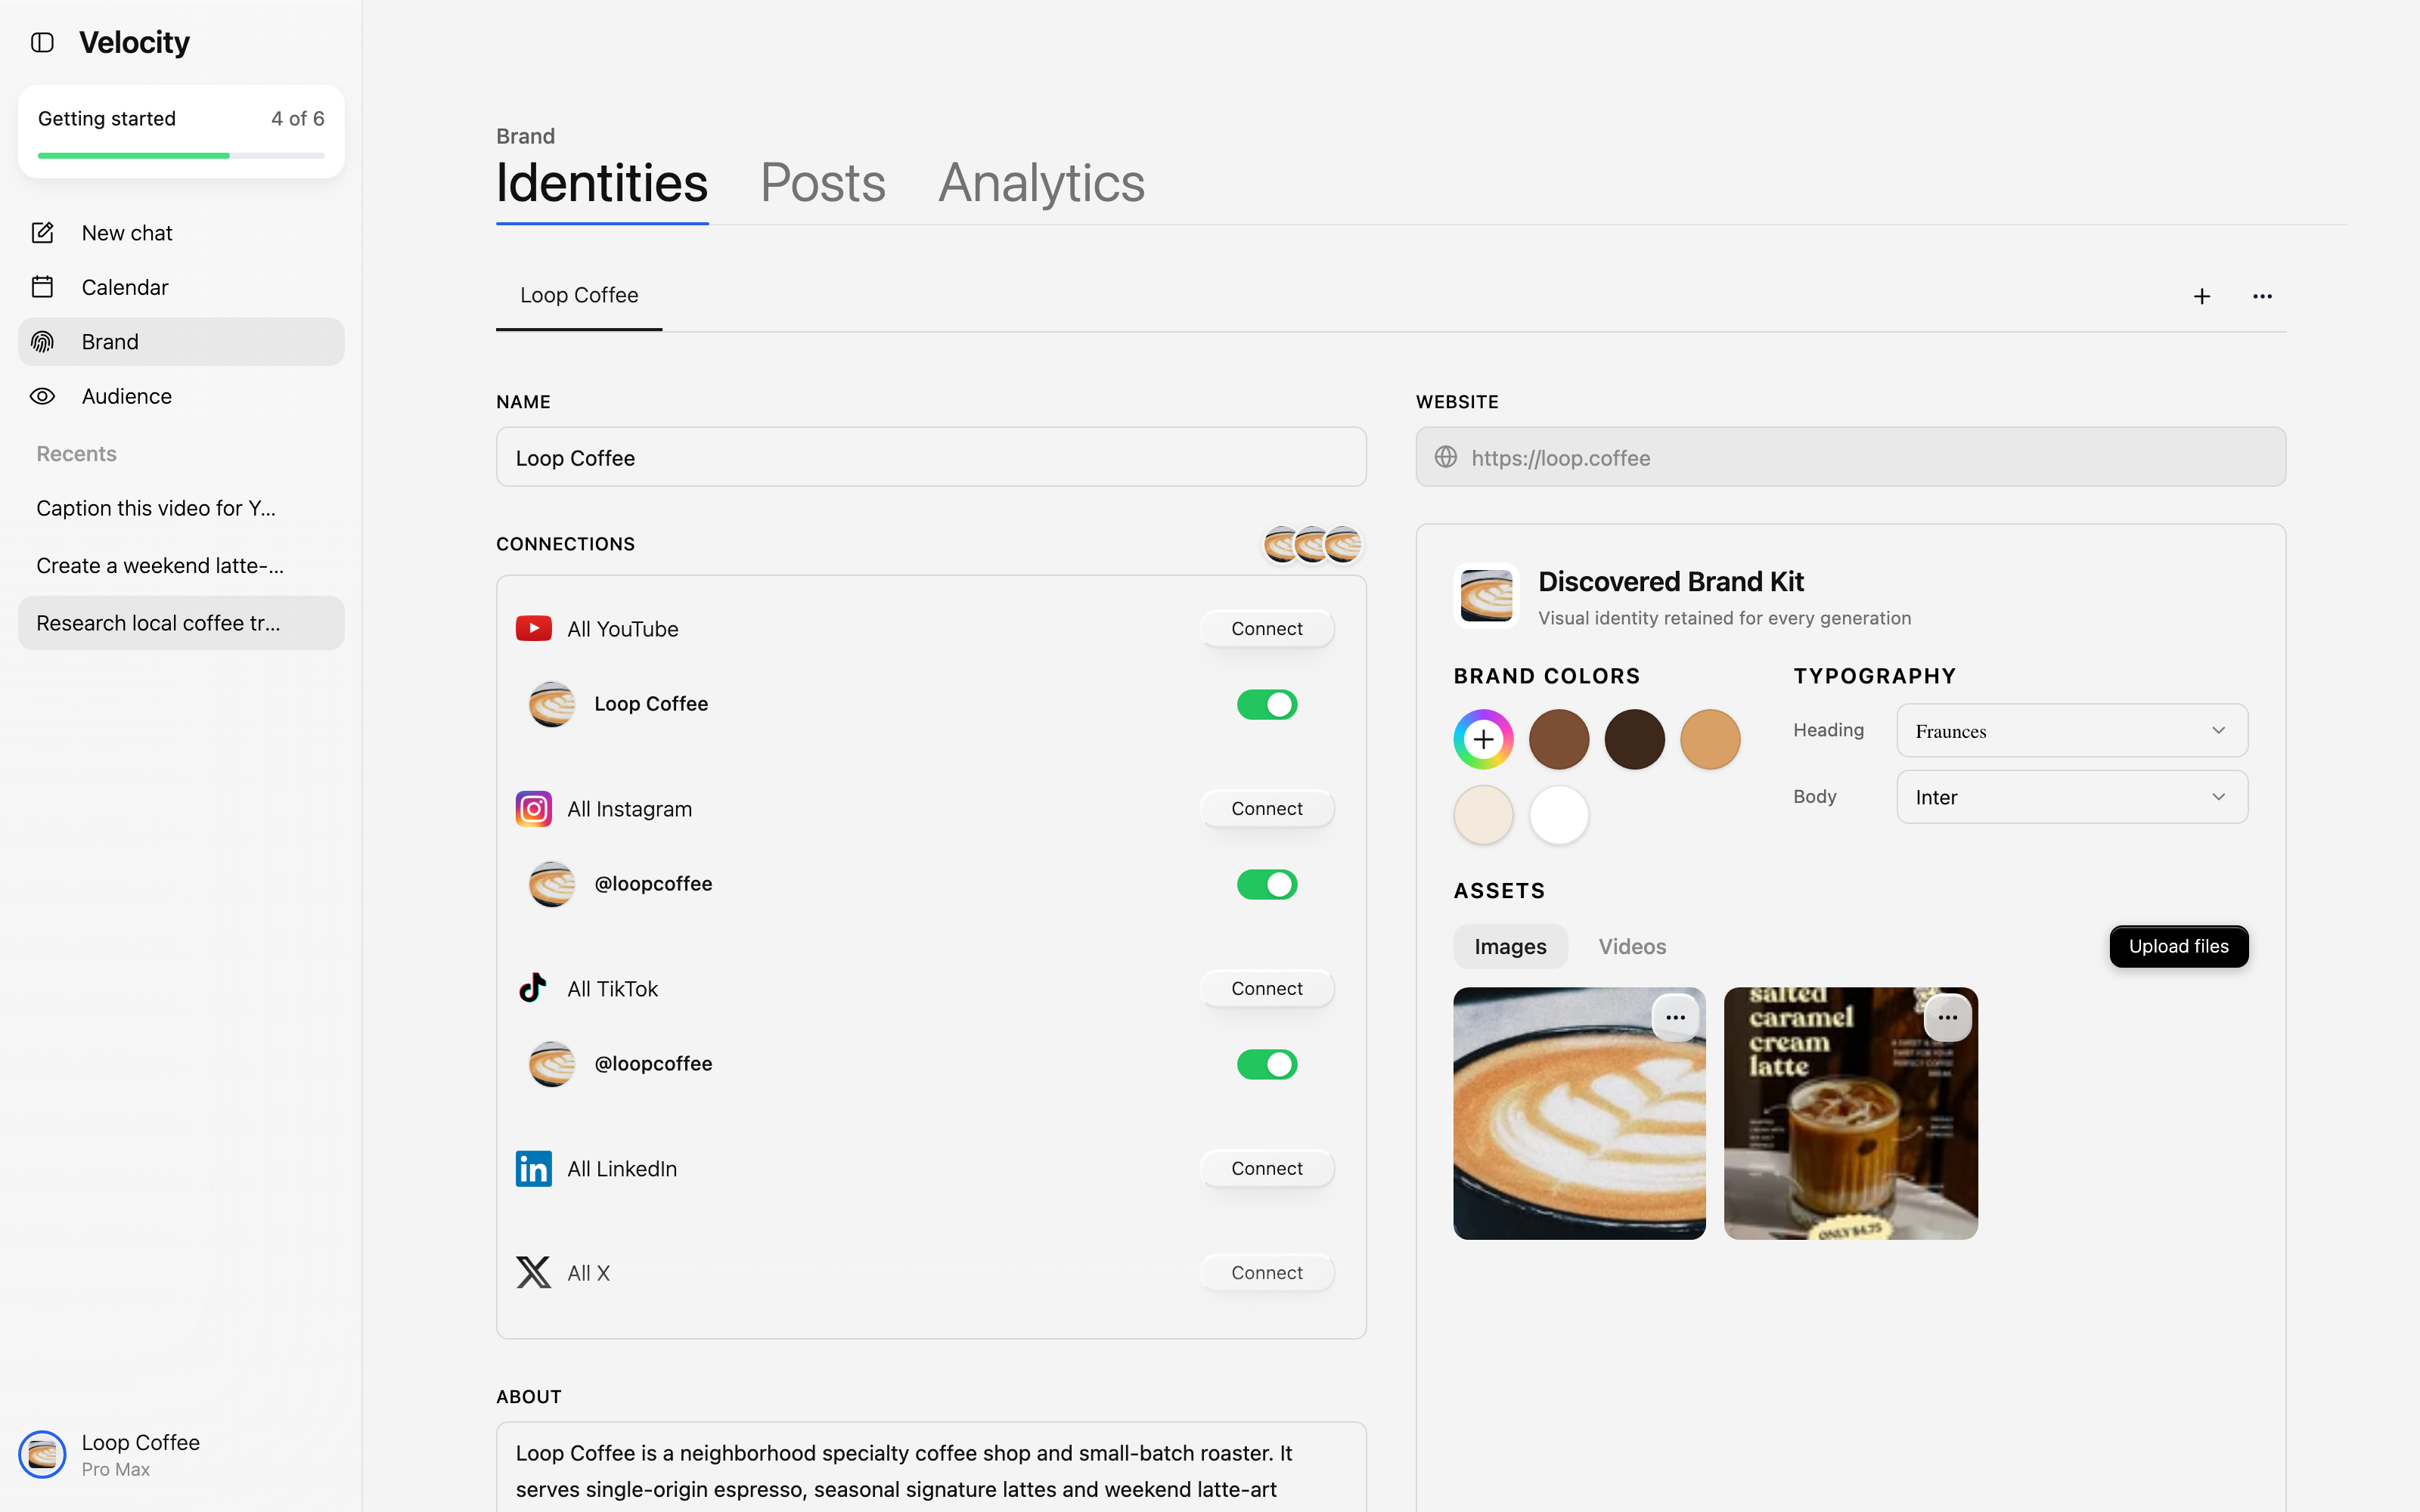
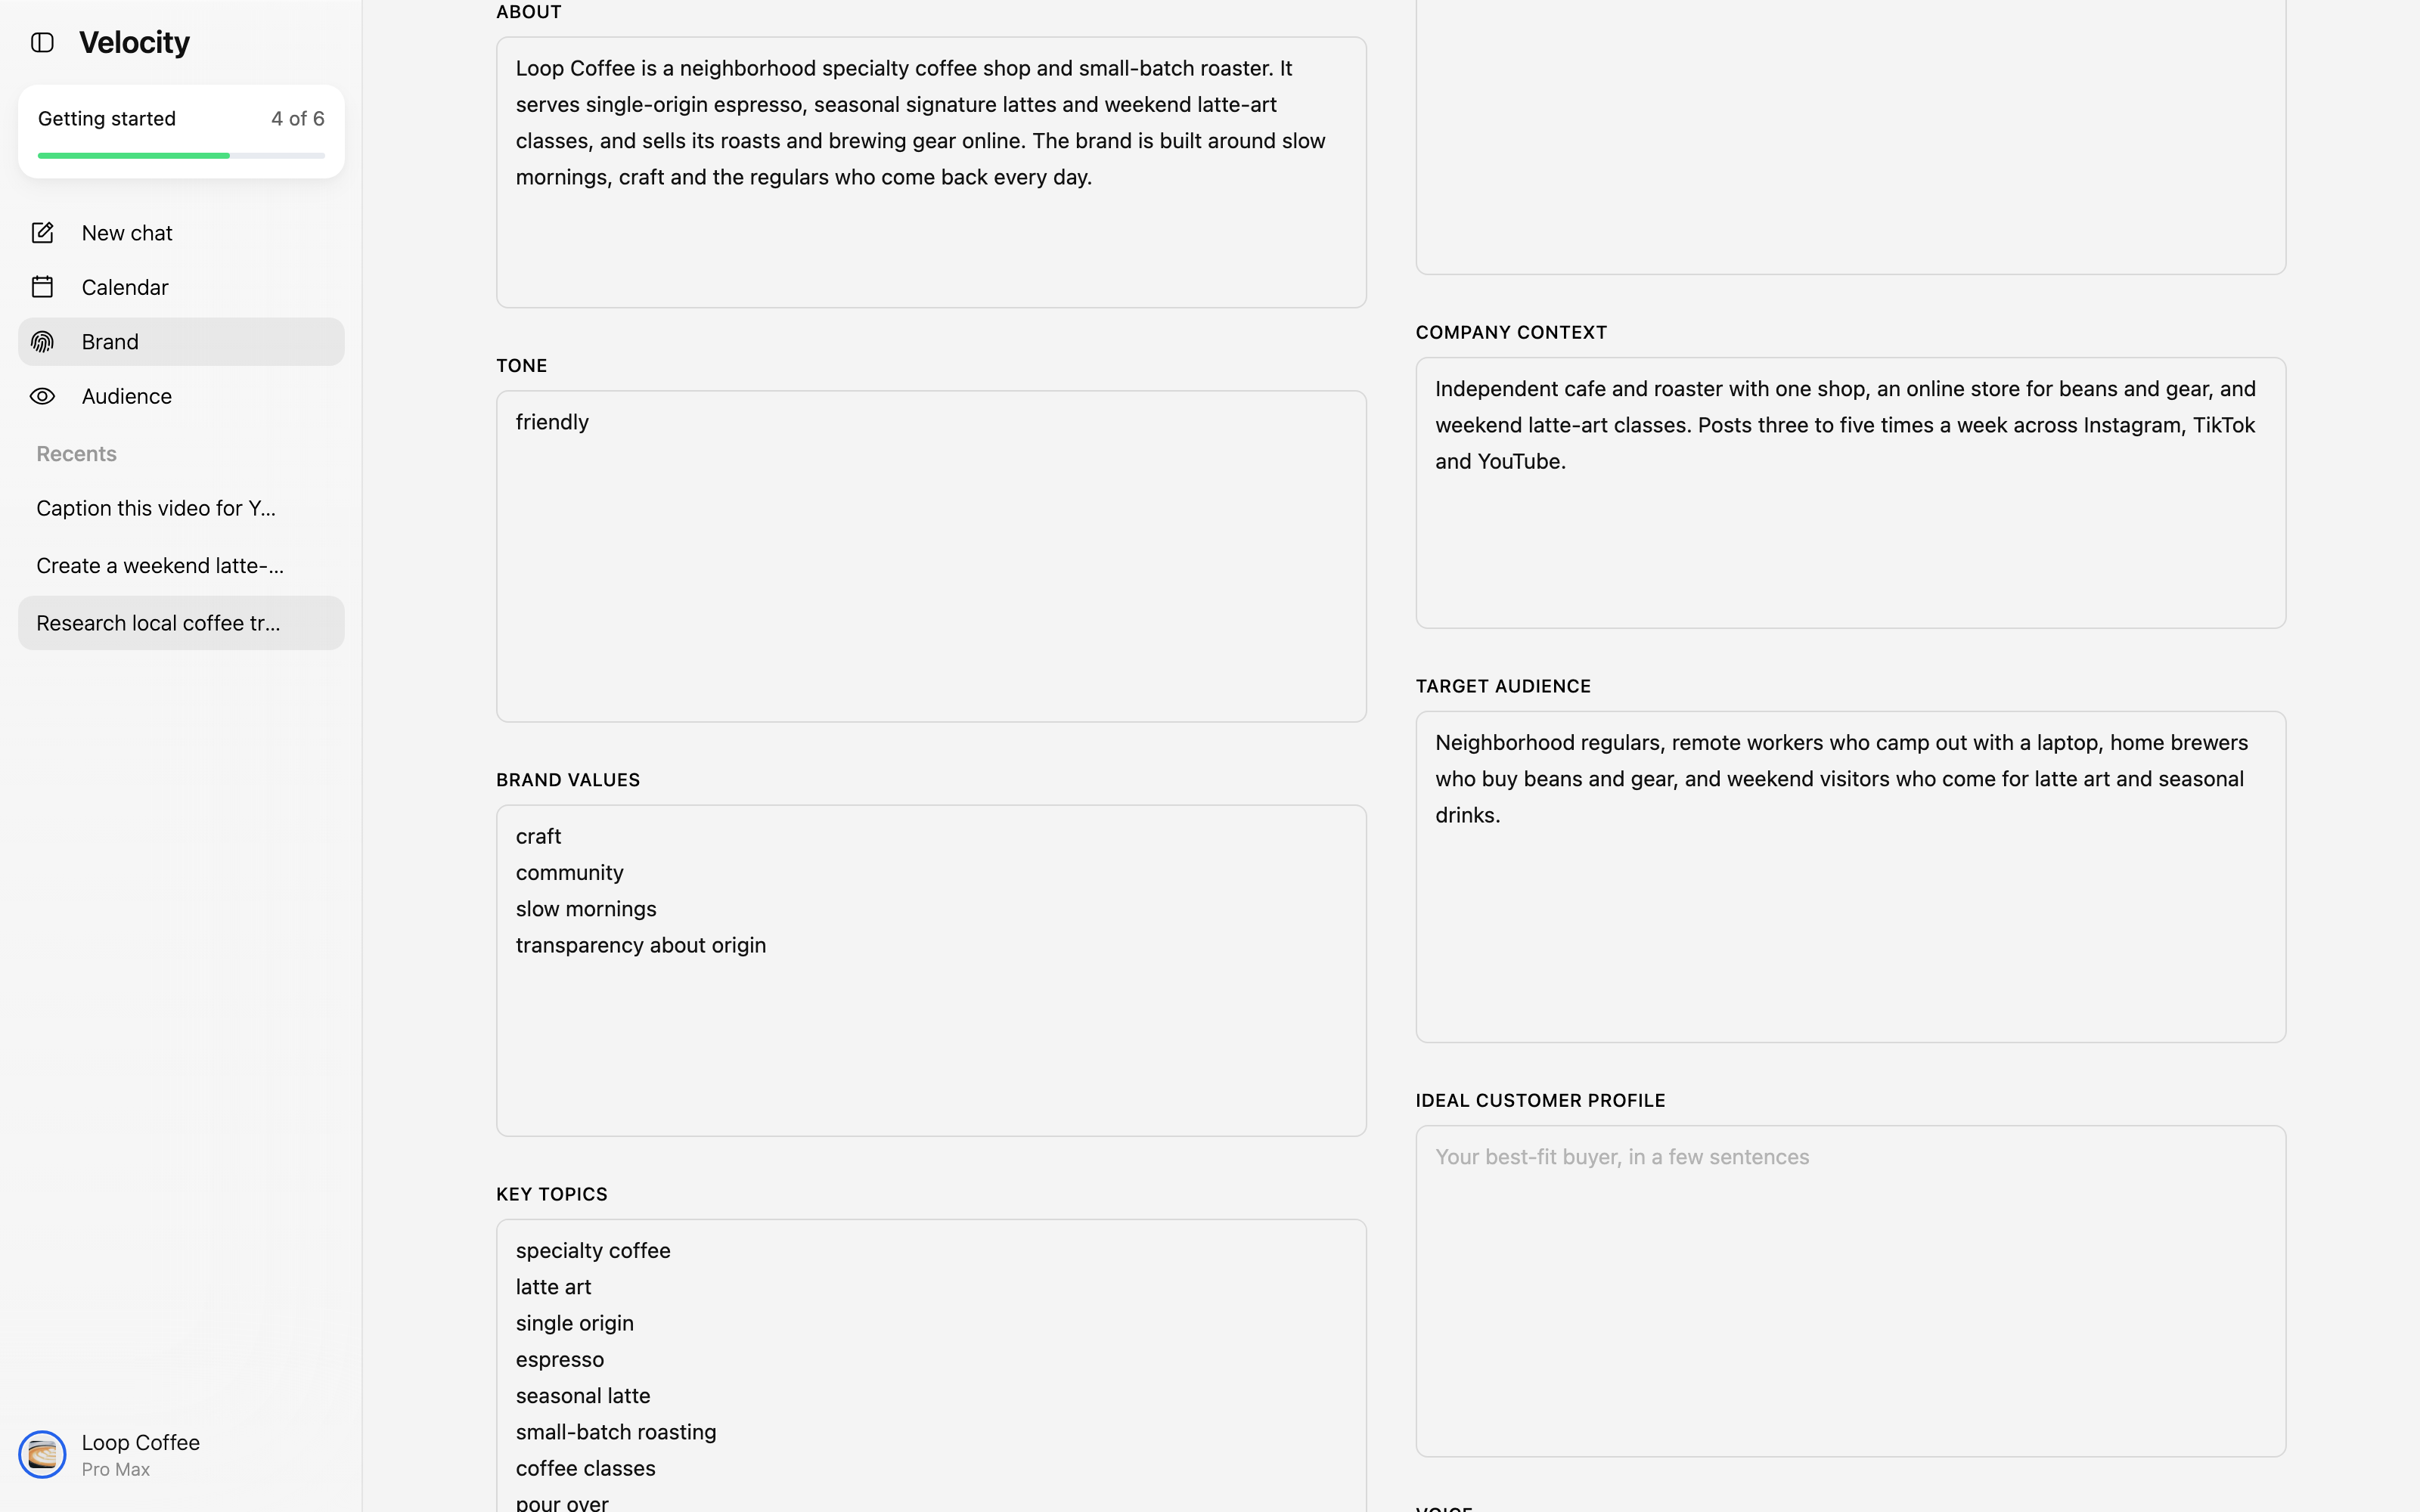
For a strong result, the identity should give the system useful direction: what the business does, who it is speaking to, the tone it should use, and the topics it should return to. In this example, the identity describes a neighborhood coffee shop, its friendly tone, its focus on craft and community, and the audience it wants to reach.
The right brand is selected, especially if you manage more than one business or client.
The description and audience are specific enough to guide a real post.
The tone and values reflect how the brand should sound in public.
The relevant social destinations are available for the work you plan to create.
This is the foundation for a useful AI social media workflow: the output should be based on a brand context, not a generic prompt alone.
Step 2: Confirm the social destinations
Before preparing posts, make sure the accounts you want to use are connected to the same Brand Identity. In the example, Instagram, YouTube, and TikTok are visibly connected to Loop Coffee.
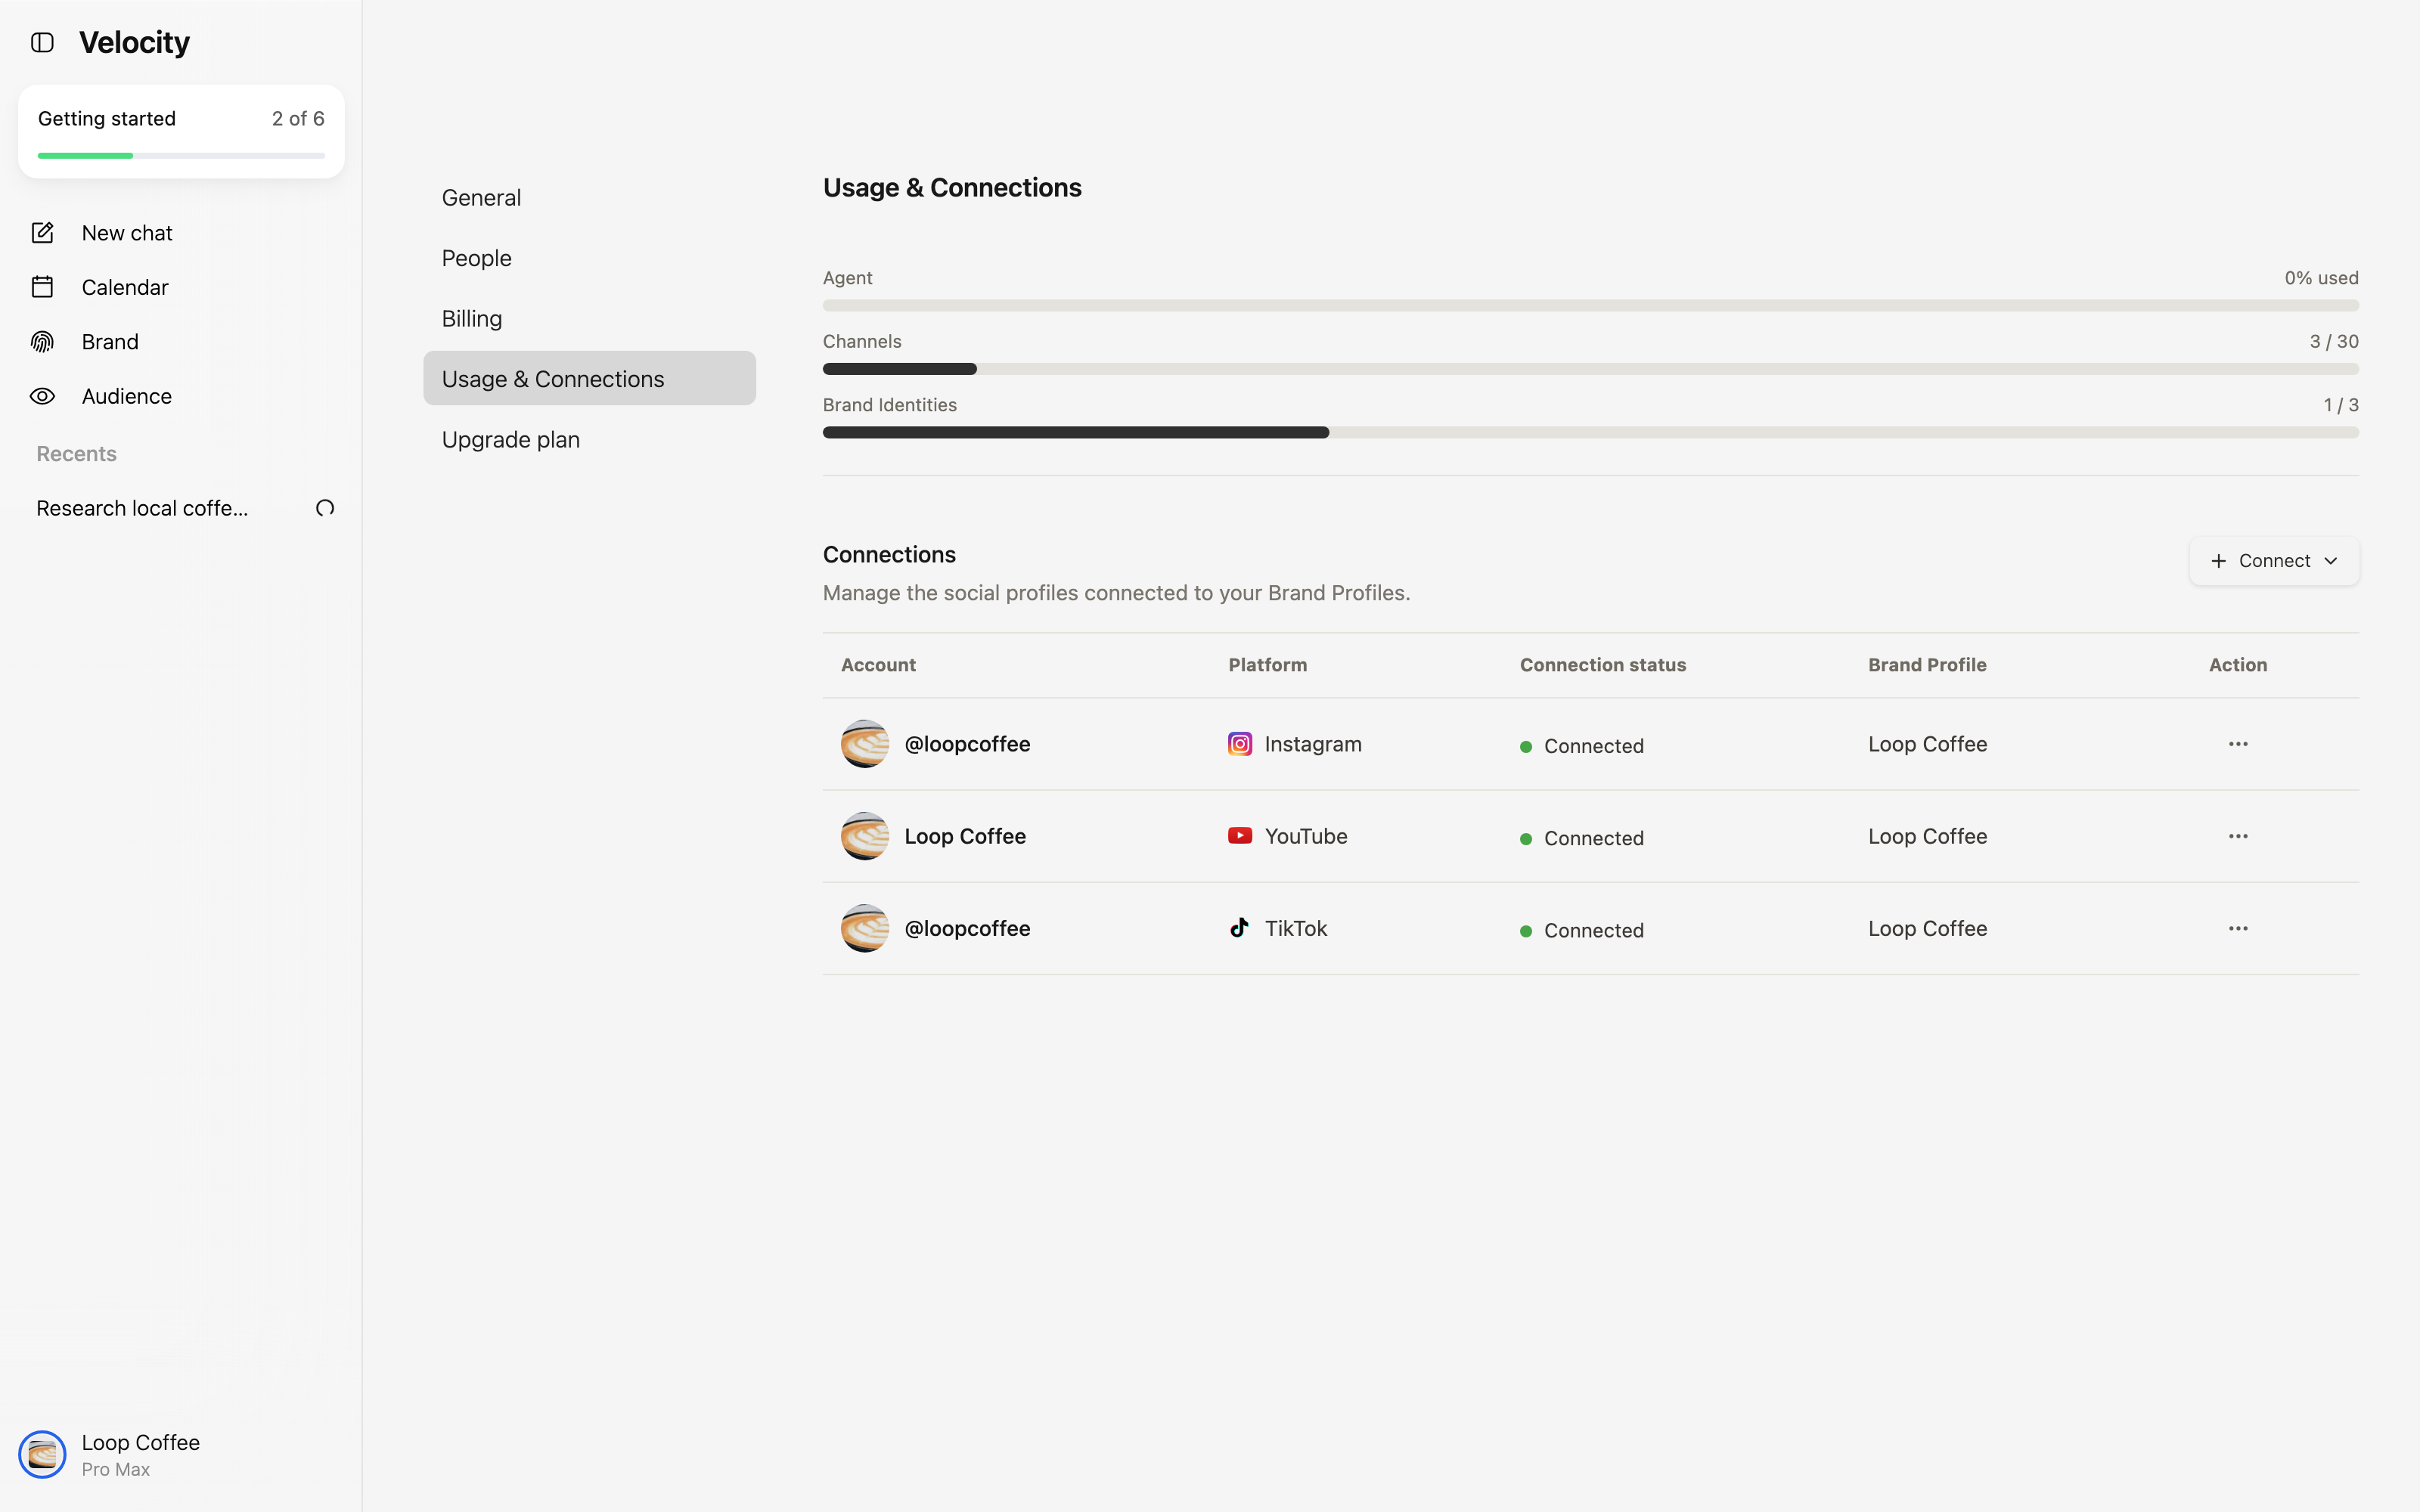
This matters because a multi-channel social workflow is more than copying the same sentence everywhere. You need the right destinations available before you create a platform-specific version, review its preview, or choose a publishing action.
Step 3: Describe the outcome in plain language
You do not need to translate your goal into a rigid command format. Think of the message as a lightweight content brief: state the business outcome, the audience, the content idea, and the channels you want to use.
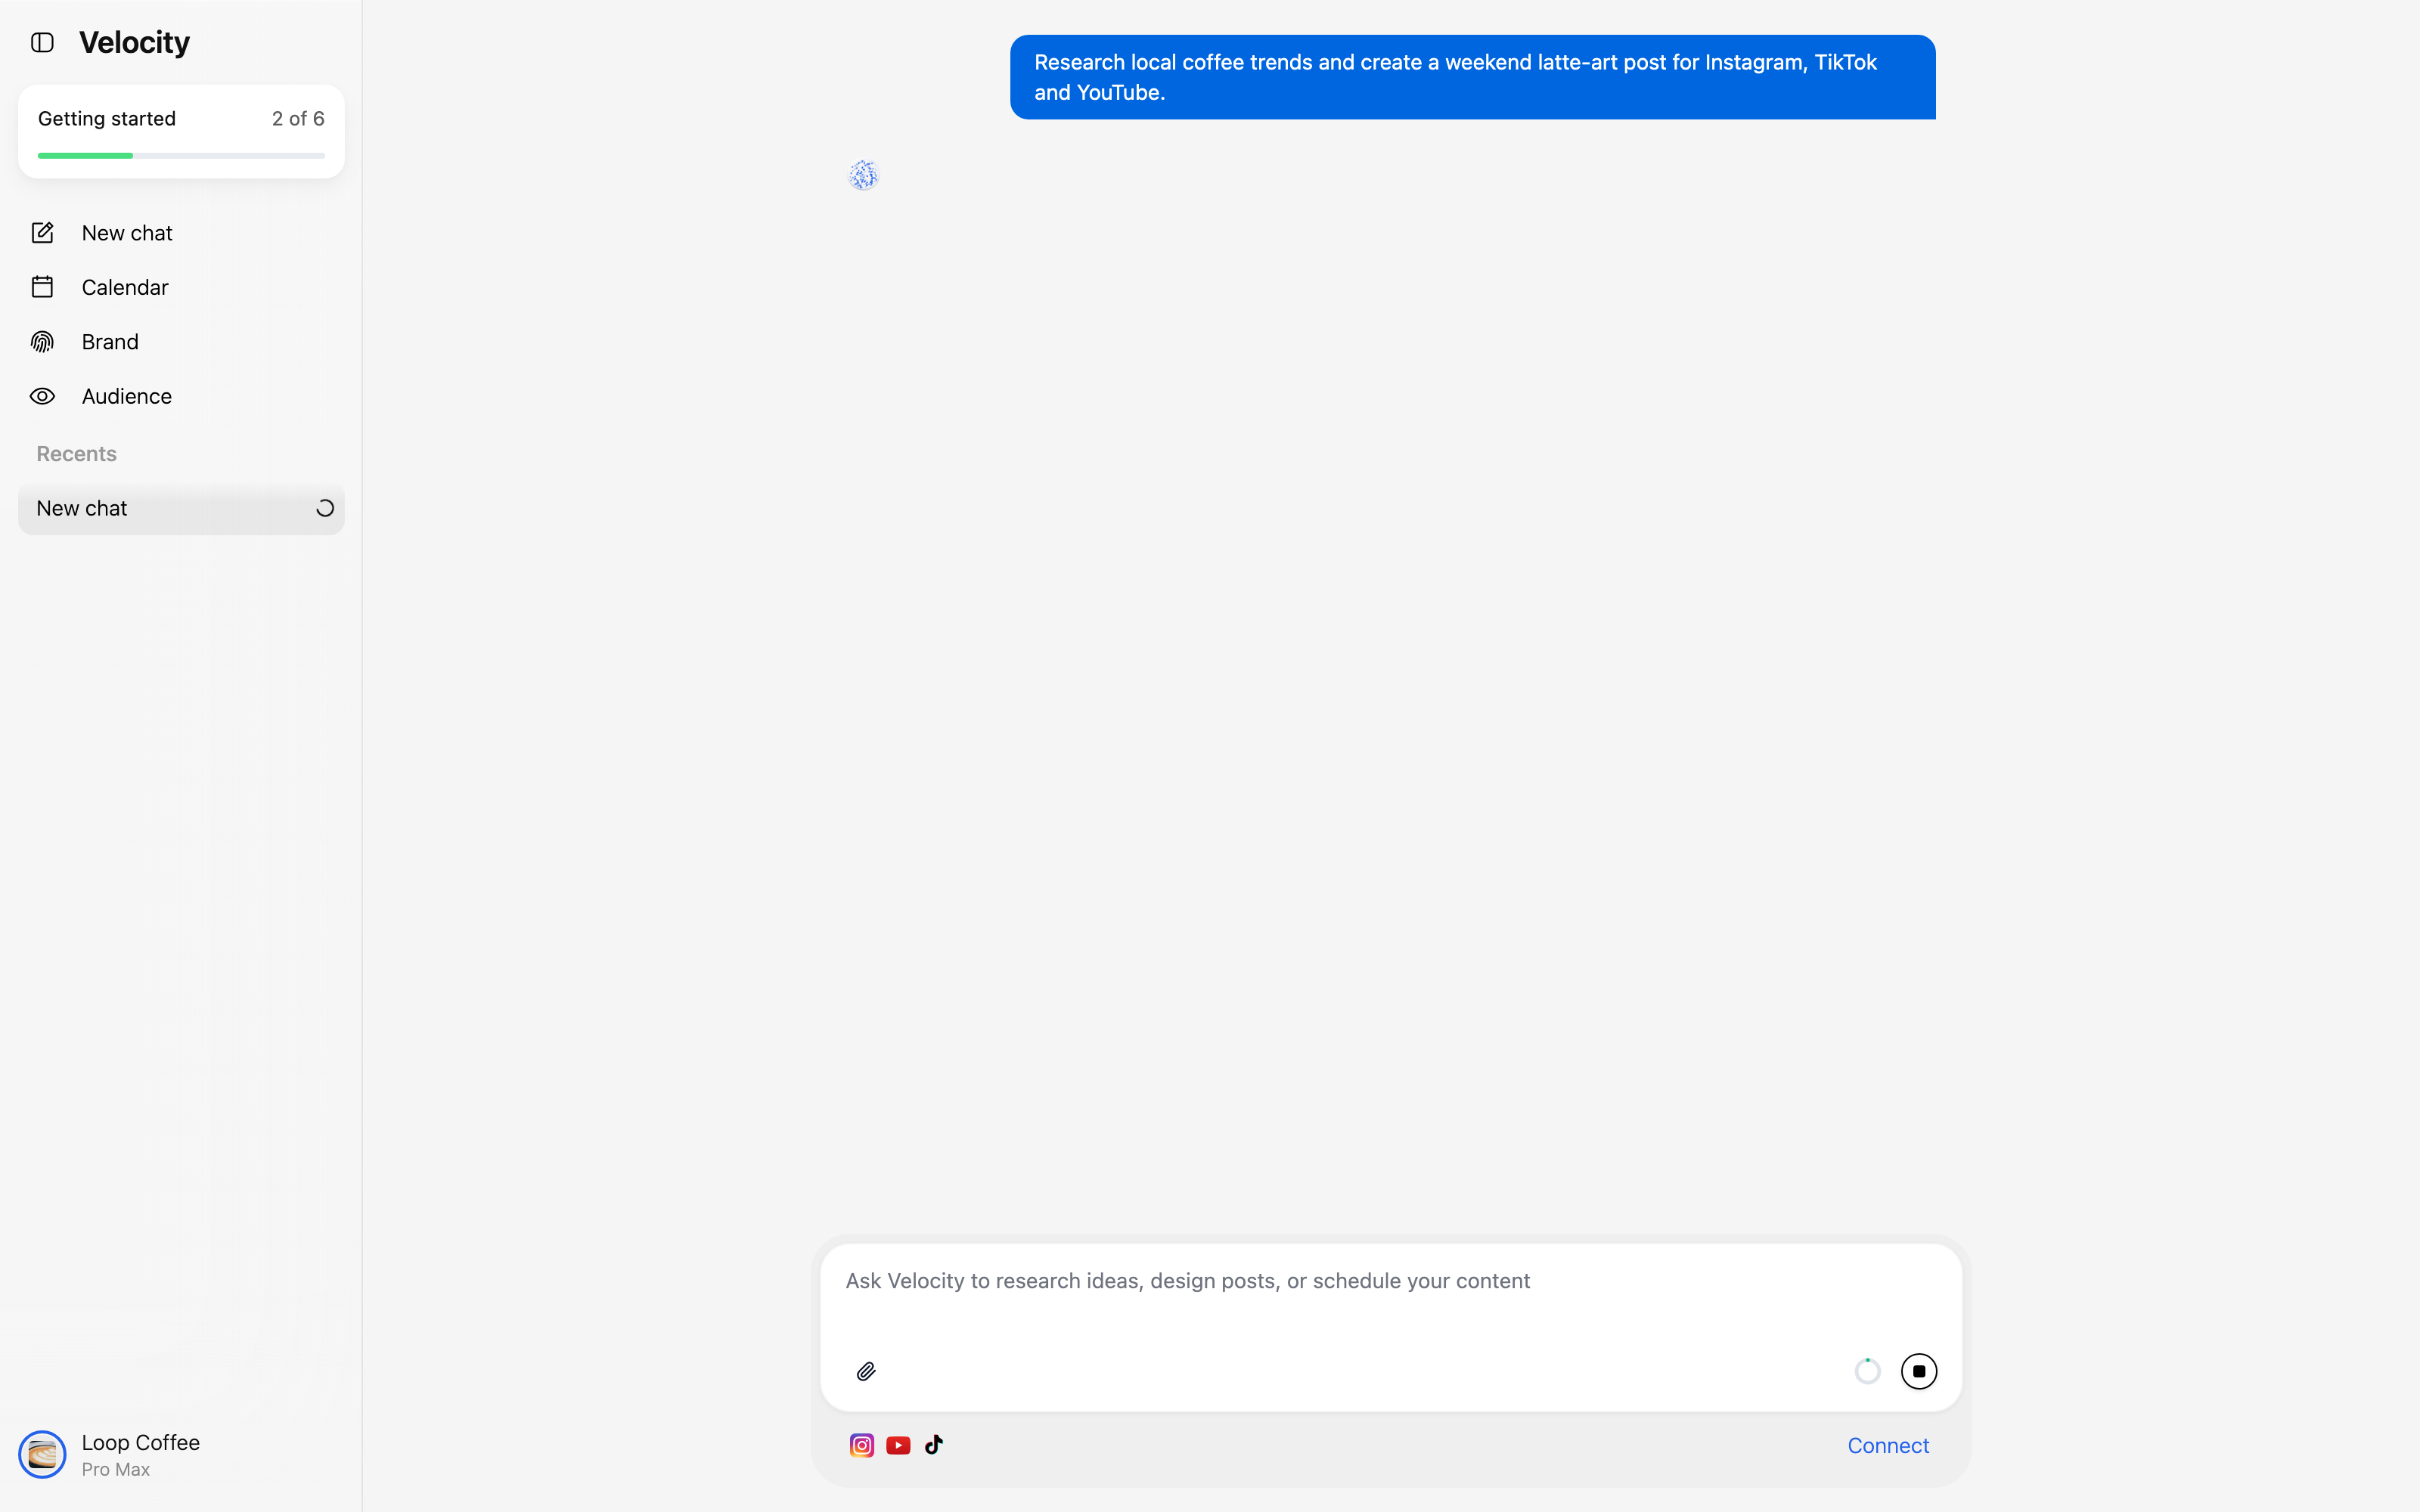
In this example, the request is: research local coffee trends and create a weekend latte-art post for Instagram, TikTok, and YouTube.
The outcome: for example, a post, campaign direction, content plan, or scheduled video.
The subject: the product, event, offer, or idea to focus on.
The audience or purpose: bring in weekend visitors, explain a service, build awareness, or start a conversation.
The channels: select only the destinations that make sense for the content.
For example: "Create three friendly social post ideas about our new weekend class. Make one version for Instagram, one for TikTok, and one for YouTube." That gives the workflow a useful starting point without forcing you to write the final copy yourself.
Step 4: Use research to make the content direction more useful
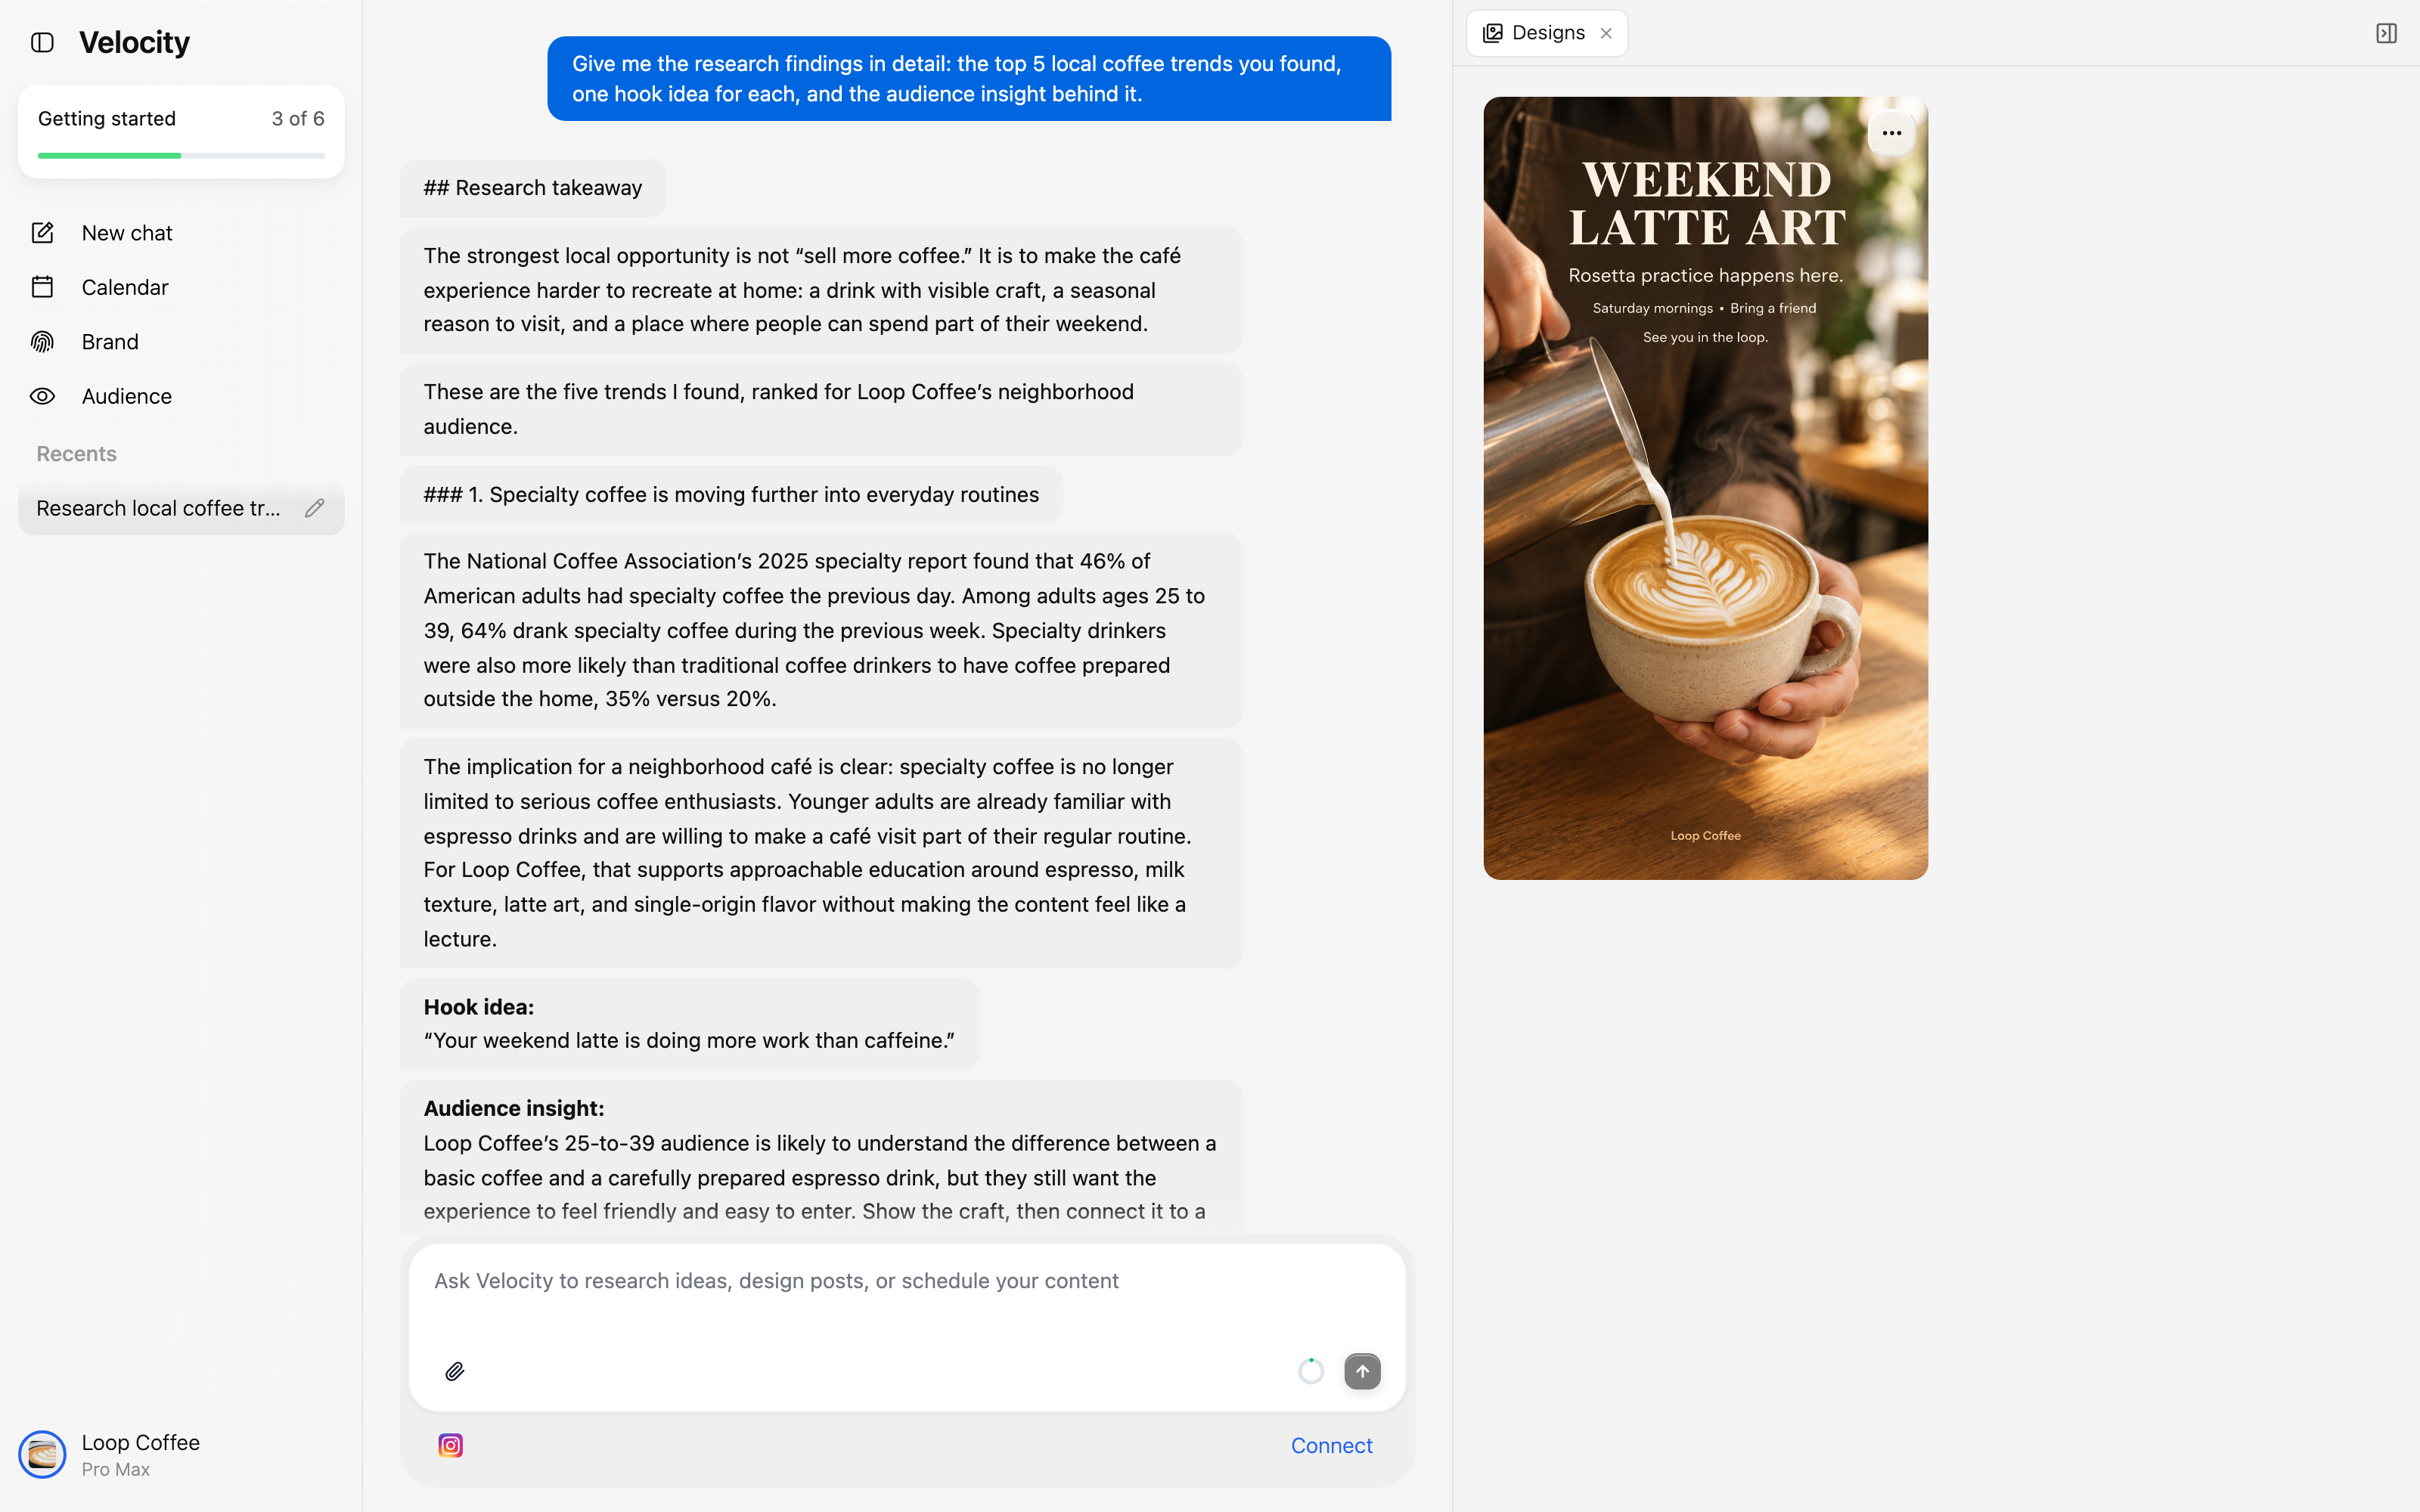
Velocity can turn the goal into research, a hook, and an audience insight before you move into publishing decisions. This is where the workflow becomes more than a caption generator: it gives you a direction to assess.
- 1
A research takeaway explains the opportunity.
- 2
A trend gives the team a timely angle to consider.
- 3
A hook turns that angle into a starting line for the post.
- 4
An audience insight explains why the idea may matter to the people the brand wants to reach.
Treat this as a planning stage, not as an automatic instruction to publish. Read the research, keep what fits the business, and adjust the direction if the angle is wrong for your audience.
Step 5: Add the source material and create drafts
When the content starts with a short video, image, or other asset, attach it directly to the conversation before describing what you need. Here, a short latte-art video is attached to the request.
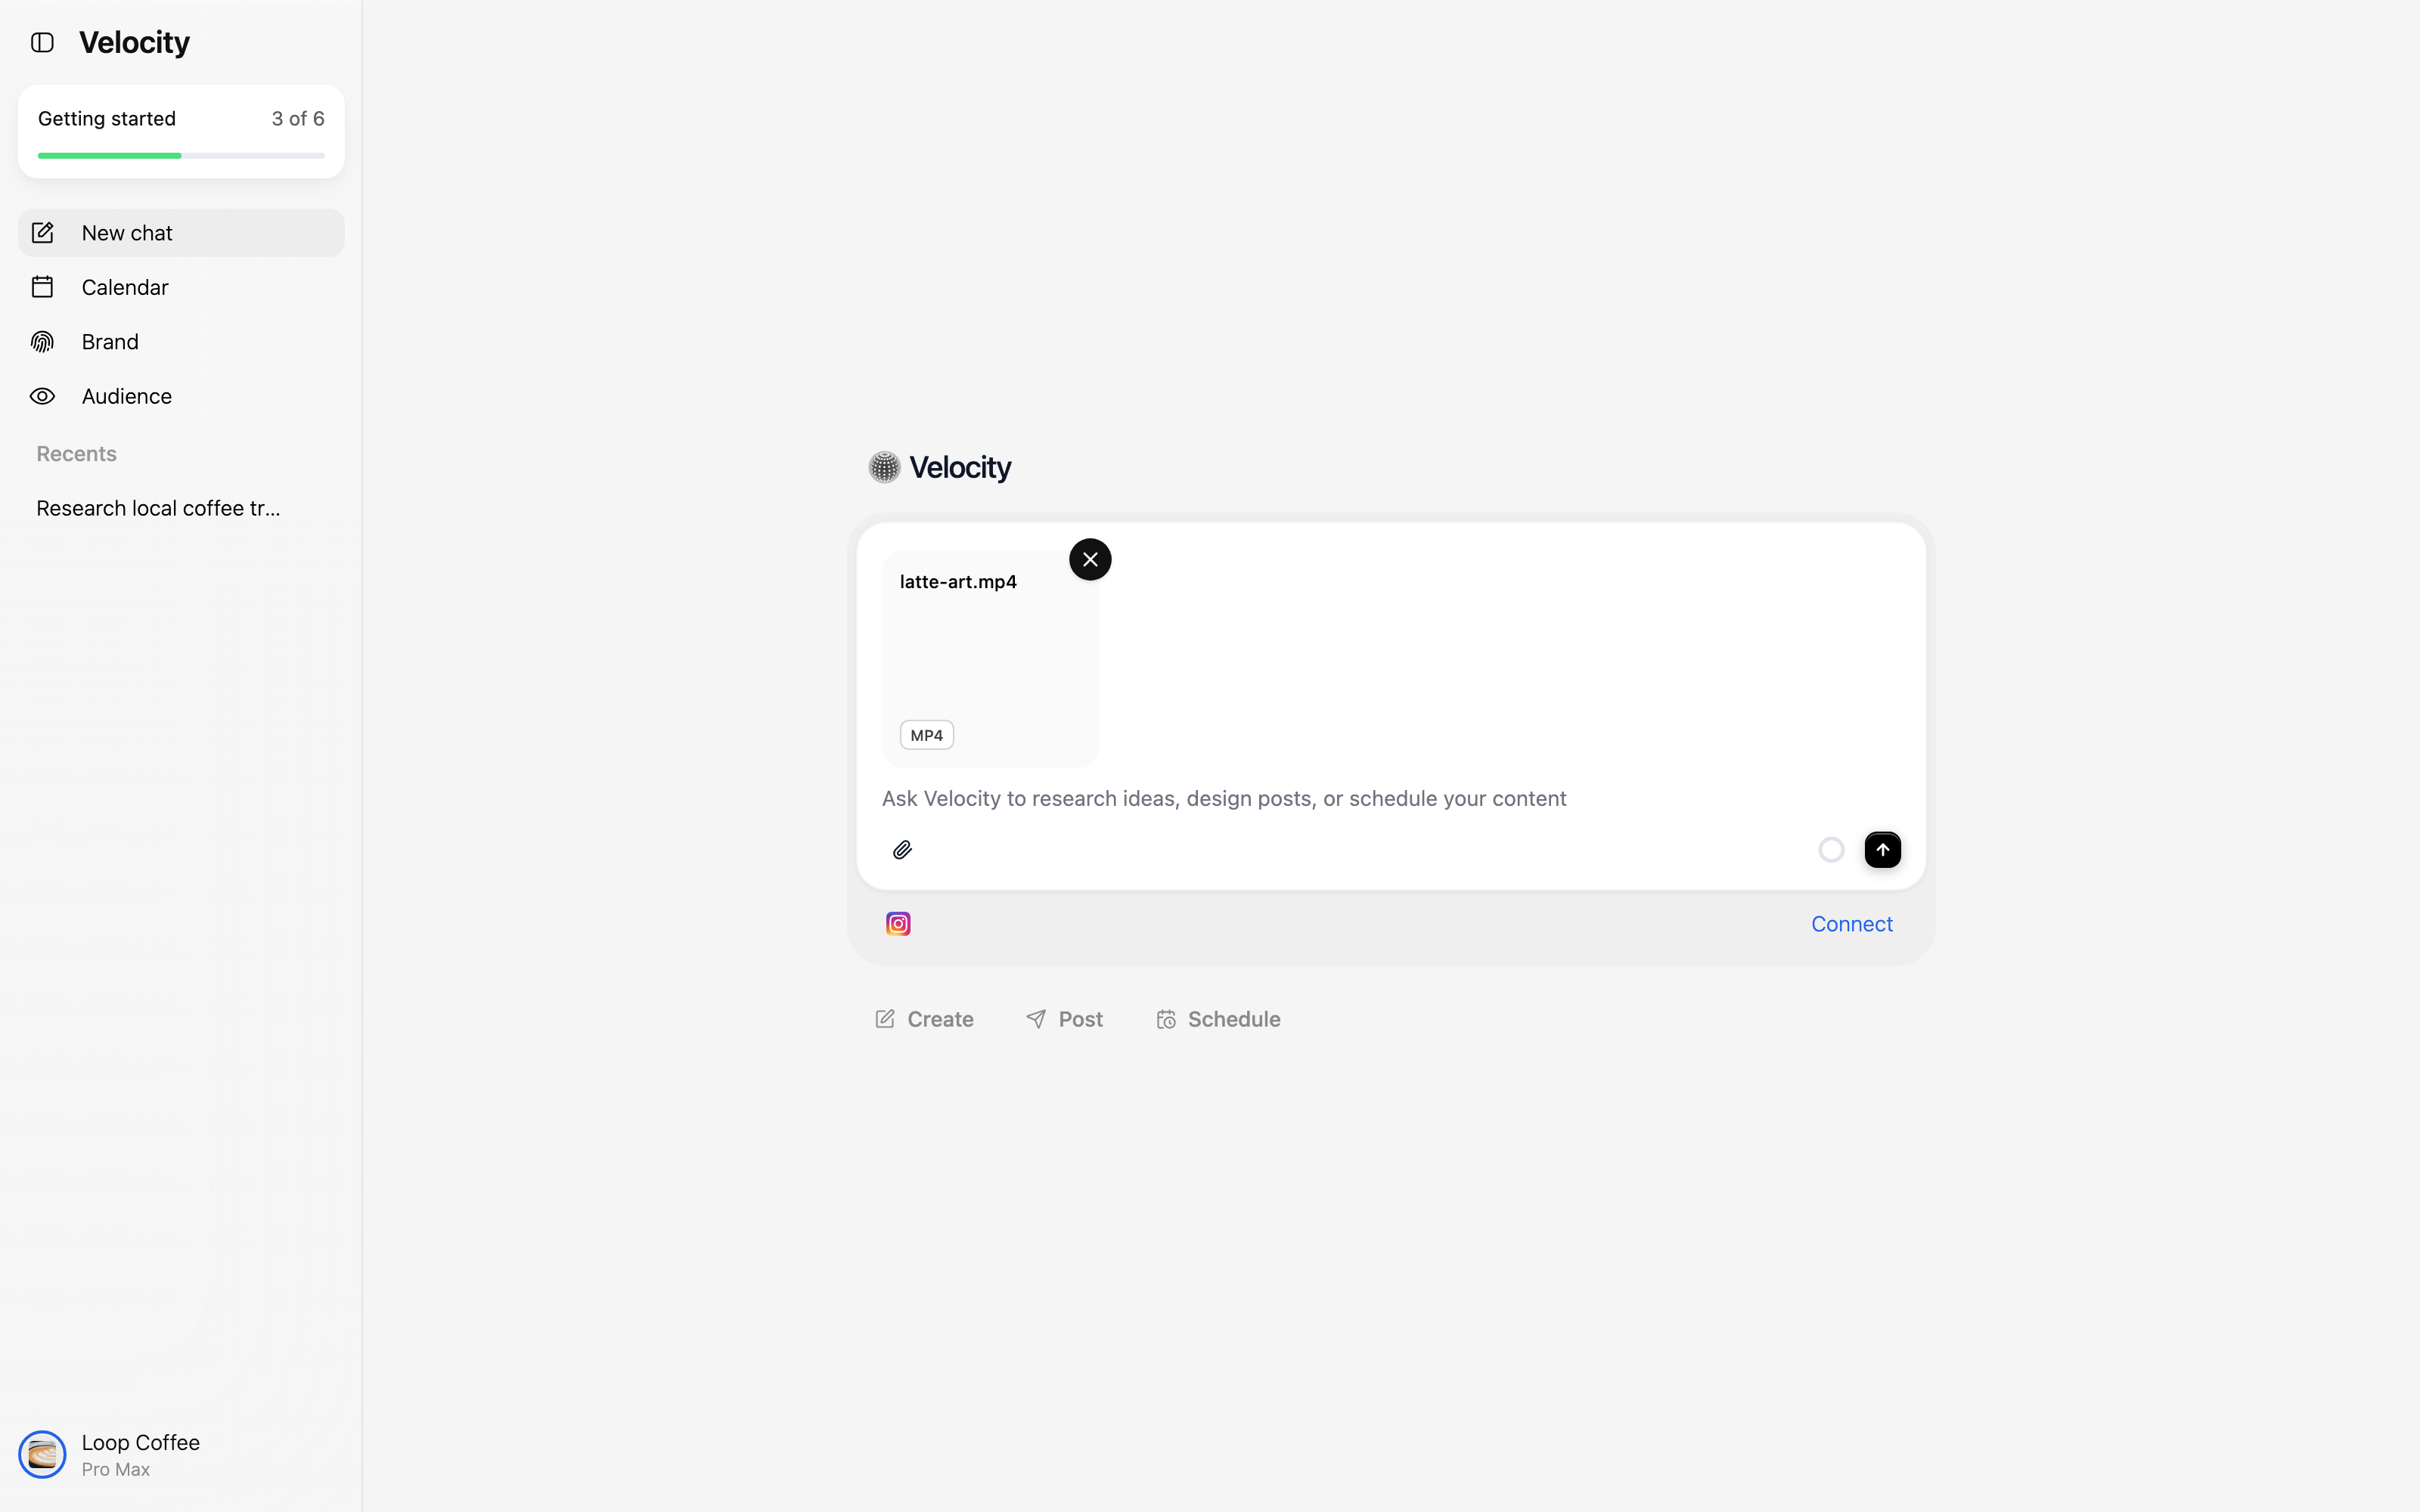
Then give one clear instruction. In the example, Velocity is asked to turn one latte-art video into platform-specific drafts for three platforms, with a caption and hashtags for each.
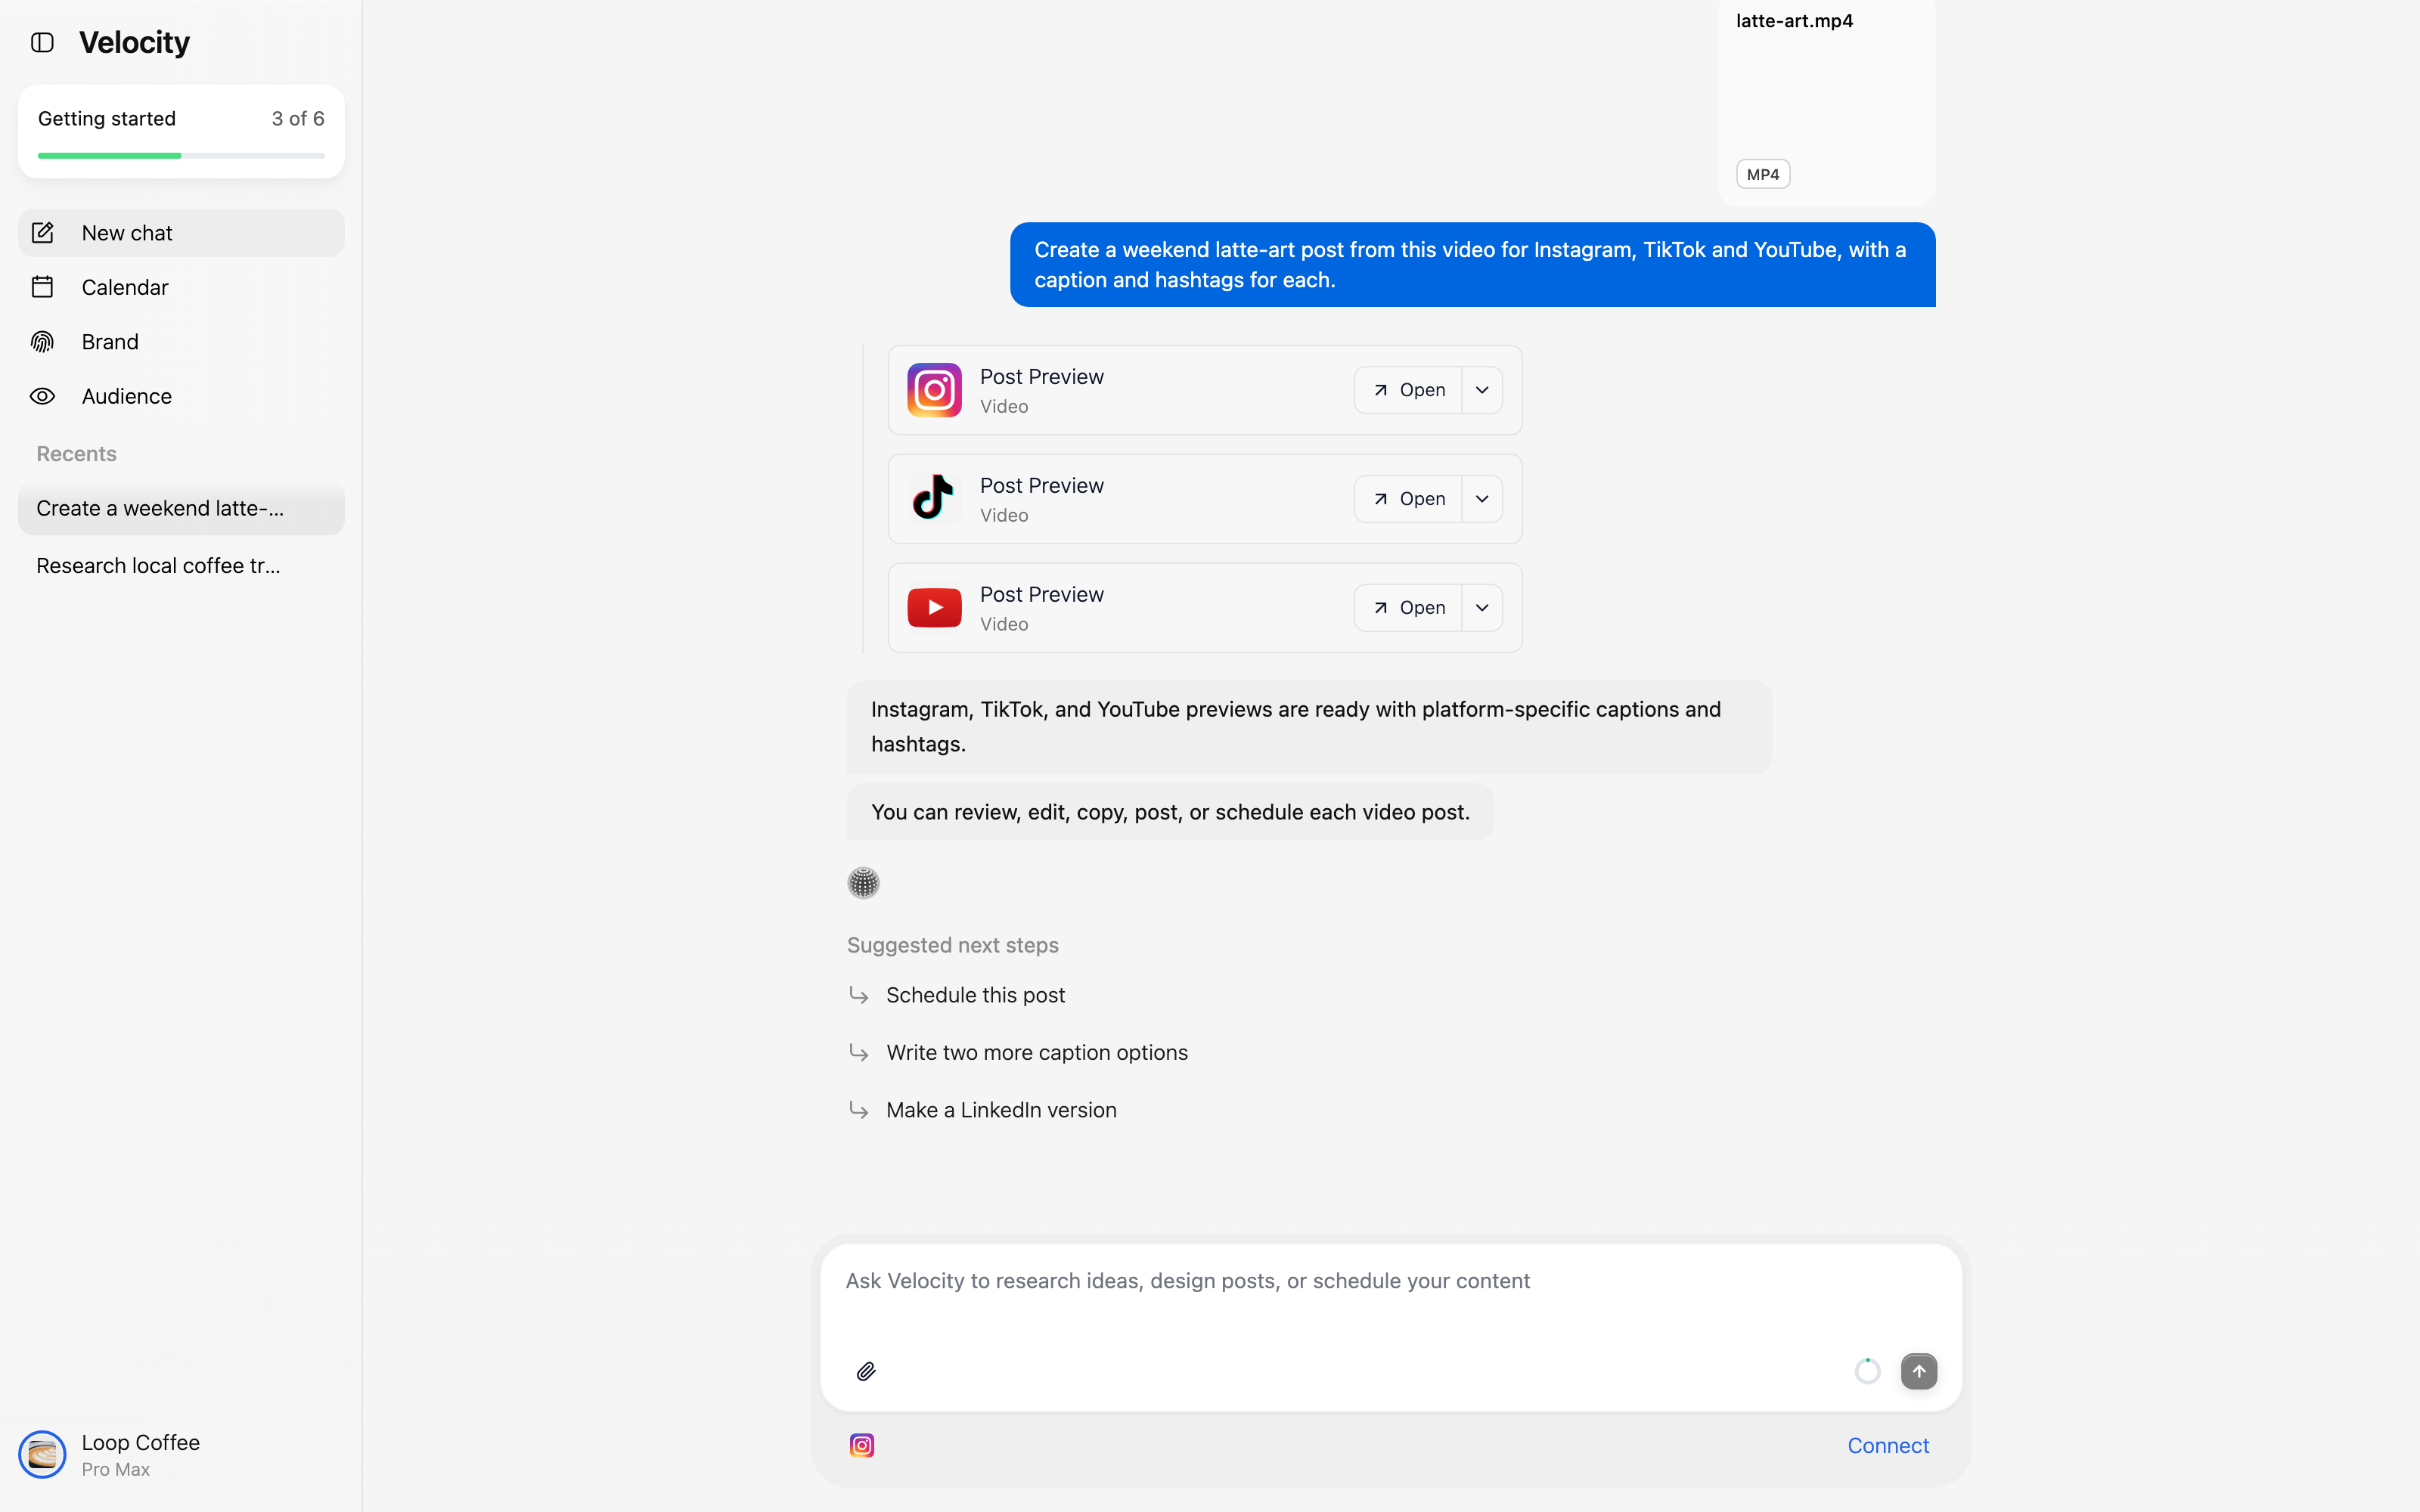
This is where a connected publishing workflow saves time: one content brief can produce separate drafts for the channels you selected. It does not mean every platform should receive an identical post. The point is to begin with one consistent idea, then adapt and review each version in the context of its destination.
Step 6: Review the platform-specific preview
Open a draft before you schedule or publish it. The Instagram preview below shows the video in its destination context, a selectable cover frame, the description, and the hashtags.
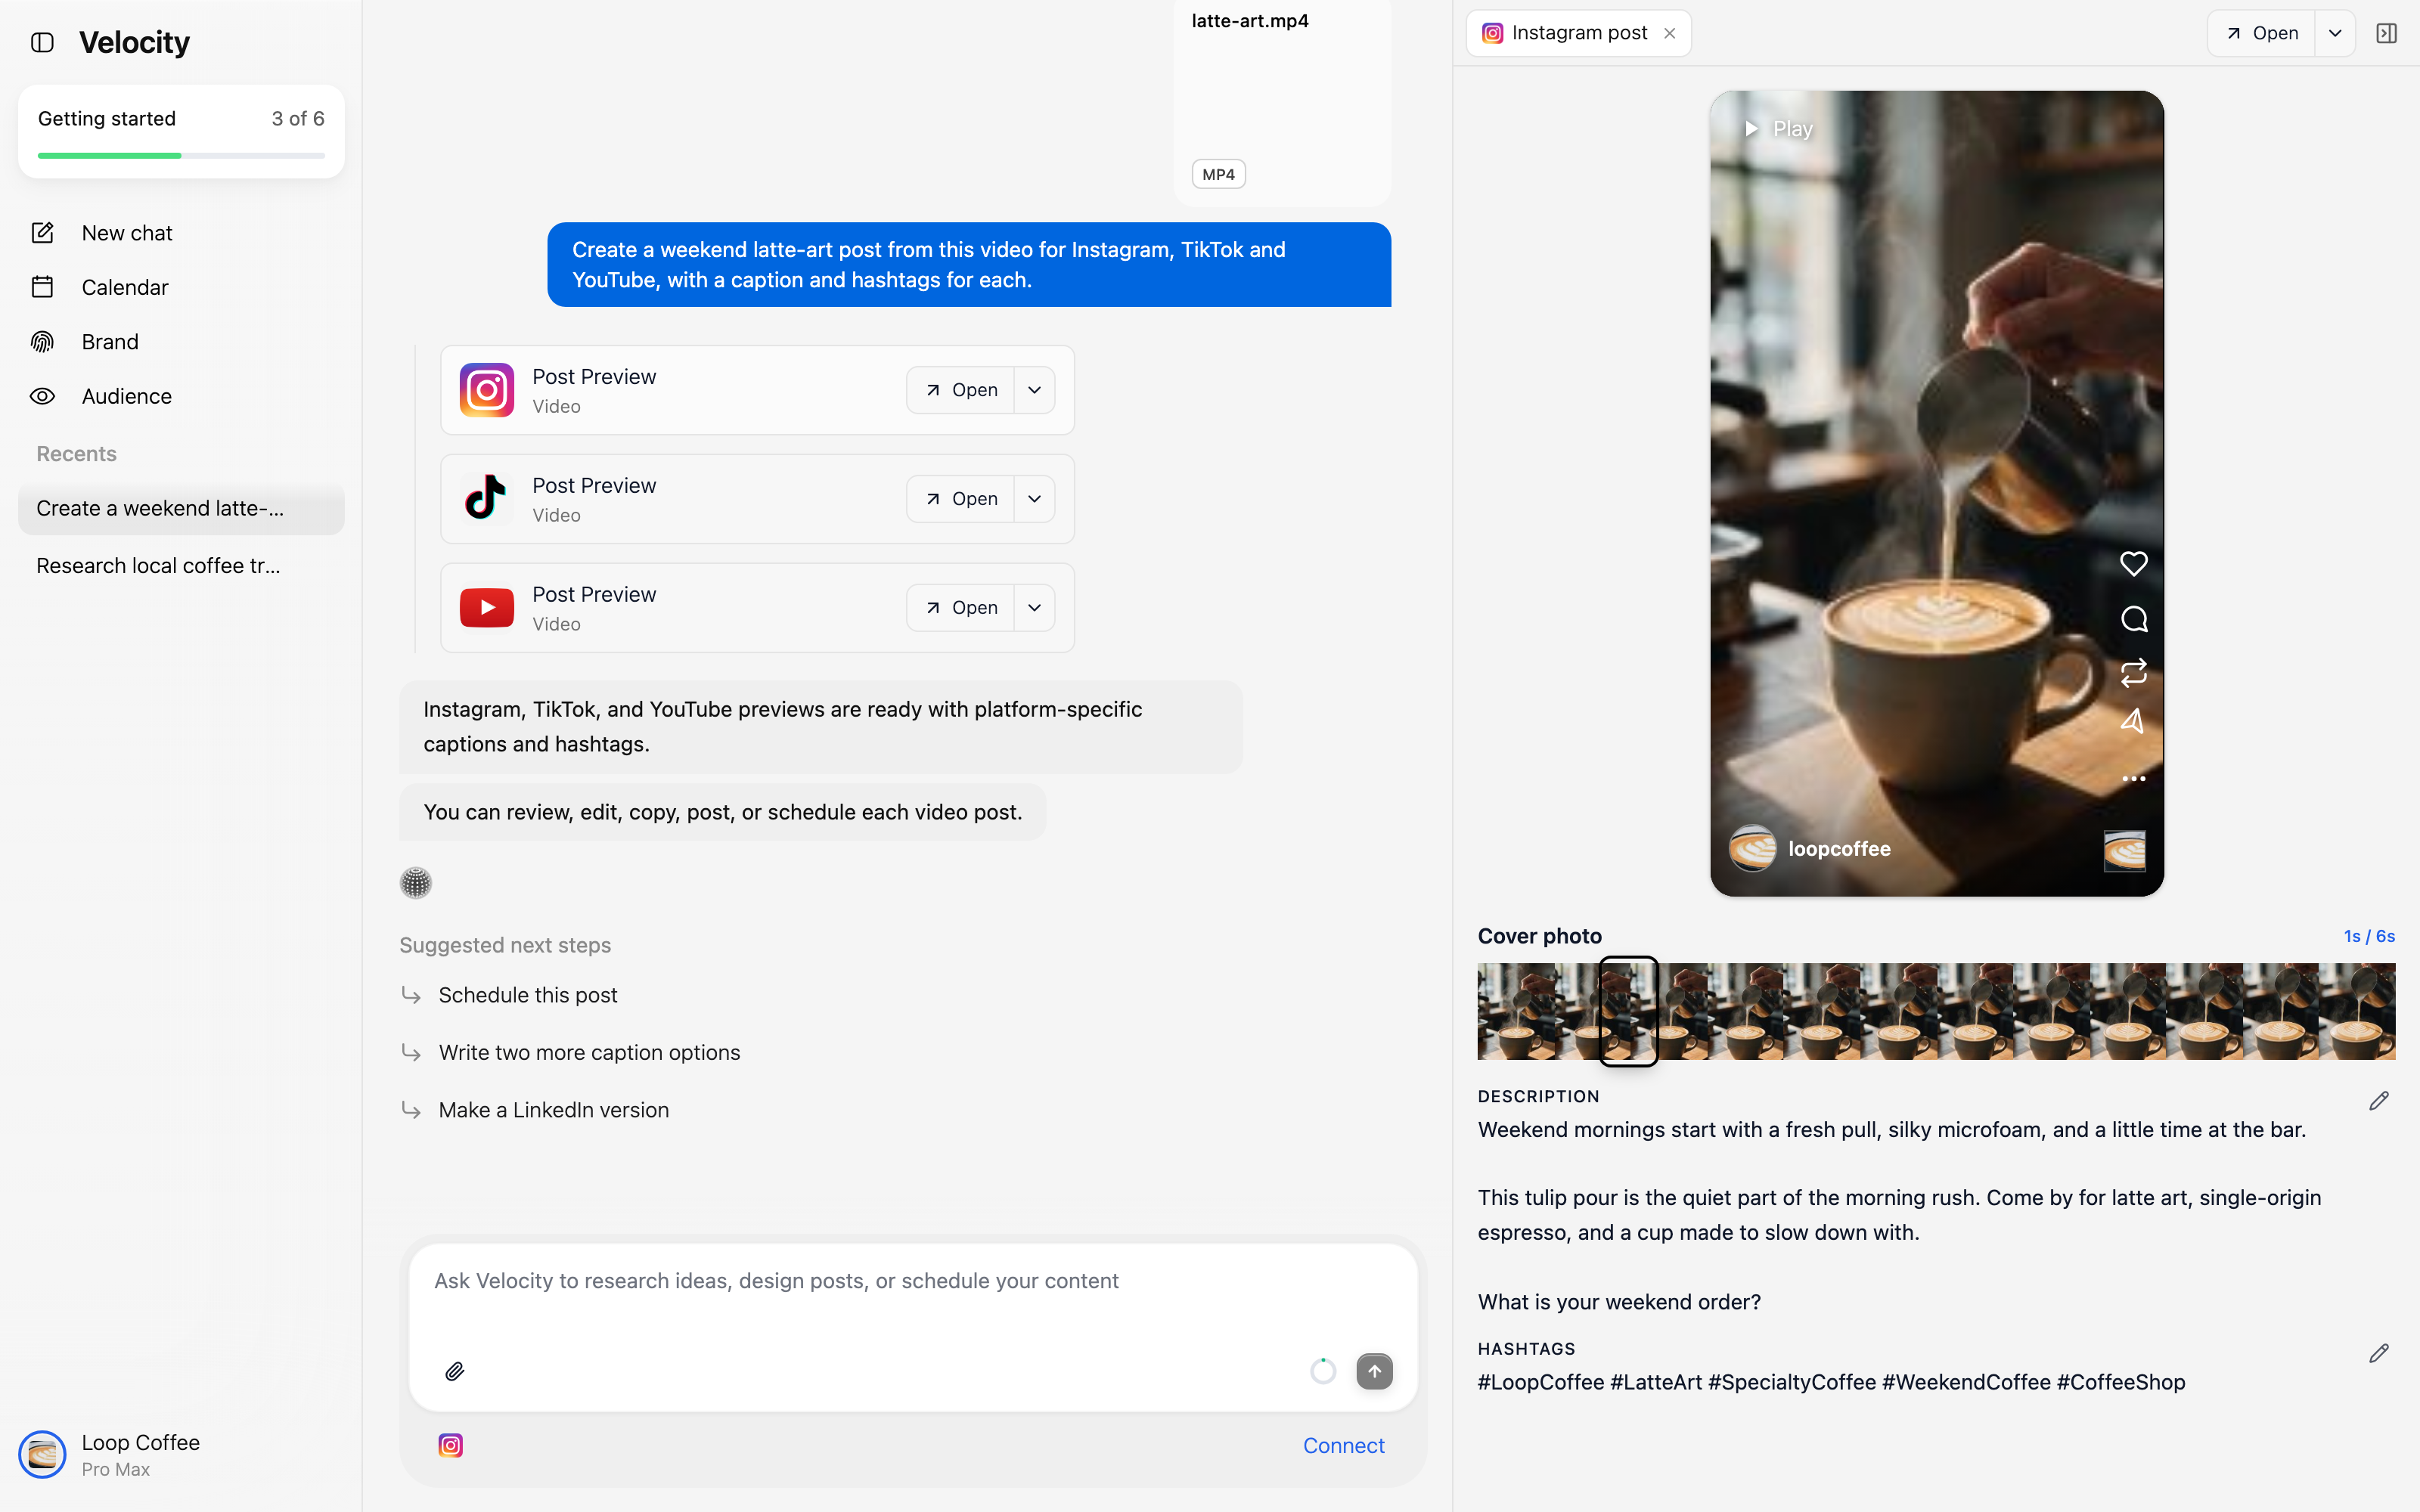
The creative: Does the opening visual make sense in the platform preview?
The cover: Is the selected frame clear and representative?
The wording: Does the description sound like the selected brand and make sense on this channel?
The metadata: Are the hashtags relevant rather than just numerous?
The call to action: Does the post give people an appropriate next step, such as visiting, commenting, or learning more?
Repeat the review for every destination you plan to use. A multi-platform workflow is strongest when the shared campaign idea remains consistent but the final presentation respects each platform.
Step 7: Choose the right action for the draft
After reviewing a post, use the action menu to decide what happens next. The visible choices are Publish now, Schedule, Schedule at best time, Save, and Request review.
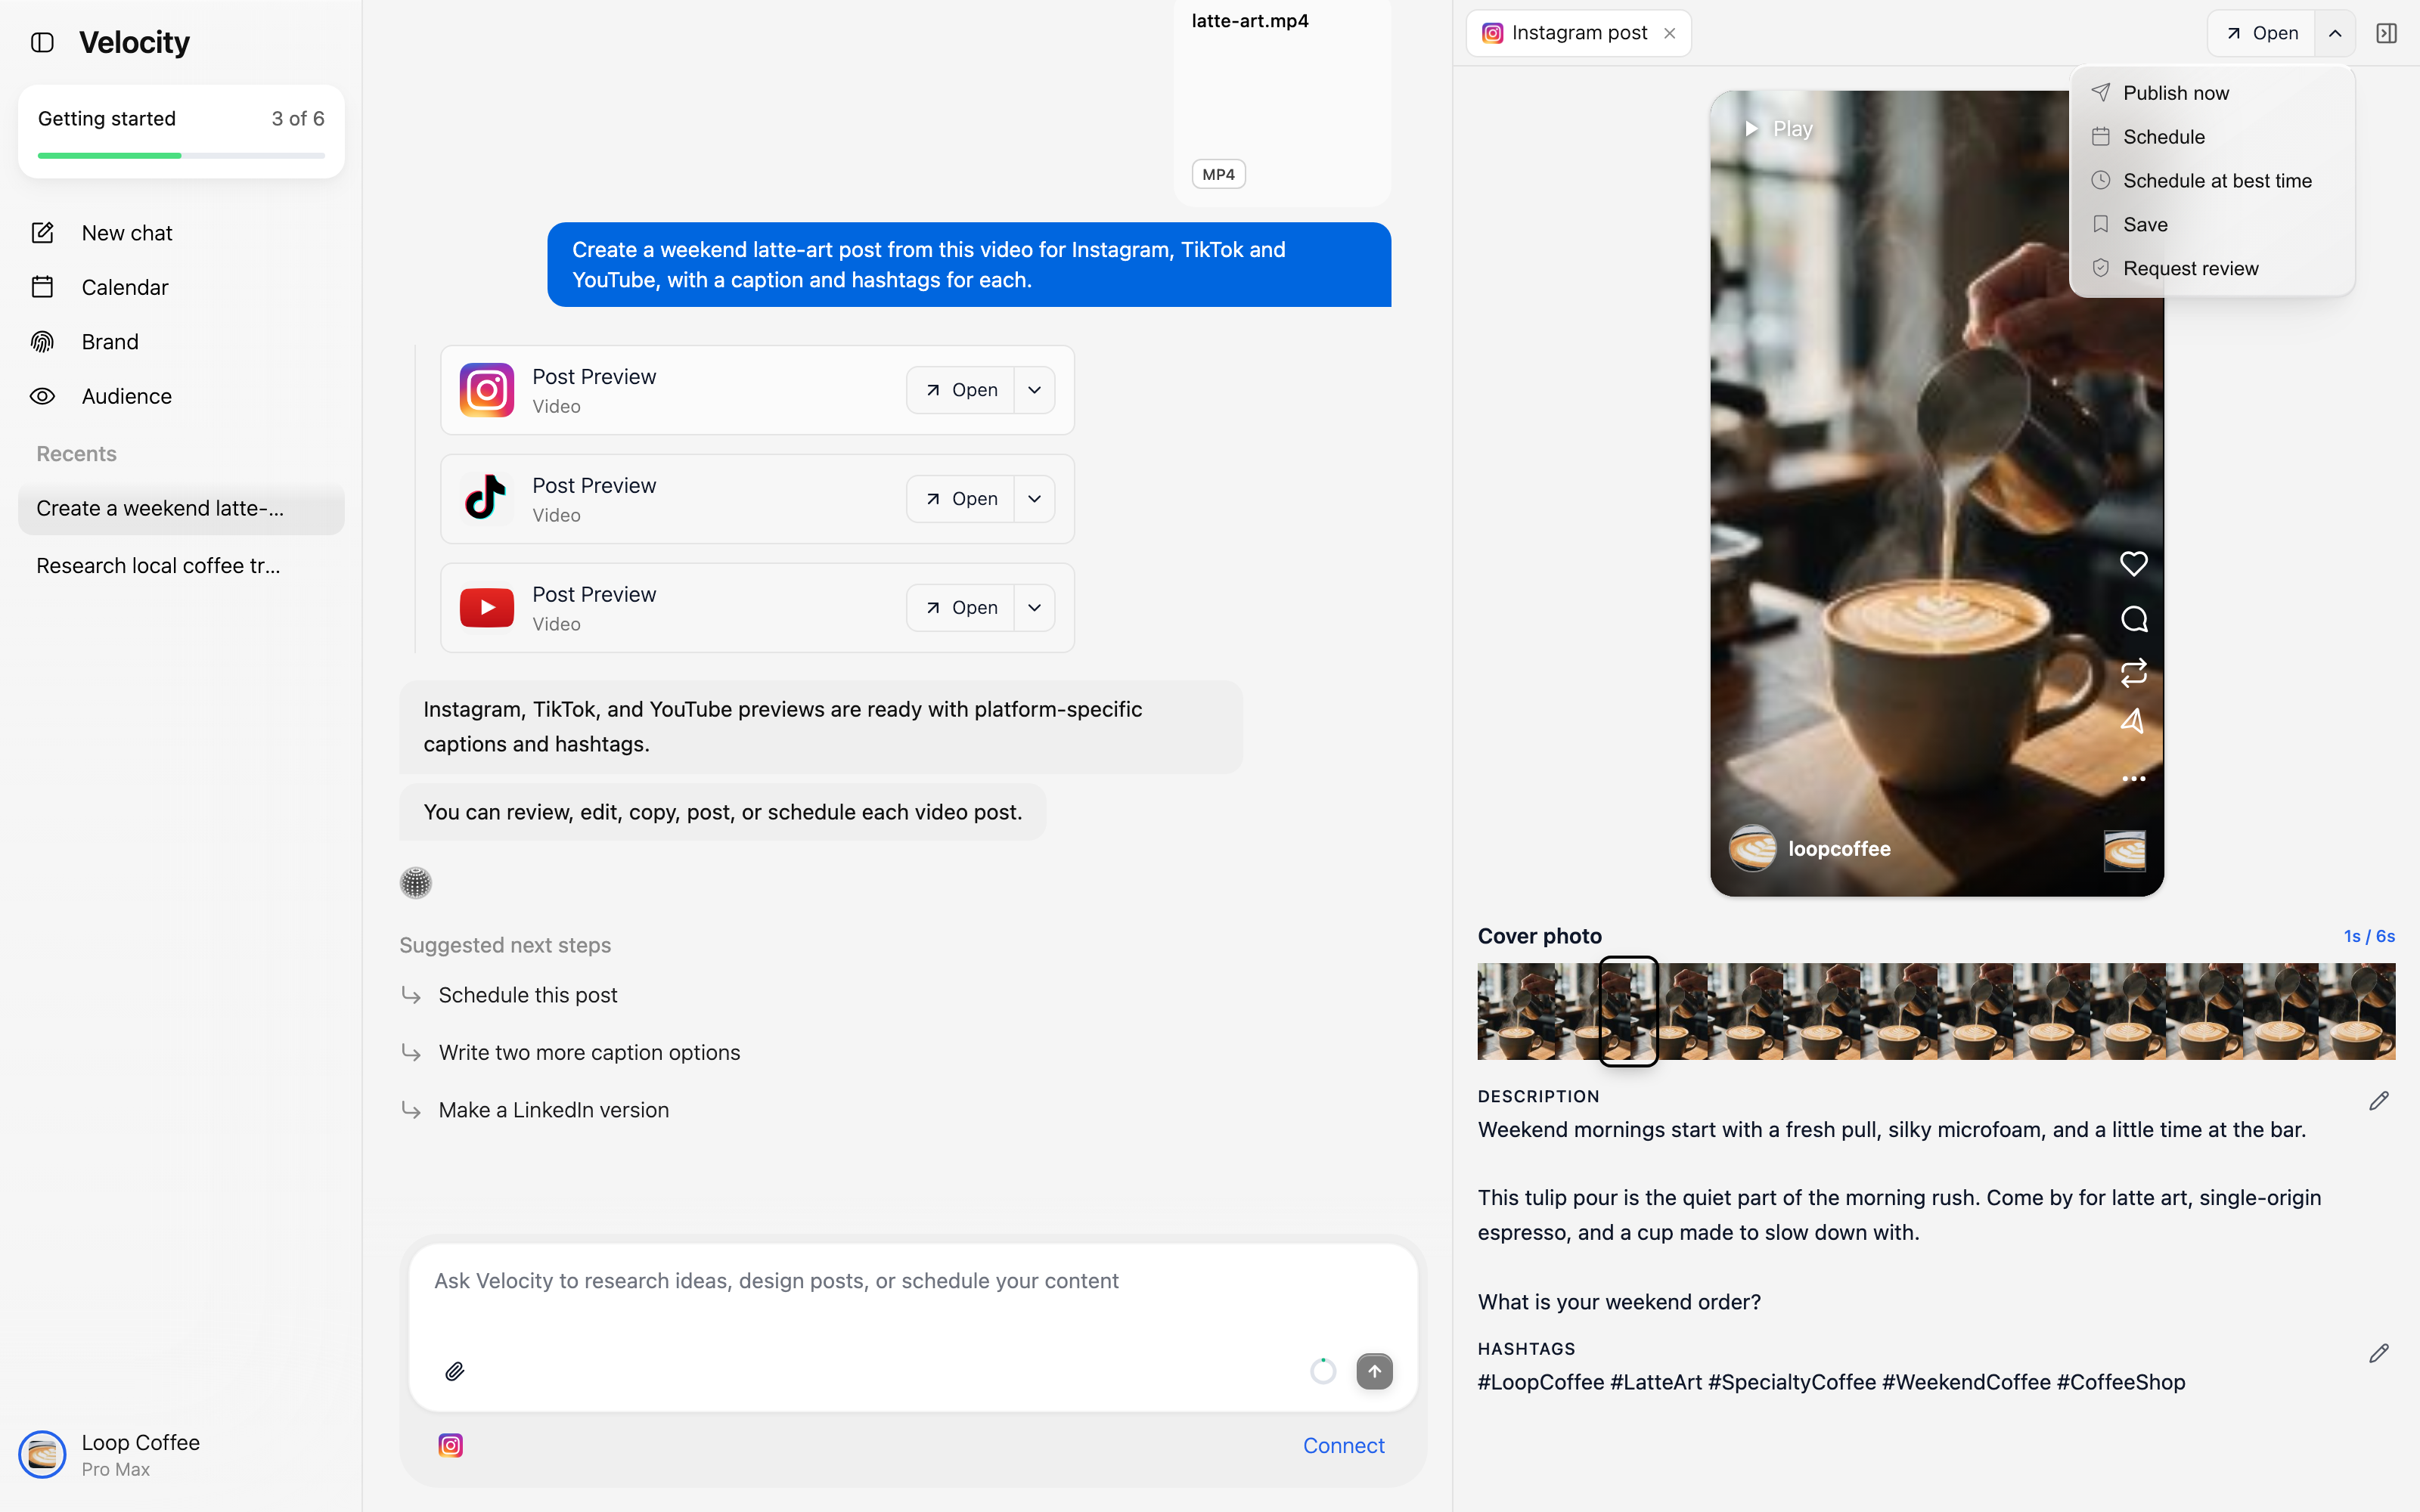
[Publish now](/publishing) when the post is approved and timing is immediate.
[Schedule](/scheduling) when you already know the date, time, and time zone.
Schedule at best time when you want timing guidance to influence the decision.
Save when the idea is good but needs additional work.
Request review when a teammate should approve the content before it is scheduled or published.
The key point is that the draft is reviewable. You retain the decision over whether it goes live, when it goes live, and whether a teammate should look at it first. This gives a small team a simple approval step before content goes live.
Step 8: Set the date, time, and time zone
If you choose a manual schedule, pick the date and time explicitly. Together, the date, time, and time zone establish the planned publishing window. The scheduling picker in this example is set to October 16 at 6:00 PM in Eastern Time.
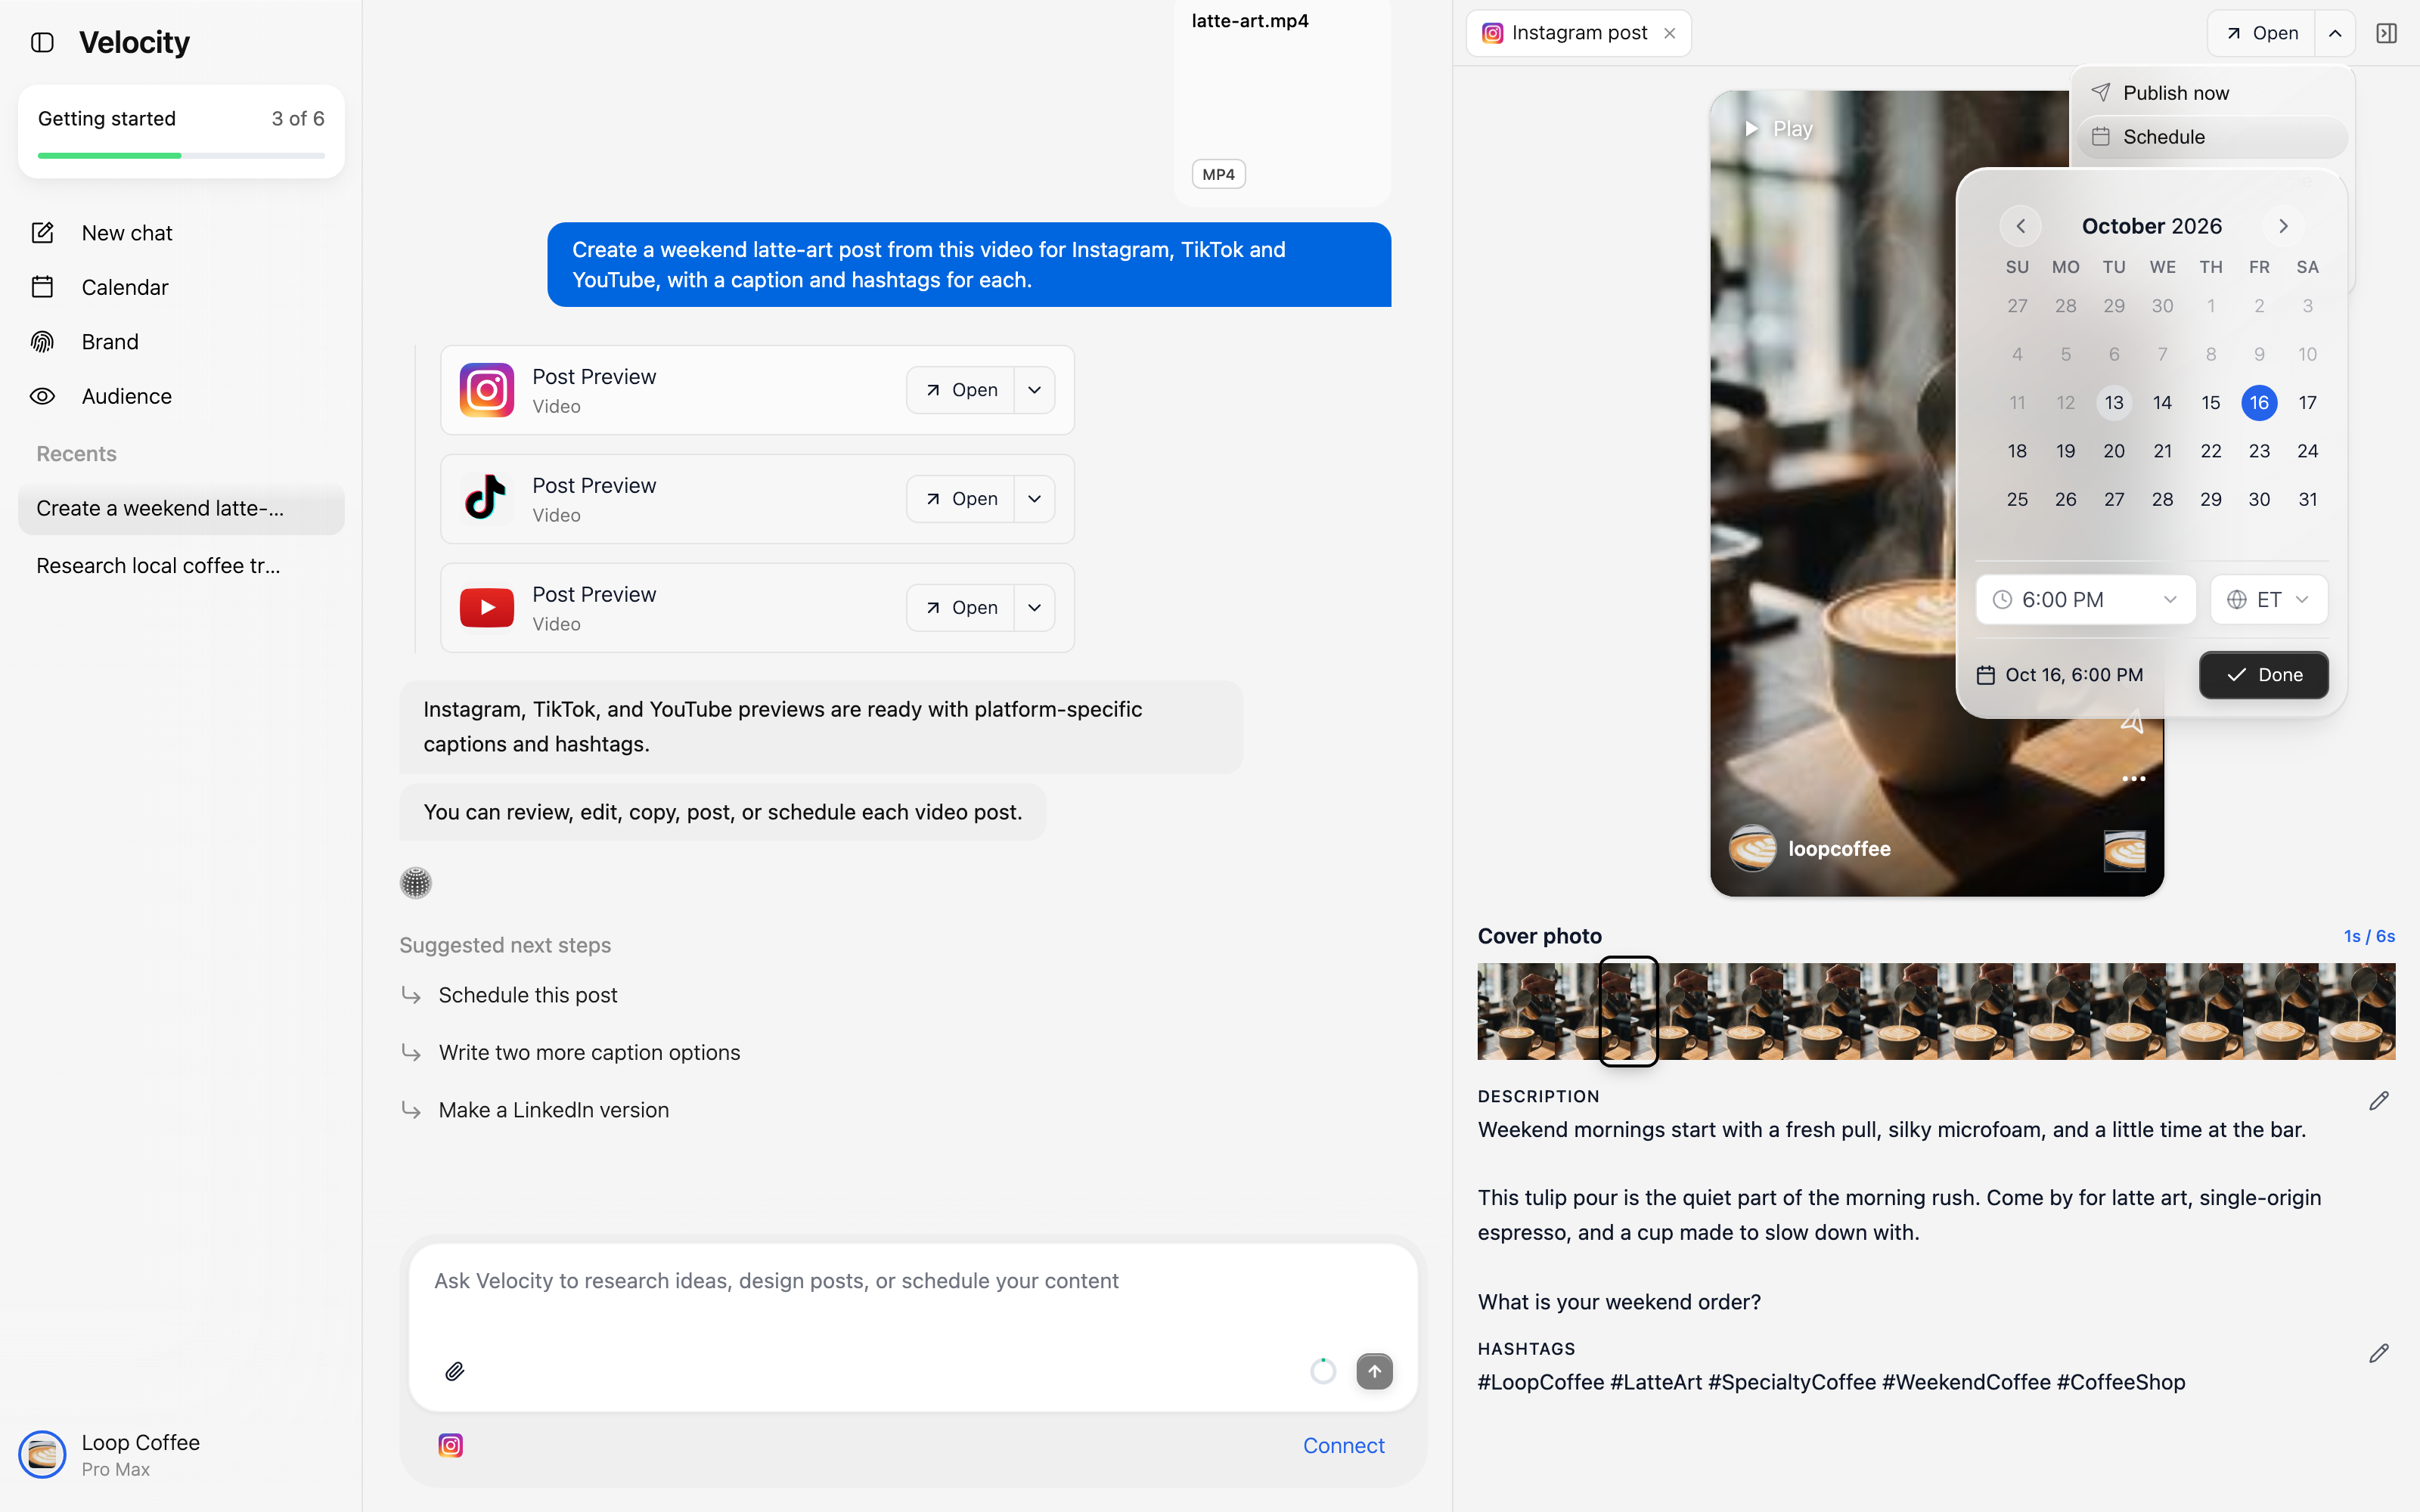
- 1
The date matches the campaign or event you are promoting.
- 2
The time reflects when you want the audience to see the post.
- 3
The displayed time zone is correct for the intended audience and team.
If you use a best-time recommendation, treat it as a useful signal, not a substitute for business context. A product launch, event deadline, local audience, or approval schedule may still make a different time the better choice.
Step 9: Confirm the post in the calendar
After scheduling, use the content calendar to confirm that the content is in the right place. This gives you a visual publishing plan rather than a collection of isolated drafts.
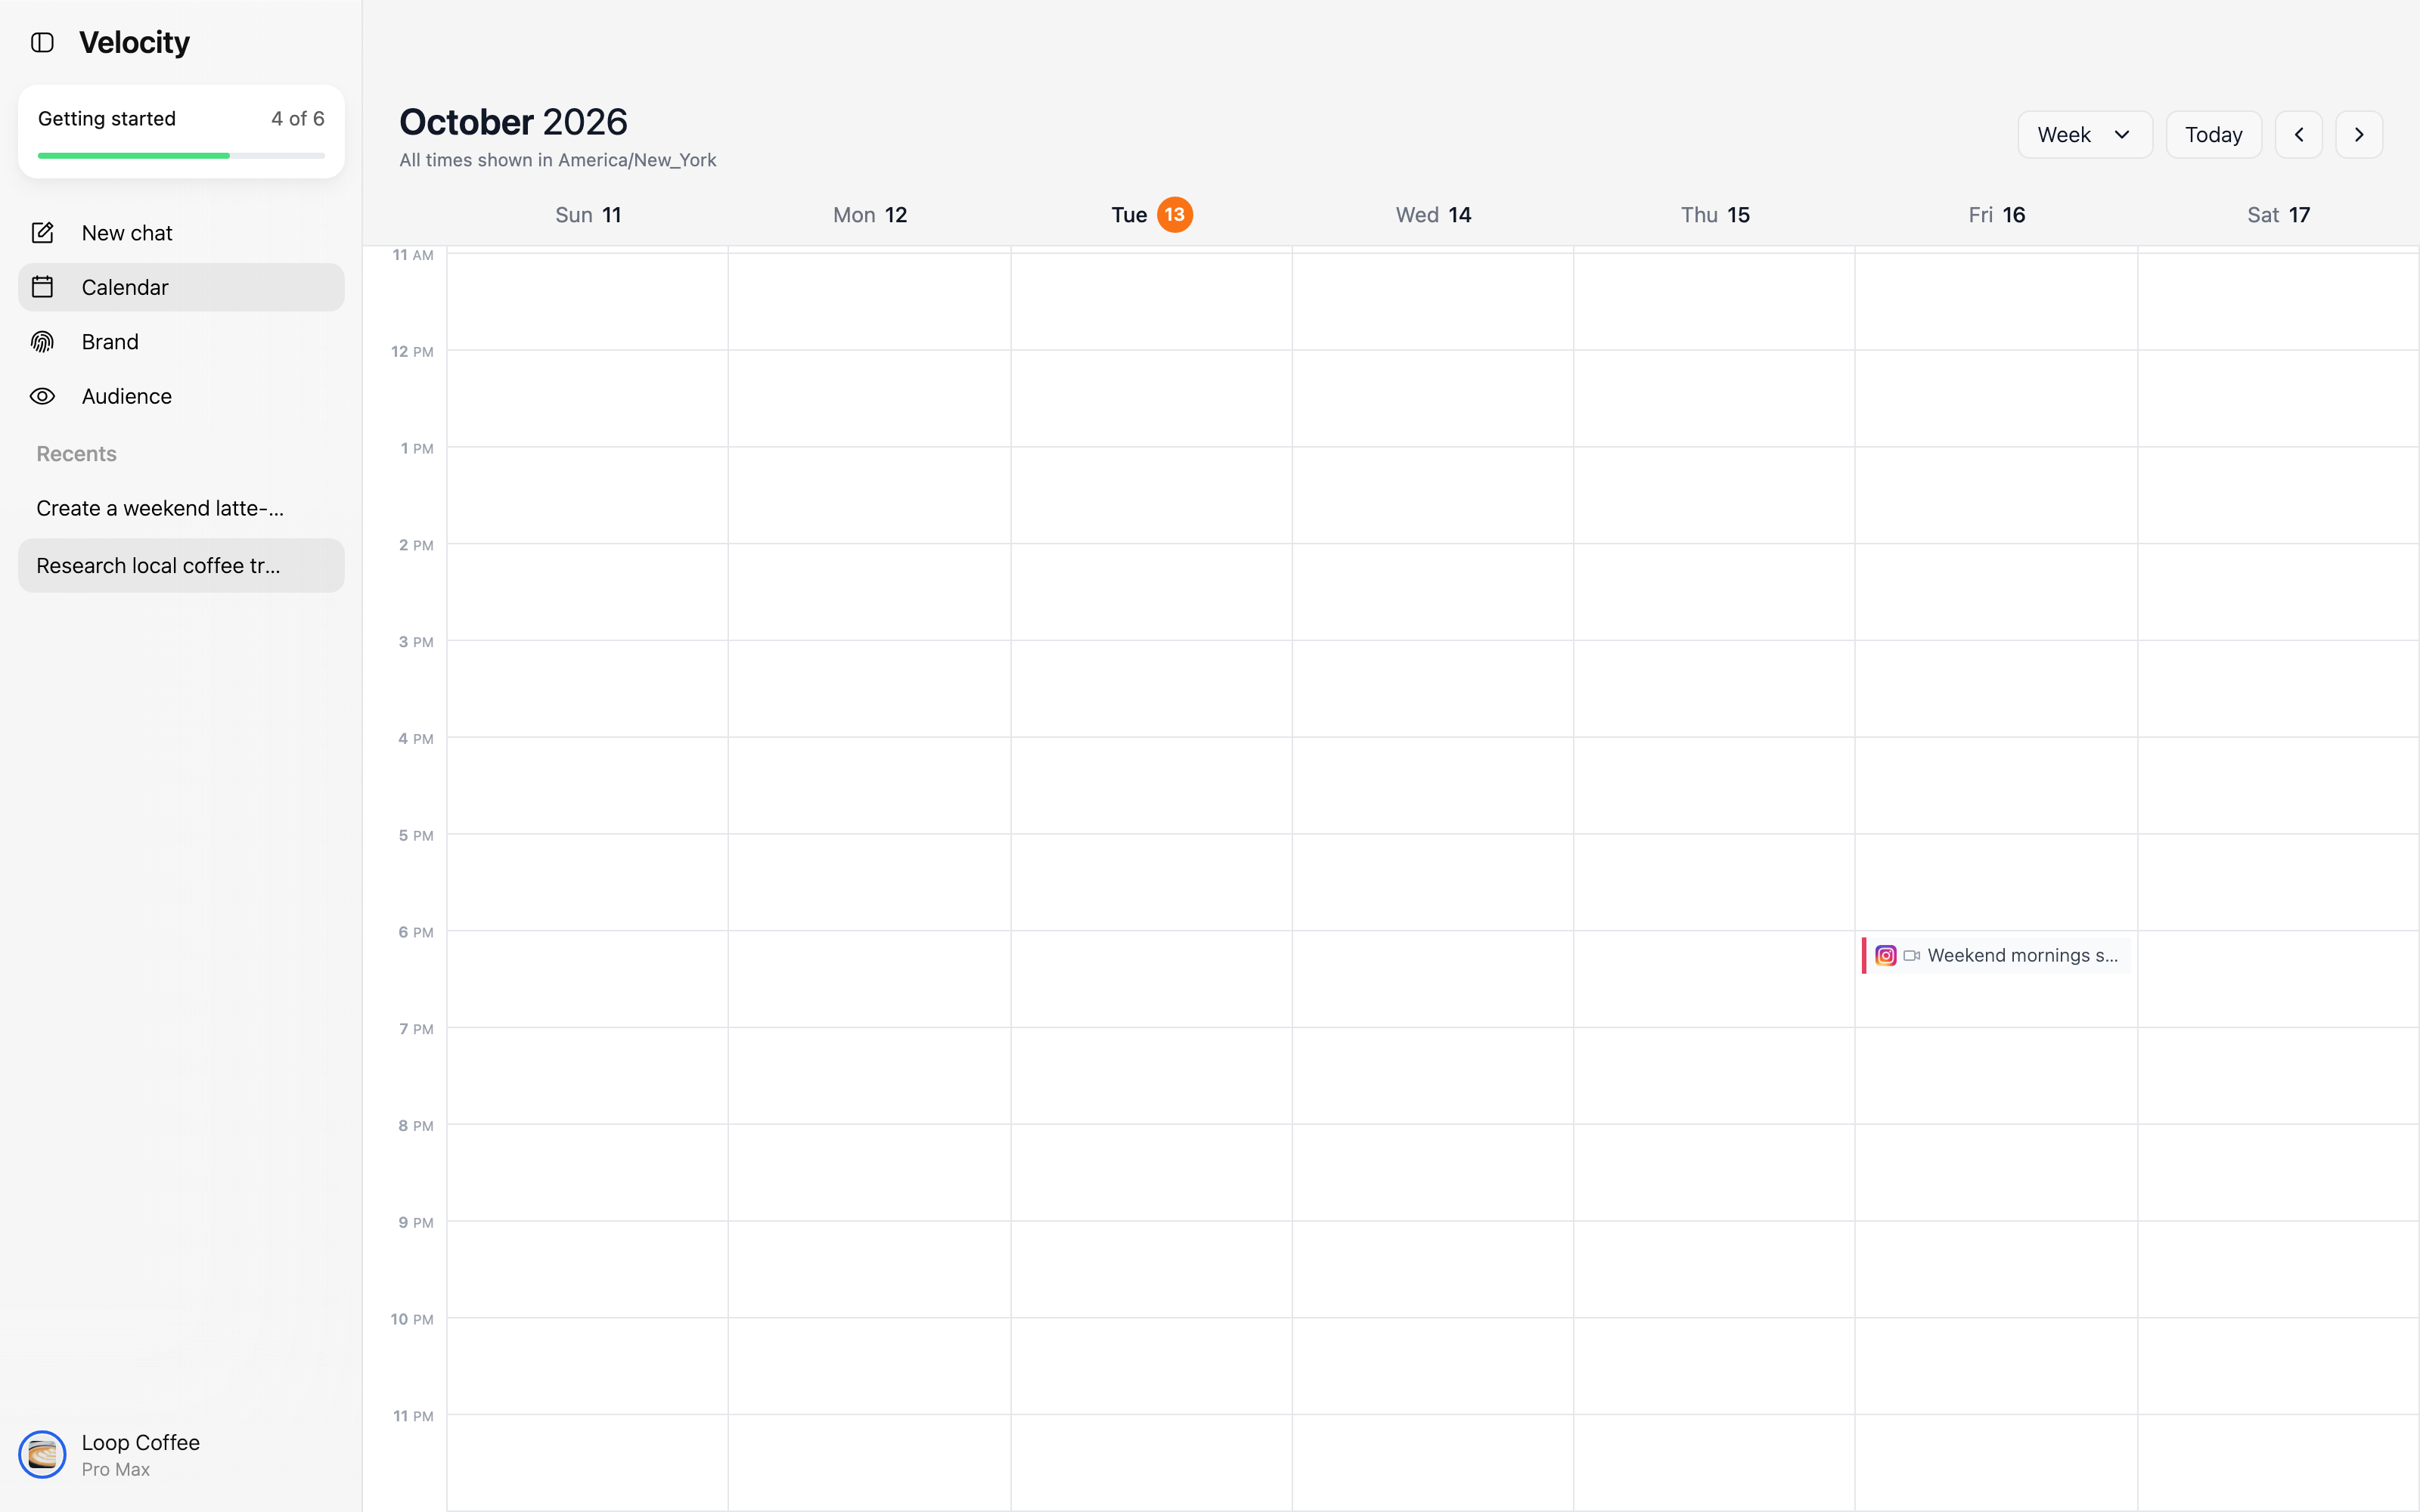
The calendar is the practical bridge between content creation and content operations. Use it to spot overlapping or tightly spaced posts, review what is already planned, and keep campaigns coordinated across the week.
Step 10: Learn from performance before planning the next post
The workflow does not stop after scheduling. Analytics help you see how the audience responded, so the next idea can be better informed.
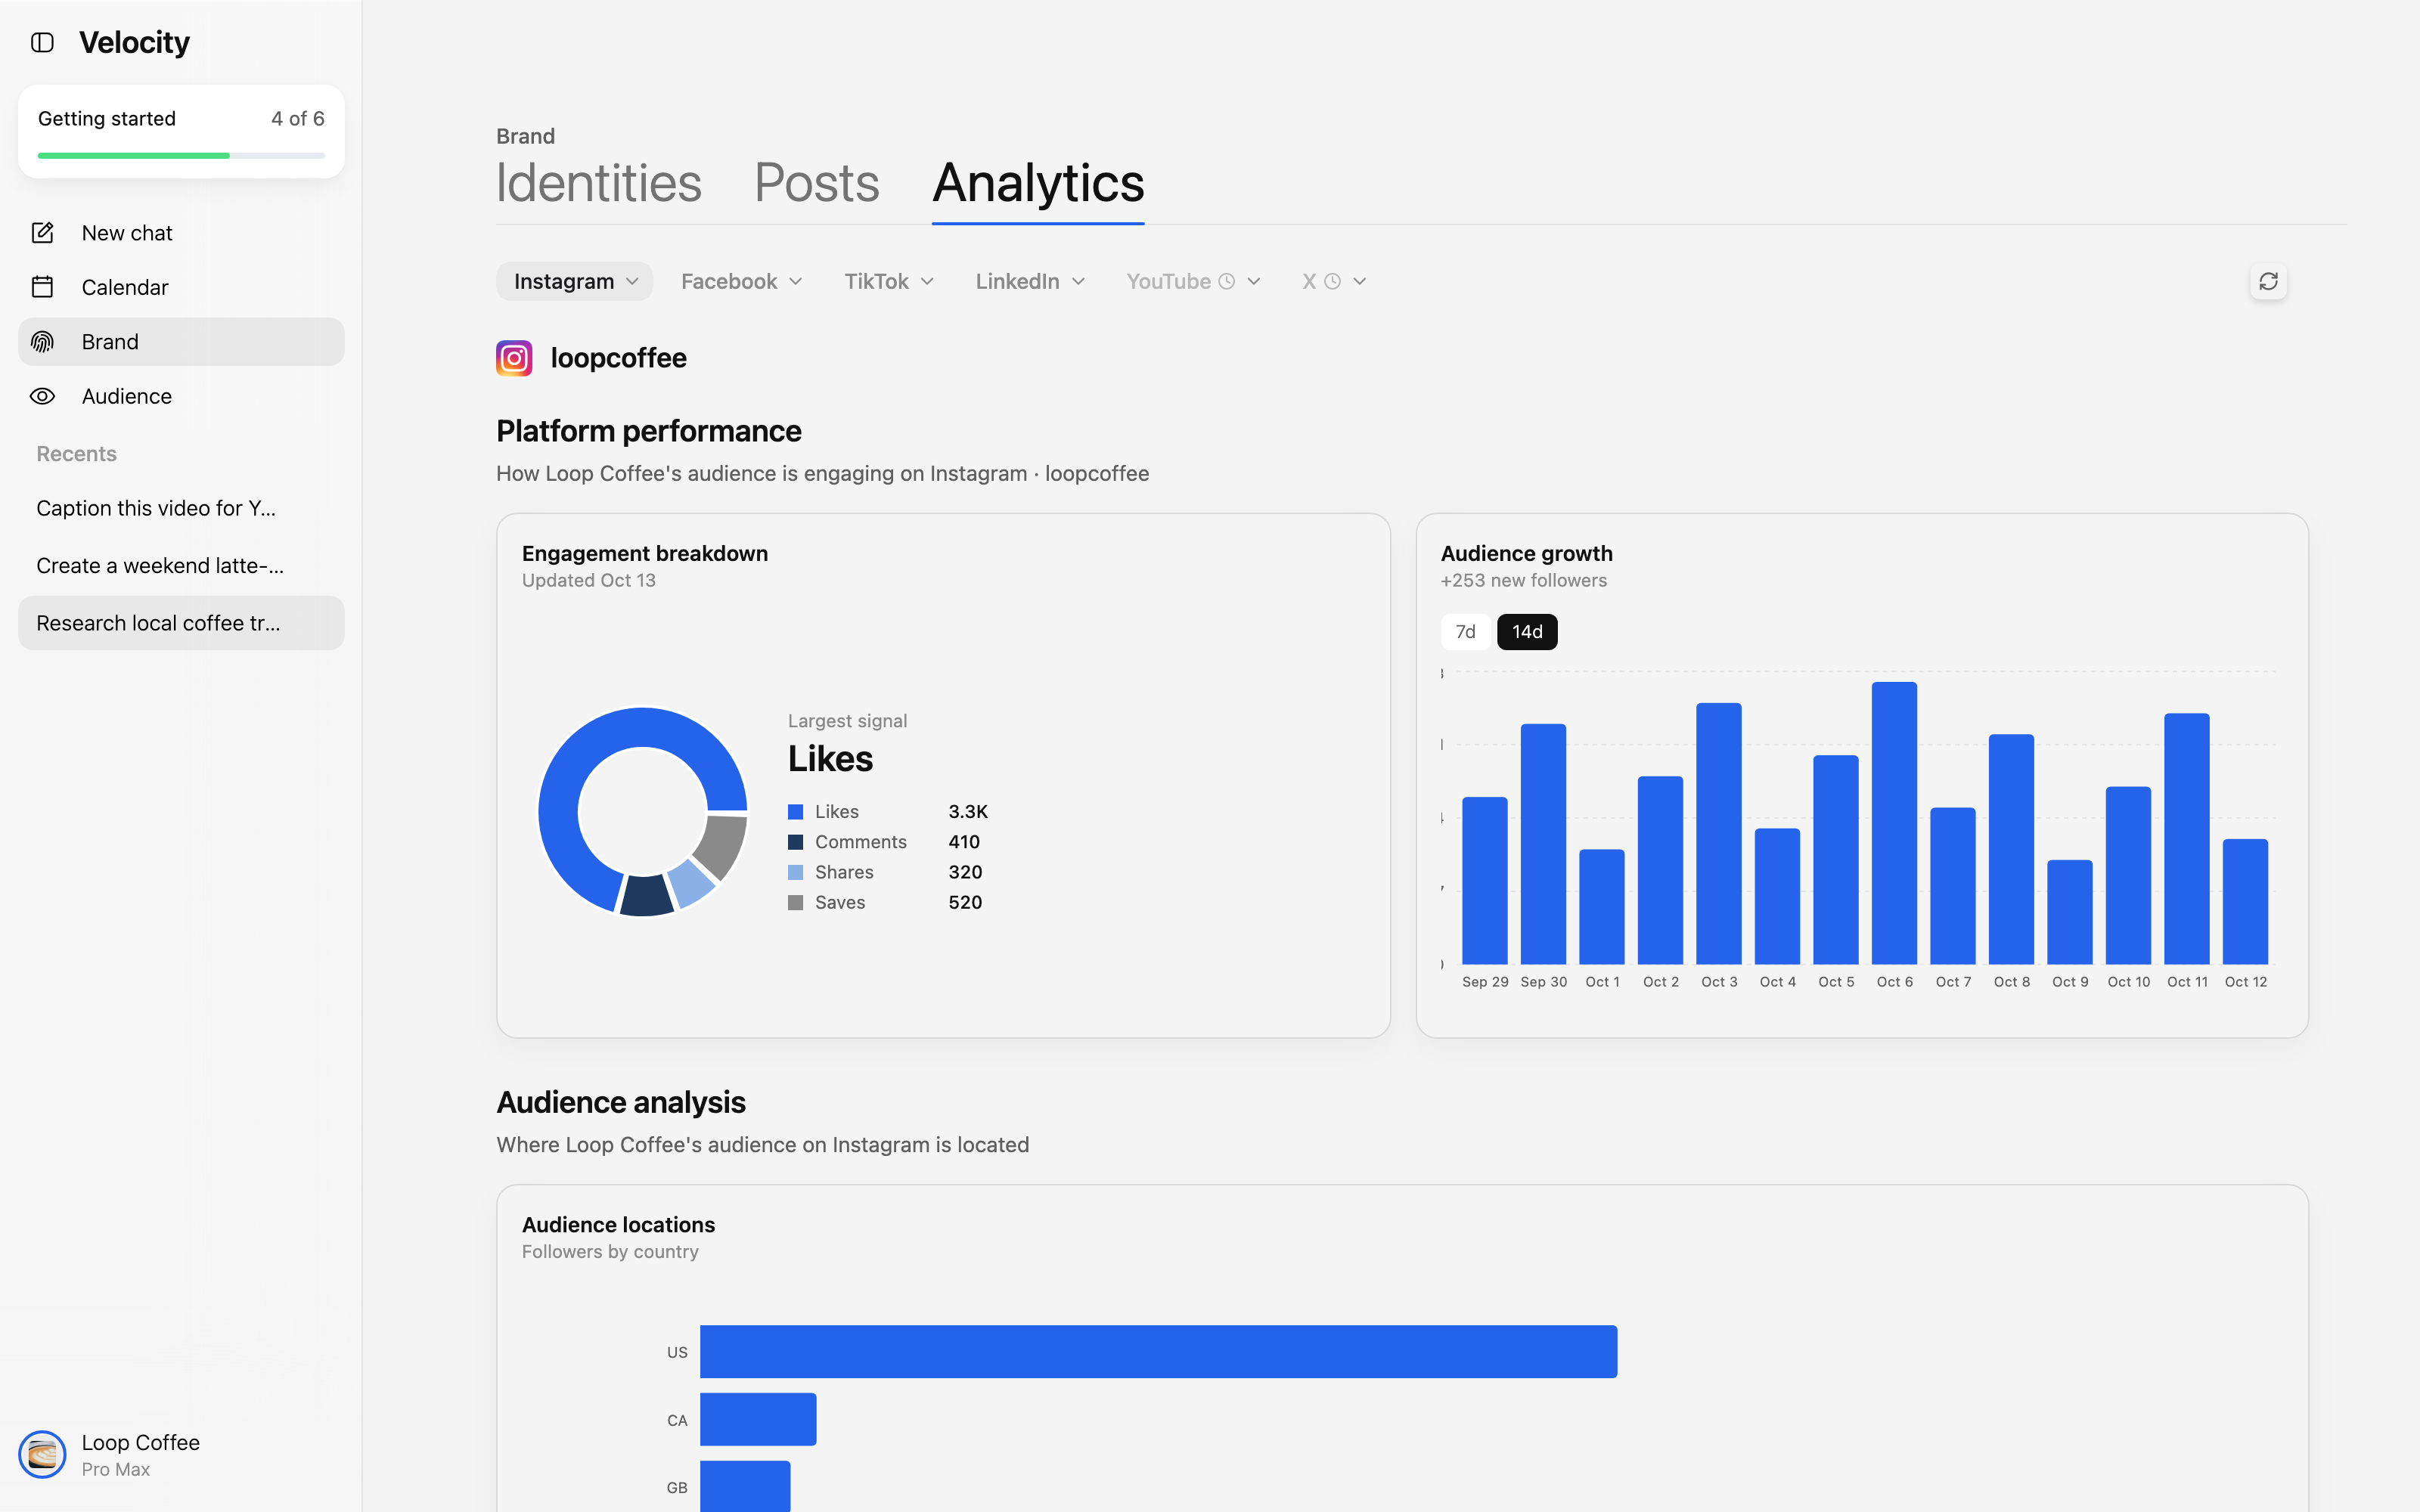
Which type of engagement is most common: likes, comments, shares, or saves?
Is the audience growing over the period you are reviewing?
Which locations make up the largest audience groups?
Which recent posts attracted meaningful engagement?
Timing is another useful input. The best-time view highlights the time window associated with the strongest average engagement in the selected data.
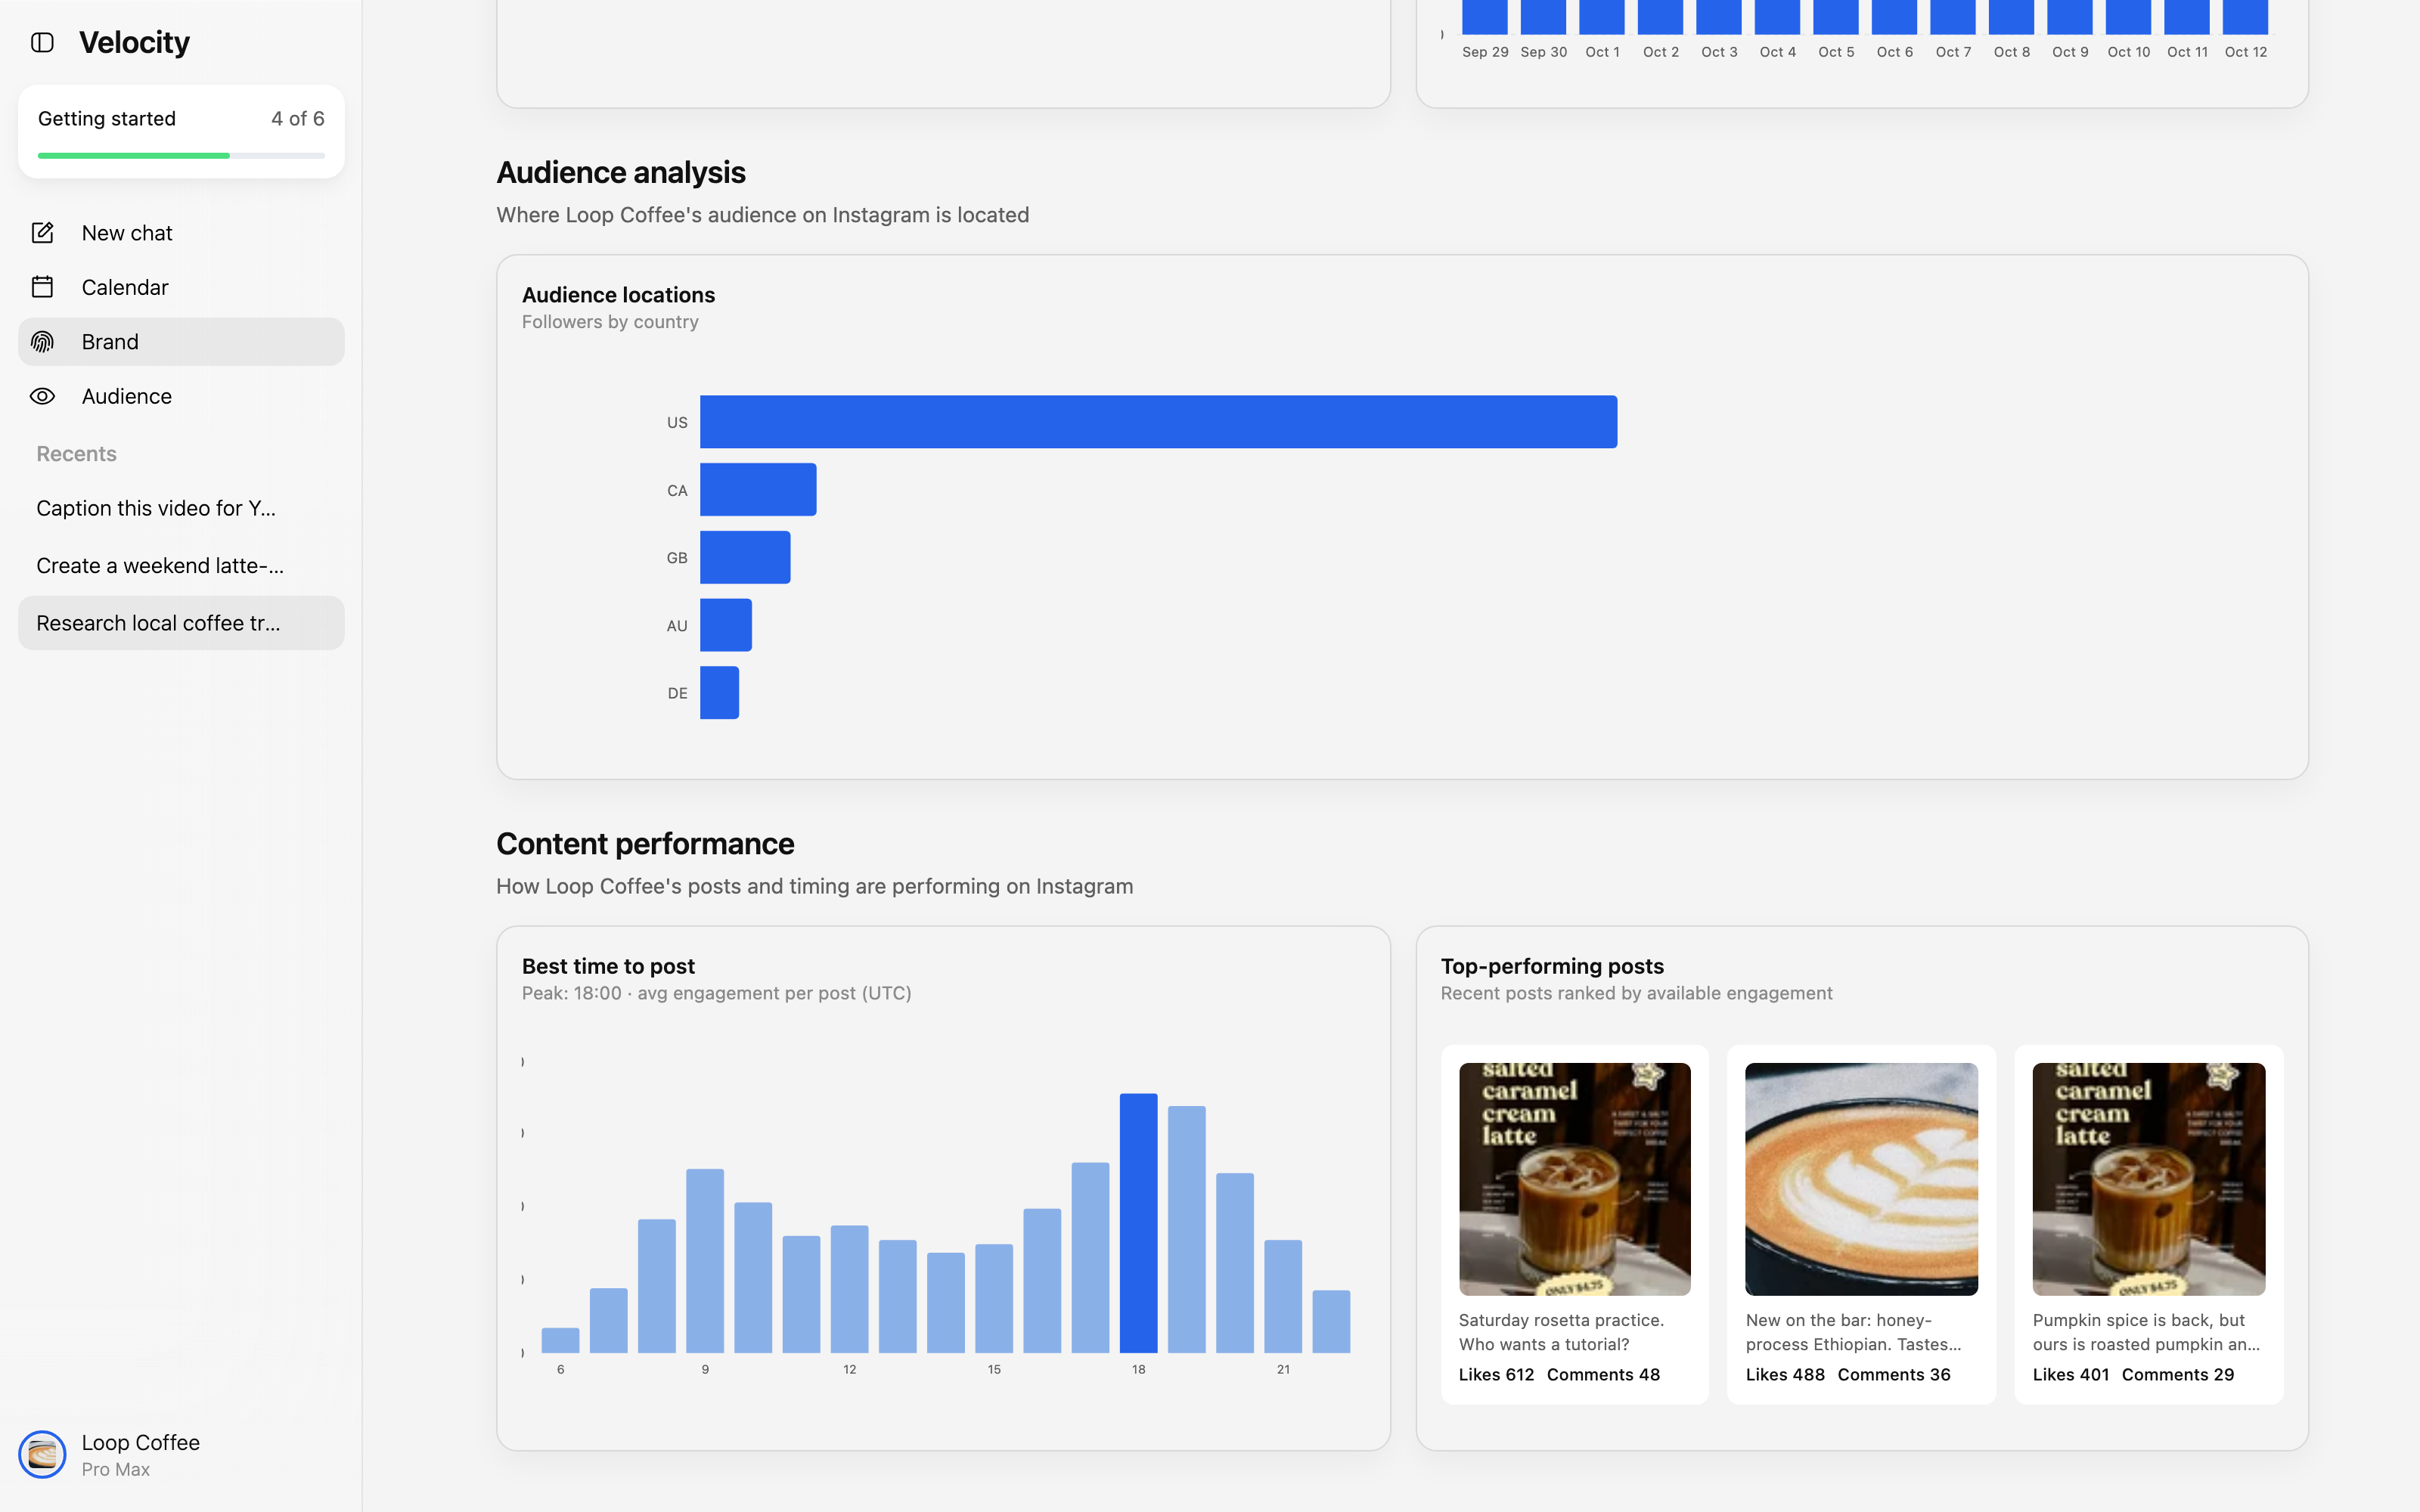
Use this information to improve the next brief. If a format, hook, topic, or time consistently works, bring that learning into the next plain-language request. That creates a practical loop: plan, create, review, schedule, learn, then plan again.
A simple way to use the workflow every week
- 1
Review the Brand Identity and connected destinations.
- 2
Pick one meaningful business goal for the week.
- 3
Ask Velocity to research the angle and prepare content ideas.
- 4
Attach any photos or videos you want to use.
- 5
Review every platform-specific draft before taking action.
- 6
Save, request review, schedule, or publish based on your own process.
- 7
Check the calendar so the plan is coordinated.
- 8
Use analytics and timing patterns to improve the next request.
That sequence keeps the work grounded in the brand, makes multi-channel publishing easier to manage, and leaves the final editorial decision with the team.
Frequently asked questions
How does Velocity help with social media planning and scheduling?
Velocity helps turn a business goal into research, drafts, previews, scheduling choices, and calendar visibility. You review the work, then choose whether to save, request review, schedule, or publish.
How does Velocity keep social posts aligned with a brand voice?
Velocity uses the selected Brand Identity as the context for the work. Keep its business description, audience, tone, values, and topics accurate so the drafts have useful direction.
Can I prepare one short video for several social platforms?
Yes. Start with one source video, then review the platform-specific drafts individually. Keep the campaign idea consistent while checking that the description, hashtags, cover, and final presentation suit each destination.
Can I use Velocity to research a content idea before drafting a post?
Yes. Ask for research in the same plain-language goal. Review the takeaway, hook, and audience insight before using them to guide the content direction.
Do I have to publish a draft immediately?
No. The visible post actions include saving, requesting review, scheduling for a selected time, scheduling at a best time, and publishing now. Choose the action that matches your approval process.
How do I handle time zones when I schedule a post?
Choose the date, time, and displayed time zone deliberately, then confirm the slot in the calendar. Best-time data is useful context, but your audience and campaign timing still decide.
Can I use the content calendar to avoid overlapping posts?
Yes. Use the calendar to view upcoming posts in their scheduled slots. That makes it easier to spot timing conflicts and adjust a draft before it goes live.
How should I use best-time and analytics information?
Use them as decision inputs, alongside campaign timing and audience context. Look for repeatable patterns in engagement, top-performing posts, and timing, then apply those learnings to your next brief.
Ready to turn your next goal into social content?
Start with the business goal, brand context, and channels that matter. Then review the work before you decide what goes live.
Start with Velocity